How to Replace Tie Rod 2000-13 Chevy Impala
Created on: 2013-09-08
Check out this video to learn how to replace the tie rods on your 00-12 Chevy Impala.
-
step 1 :Removing the Wheel
- Remove the lug nut covers with a 19mm socket
- Pull off the hub cap
- Loosen the lug nuts with the vehicle on the ground
- Raise the vehicle with a floor jack
- Secure the vehicle on jack stands
- Remove the lug nuts
- Pull off the wheel
-
step 2 :Removing the Outer Tie Rod
- Twist the cotter pin out of the tie rod nut with needle nose pliers
- Remove the 18mm nut from the tie rod
- Measure from the boot of the inner tie rod to the center of the outer tie rod
- Note this measurement
- Loosen the 7/8 inch nut that holds the inner to the outer tie rod
- Thread the 18mm nut onto the tie rod slightly
- Strike the tie rod with a hammer to loosen it from the spindle
- Twist off the outer tie rod
-
step 3 :Installing the New Outer Tie Rod
- Attach the grease fitting to the new outer tie rod
- Tighten the grease fitting with a 7mm socket and ratchet
- Twist the outer tie rod onto the inner tie rod
- Push the tie rod into the spindle
- Thread the 18mm nut onto the tie rod
- Measure the distance from the boot to the center of the tie rod
- This measurement should match the one taken in Step 2
- Adjust the tie rod as necessary
- Tighten the 18mm nut
- Put the cotter pin through the 18mm nut and fold it over with needle nose pliers
- Hold the nut that connects the inner to the outer tie rod with a 7/8 inch wrench
- Turn the inner tie rod with a 13mm wrench
- Add grease to the grease fitting with a grease gun
-
step 4 :Reattaching the Wheel
- Slide the wheel into place
- Start the lug nuts by hand
- Tighten the lug nuts preliminarily
- Lower the vehicle to the ground
- Tighten the lug nuts to 100 foot-pounds in a crossing or star pattern
- Put on the hub cap, lining up the hole with the valve stem
- Tighten the lug nut covers with a 19mm socket
Tools needed
-
Measuring Tape
Bearing Grease
Jack Stands
18mm Socket
19mm Socket
7mm Socket
22mm Wrench
Ratchet
Floor Jack
Needle nose pliers
7/8 Inch Wrench
13mm Wrench
Brought to you by 1AAuto.com, your source for quality replacement parts and the best service on the Internet.
Hi, I'm Don from 1A Auto. I hope this how-to video helps you out, and next time you need parts for your vehicle, think of 1AAuto.com. Thanks.
In this video we're going to show you how to replace the outer tie rod on this 2006 Chevy Impala. It's similar for 2000 through 2009, as well as from the left side to the right side. Also keep in mind that any time you're replacing suspension and steering components, we always recommend that you get an alignment afterward. In order to perform this repair, you'll need a jack and jack stands; 7mm, 18mm, and 19mm socket wrench; needle nose pliers; 13mm wrench; a 7/8" or a 22mm wrench; and a tape measure.
By hand, loosen the plastic lug nut covers until they release from the lug nuts themselves. Go ahead and pull off your hubcap. You're going to use the same size 19mm sockets to remove the lug nuts once you get that cover off. If you don't have the benefit of using a lift or air tools, what you'll want to do is remove or loosen up the five lug nuts just slightly with a socket and socket wrench and breaker bar, and then, once you've got it jacked up and on the jack stands, you can proceed to remove them completely with your socket and socket wrench.
Your outer tie rod end is going to be attached to your spindle on the back side, and you'll see it there. I'm going to start by using a pair of needle nose pliers to remove the cotter pin that goes through the end of the ball joint. I'm using an 18mm socket and socket wrench to remove the nut on the bottom of the outer tie rod. I'm measuring the distance from a fixed point at the boot of the inner tie rod with the center of the outer tie rod. This will give us a good starting point for when we install the new one. We can set it up to the same measurement, and that will give us a good preliminary alignment. The nut on the inner tie rod that sits against the outer tie rod is 7/8" or 22mm. Go ahead and loosen that up. I'm going to just slightly install that nut again, and give it a couple whacks to get it to pop out of the spindle. Now I'm removing the outer tie rod.
Here you can see the new tie rod on the left, from 1A Auto, and the old tie rod. It's going to be an exact match and install just like the original. Install your grease fitting and tighten it down with a 7mm socket and socket wrench.
Install the outer tie rod to the point of where the nut is on the inner tie rod, and then put it into its position on the spindle. Install the new nut that came with the outer tie rod. Measure the distance again from the boot to the center of the tie rod. Make sure it matches; adjust it if you need to. Then we can tighten up that nut. I'm going to install the new cotter pin. Put it through the threaded portion and the crown nut that you just tightened. Then peel the ears back so that it won't come loose. Use your 7/8" or 22mm to hold the nut and that 13mm wrench to hold the inner tie rod, and go ahead and tighten those down. Use a grease gun, attach it to the fitting on the outer tie rod, and squeeze until you're sure that it's full.
Reinstall the wheel and start by hand-tightening the lug nuts. With some pressure, back on the ground, torque your five lug nuts to 100 foot pounds. Then, by hand, tighten up the plastic lug nut covers, making sure that you're lining up the hole in your hubcap with the valve stem. I'll go ahead and fast forward as I do that.
We hope this video helps you out. Brought to you by www.1AAuto.com, your source for quality replacement parts and the best service on the Internet. Please feel free to call us toll-free, 888-844-3393. We're the company that's here for you on the Internet and in person.
Shop Products


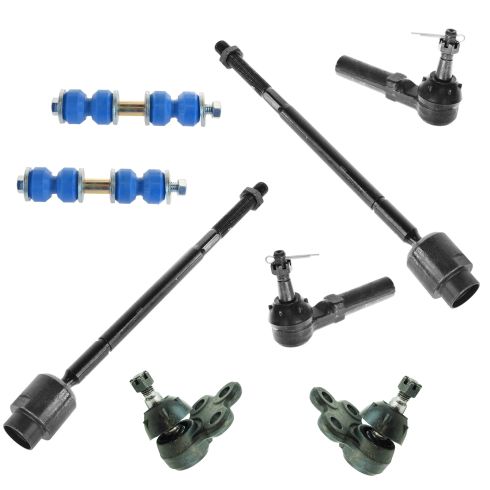
Chevrolet Buick Pontiac Olds Front 8 Piece Steering & Suspension Kit TRQ PSA85273
Part Details:
- (2) Front Sway Bar Links
- (2) Front Lower Ball Joints
- 8 Piece
- (2) Front Outer Tie Rods
- (2) Front Inner Tie Rods

How to Replace Front Inner Tie Rods 1997-2003 Ford F-150
How to repair, install, fix, change or replace loose and worn tie rods on 97, 98, 99, 00, 01, 02, 03 Ford F-150
