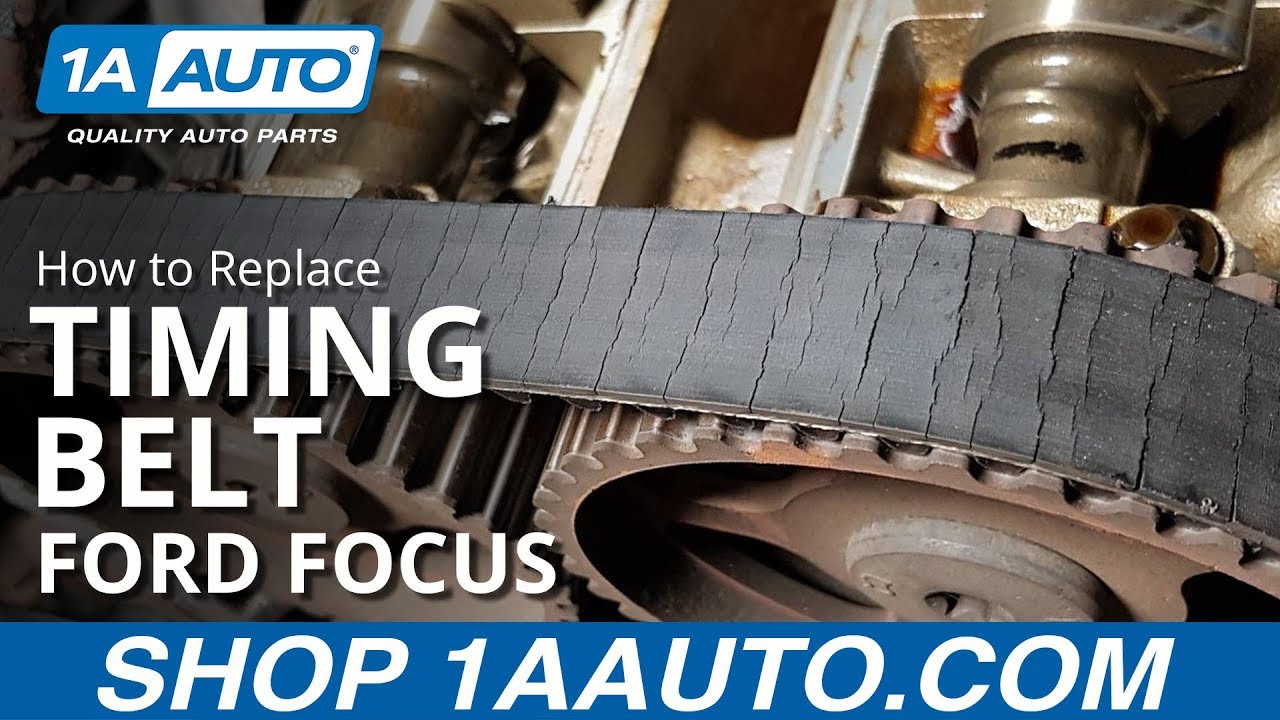
How to Replace Timing Belt 2000-04 Ford Focus Sedan Wagon Hatchback
Created on: 2019-08-22
You want to change the timing belt on your 00-04 Ford Focus? Great! Check out this video to learn how. 1A Auto helps you out in this step by step guide!
-
step 1 :Removing the Motor Mount
- Remove 10 mm coolant reservoir mounting bracket bolt
- Move the coolant reservoir aside
- Remove the four 8 mm cam cover bolts
- Support the engine from below with a floor jack
- Remove the two 18 mm motor mount nuts
- Remove the three 15 mm motor mount bracket bolts
- Remove the motor mount
- Remove the motor mount studs with an E10 socket
- Remove the cam gear cover
-
step 2 :Removing the Serpentine Belt and Pulleys
- Loosen the three 10 mm water pump pulley bolts
- Turn the serpentine belt tensioner counter clockwise using a 14 mm wrench to remove tension from the belt
- Remove the serpentine belt
- Remove the three water pump pulley bolts
- Jack the engine up
- Remove the water pump pulley
- Remove the 13 mm idler pulley bolt
- Remove the 13 mm idler pulley and spacer
-
step 3 :Removing the Timing Covers
- Remove the three 13 mm bolts and one T50 bolt
- You will need to remove the water pump pulley to access the T50 bolt, which may require raising the vehicle and removing the passenger side wheel
- Remove the18 mm harmonic balancer bolt
- Remove the harmonic balancer
- Reinstall the 18 mm harmonic balancer bolt
- Remove the 2 8 mm bolts to remove the lower timing cover
- Use the 18 mm harmonic balancer bolt to turn the crank shaft
- Always turn the crank shaft clockwise
- Use the crank shaft keyway for the harmonic balancer as a guide to get near top dead center
- Turn the crank until the keyway is indexed at roughly twelve o'clock relative to the position of the camshafts
-
step 4 :Removing the Valve Cover
- Remove the throttle cable retaining clip
- Remove the throttle cable end from the grommet
- Remove the cruise control cable end from the throttle post
- Remove each cable housing end from the bracket
- Set the cables aside
- Twist and pull up to remove the spark plug end of each ignition wire
- If the ignition coil is not numbered, number the cables according to cylinder beforehand
- Loosen, then remove, the 10 8 mm valve cover bolts
- Loosen the vent hose clamp and remove the vent hose
- Pry up carefully to remove the valve cover
-
step 5 :Finding Top Dead Center
- Remove the cylinder 1 spark plug using a 5/8 spark plug socket
- Insert a screwdriver into cylinder 1 through the spark plug well so that it contacts the piston
- Turn the crank using the 18 mm harmonic balancer bolt
- As the crank turns the screwdriver will raise with the piston
- The piston will be all the way up on the compression stroke for top dead center
- As you turn the crank listen for compression noise, and look for the crank keyway to be at the twelve o'clock position
-
step 6 :Removing the Timing Belt and Pulleys
- Locate the 10 mm plug bolt on the engine block, behind the catalyst, and remove it
- Install the crank pin into the hole
- Turn the crank to bottom it out on the crank pin
- Loosen the two T55 cam gear bolts while holding the cam shaft with a 15/16 wrench
- Turn the 6 mm hex on the tensioner to remove belt tension
- Remove the 10 mm belt tensioner bolt to remove the tensioner and spacer
- Remove the timing belt
- Remove the 15 mm bolt to remove the idler pulley and spacer
- Remove the T55 cam gear bolts to remove the cam gears
-
step 7 :Preparing for the Installation
- Clean the head surface so the camshaft alignment tool will lay perfectly flat
- Align the grooves in the driver side ends of the cam shafts so that the alignment tool fits in the grooves
- Twist the camshafts with a 15/16 wrench if necessary
- Tap the alignment tool in if necessary
- The alignment tool should fit flush against the camshafts
- Carefully pry out the camshaft seals on the gear end of the shafts
- Clean around the seal seat, and the camshaft
- Install new cam seals by tapping them in with a socket, or evenly with a punch
- Use silicone paste on the inside of the seal
- Loosely install the cam gears
- Remove the 18 mm bolt to remove the crank gear and shield
- Remove the crank seal
- Clean the crank seal seat
- Install a new crank seal by tapping it in with a socket or evenly with a punch
- Reinstall the crank shield and gear
- Clean the timing covers
-
step 8 :Installing the Timing Belt
- Install the belt around the crank gear, passing the rest of the belt towards the top
- Install the lower timing cover with the two 8 mm bolts
- Install the harmonic balancer
- Install the 18 mm crank bolt
- Install the timing belt tensioner with the 10 mm bolt, making sure the adjuster alignment tab fits into the slot
- Install the belt around the cam gears
- Install the idler pulley with the 15 mm bolt
- Torque the 15 mm idler pulley bolt to 18 ft-lb
- Turn the 6 mm hex tensioner adjuster until the arrow aligns with the center of the hole in the alignment tab
- Torque the 10 mm tensioner pulley bolt to 18 ft-lb while holding the adjuster
- Remove the camshaft alignment tool
- Torque the two T55 cam gear bolts to 50 ft-lb while holding the camshaft with a 15/16 wrench
- Remove the crank pin
- Reinstall the 10 mm plug bolt
- Turn the crank several full revolutions while watching the timing belt tensioner
- The alignment arrow will shift, but the 6 mm hex adjuster should not move
- If the adjuster moves, timing needs to be set again
- Install the top timing cover loosely with the four 8 mm bolts
-
step 9 :Installing the Valve Cover
- Clean the surface of the cylinder head with a scraper and parts cleaner
- Clean the valve cover with parts cleaner and a brass brush
- Install the valve cover gasket into the gasket grooves
- Make sure the gasket is seated evenly and smoothly
- Apply RTV to the seams on the cam gear side
- Reinstall the cylinder 1 spark plug and torque it to 11 ft-lb
- Seat the valve cover and press it down firmly
- Install the 8 mm valve cover bolts staring from the center
- Torque the 8 mm valve cover bolts to 7 nm starting from the center
- Reconnect the vent hose and tighten or replace the hose clamp
- Insert the ignition cables where the cylinders are numbered 4, 3, 2, 1, with 4 being the closest to the ignition coil
- Route the cables neatly, and install the included retaining clips
- Torque the timing cover 8 mm bolts to 7 Nm
- Insert the throttle and cruise control cable housing ends into the brackets
- Attach the cruise control cable to the throttle post
- Attach the throttle cable end over the grommeted post
- Install the throttle cable retaining clip
-
step 10 :Installing the Mid Timing Cover
- Install the mid timing cover with the T50 bolt and the three 13 mm bolts
- Torque the four bolts to 50 Nm
- Torque the 18 mm crank bolt to 87-92 ft-lb
- Install the motor mount studs into the mid timing cover with an E10 socket
-
step 11 :Installing the Serpentine Belt and Pulleys
- Install the serpentine belt idler pulley with the 13 mm bolt and spacer
- Torque the idler 13 mm bolt to 40 Nm
- Install the water pump pulley with the three 10 mm bolts
- Install the serpentine belt
- Route the belt under the crank and power steering pulleys, over the AC condenser pulley, under the idler pulley, around the alternator and water pump pulleys, with the slack held near the tensioner pulley
- Turn the belt tensioner counter clockwise to fit the belt over the tensioner
- Release the tensioner
- Torque the 10 mm water pump pulley bolts to 18 ft-lb
- Position the motor mount
- Install the two 18 mm motor mount nuts
- Install the three 15 mm motor mount bracket bolts
- Torque the nuts and bolts to 80 Nm or 59 ft-lb
- Reposition the coolant reservoir
- Reinstall the 10 mm reservoir mounting bracket bolt
-
step 12 :Installing the Wheel
- Install the wheel onto the wheel studs
- Install the 19 mm lug nuts
- Tighten the lug nuts by hand in a crossing pattern
- Lower the vehicle with minimal weight on the wheel
- Torque the lug nuts to 94 ft-lb in a crossing pattern
Tools needed
-
Razor Blade / Gasket Scraper
Socket Extensions
Pry Bar
Jack Stands
10mm Wrench
T50 Socket
RTV
Ratchet
Floor Jack
15/16 Inch Socket
13mm Wrench
14mm Wrench
13mm Socket
Torque Wrench
15mm Socket
18mm Socket
19mm Socket
5/8 Inch Spark Plug Socket
Flat Blade Screwdriver
E10 Socket
6mm Hex Socket
8mm Socket
Silicone Paste
10mm Socket
Ford Camshaft Alignment Tool Kit
Hey, everyone. Sue here from 1A Auto, and today I want to show you how to do a timing belt on a 2001 Ford Focus with a 2.0 dual overhead cam. Let's get it done, and hope that doesn't happen to you. So if you need this part, we sell it in a kit with all the pulleys and the tensioner. If you need it, click on the link below and head on over to 1aauto.com.
First thing I'm going to do is take a 10 millimeter socket, going to take this mounting bolt out. This is the coolant reservoir tank. It's actually the only way to fill this car up is through this reservoir tank. There is no cover on the radiator. It has one mount here with a bolt, and then it ... set that aside. You're going to have a bracket over here you're going to lift up. See the little piton under the hoses, and you're going to want to move this over this way. Let's undo the power steering wheel clip. There you go. Now that's nice and out of the way. You can see everything in here.
Next up is I'm going to remove this upper cover. It looks like an 8 millimeter socket. Three bolts total holding it. One on the front. Let's see if I can feel one down there. Nope. One here, one back there, and then one on the bottom. Last one down here. So like I said, two in the back and one on the front. You can see the ears of the plastic cover. Get them undone and get them out of the way. Grab onto the cover and lift it up. Oh, I lied. There's four total. Two in the front, two in the back.
Now all the bolts of the cover are off. I'm going to get a jack with a rubber stopper on it or a piece of wood, going to roll it underneath, put it on the oil pan, support the engine, and then I can take off this timing mount motor mount. It's on the timing belt side. Take this mount out of the way and support the engine with the jack. Support that. Now I can get my socket and ratchet, and undo the bolt to the mount. Now with the engine supported with the floor jack, got an 18 millimeter socket. I'm going to release these two motor nuts that hold it onto the front of the timing cover area. I'm just going to use a 1/2 inch breaker bar. Make sure you have a good support on the engine if it's not jacked up tight. That would've just dropped a little bit, and you don't want to cross-thread or jam those nuts under the studs.
As you can see, the motor's starting to sink a little bit. It's just a slight. It's not tons of pressure, so I can still turn this by hand. Look at the whole stud came with it. That's going to happen. It's not uncommon. Now we have one stud left in there, so it's easy. Now that I have it disconnected from the engine, I'm going to take three bracket bolts out. It's a 15 millimeter socket. I'm using my 1/2 inch. Make sure they all break free. Last one. It's hard to see it from down there, but it's a triangle style mounting. Now we should be able to lift it right up. Lift it right out of there. I'm going to leave the cover on because it wants to force itself past this, and it's plastic, so it's ... I don't want to crack it. We'll just take this stud off. I have an inverted T socket, so it's an inverted Torx socket.
I'll take the stud out, and then we will reveal the condition of the timing belt, which maybe I know something you don't know yet. Okay. Let's see what she looks like. Now that, my friend, is what we call right to the last minute. This timing belt is severe. That's ready to go without a doubt. He's lucky, or she is lucky that this didn't snap, because this is an interference engine. So if this had snapped, and these cams went off time with the crank, the valves would end up hitting the top of the piston out of one of the cylinders. If not all four, one or two of them. The engine would stall obviously, be stuck where he's at, or she's at, and they would need an engine.
Before I take the serp belt off, I have to take the water pump pulley off to get access to the bottom cover. So with the belt on, I like to leave the tension on so I can put a 10 millimeter socket on the water pump bolt, and then I'm going to take a long screwdriver or a pry bar and I'm going to hold the other two bolts in place. This is a little trick if you don't have a certain way of doing it, tools. So I'm going to put pressure on it clockwise, so that I can loosen the bolt counterclockwise. I just need to loosen it. Don't take it all the way out, because this is a three bolt system, so I'm going to need that other bolt to pry against.
This serp belt is so tight that, look at, I can loosen the water pump pulley. But I showed you how to do the first one in case you have a belt that's spinning in place, or any other time you need to pry something that has no way of holding it. I like to use a pry bar. You can use a long screwdriver. Let's see if they're loose enough to come off by hand. Yeah, so now I'm going to take the tension off the belt and remove the drive belt.
So now the serp belt tensioner is below ... right below the alternator. You can get that through the fender well if you have access to go through that way. You're going to anyways need to go through that way, but I have plenty room up here, so I'm going to put a 14 millimeter box end on there. I'm going to push down to release the pressure of the belt like that, and now I can slide this serp belt right off. Bring that tensioner back up. If need be, we also have the ... the engine is just on the jack, so we can jack the engine up a little bit more if we needed to get our hands down there.
Okay, so we can set this aside. If you need to replace it, replace it. Always check your belt, even `if you think, "Oh, I replaced that a year ago." You don't know the kind of road material that's get ... gets up in there and causes damage, cracks, any oil leaks that you didn't have a year ago that hit the belt, coolant. It will do damage to it. Always just examine it real quick. There's no need to do the job twice. When it's out, put a new one in.
I'm going to jack the engine up a little bit so I have better access to that mount, the bracket here, and make sure I can get to all the bolts freely to take that out. I'm going to grab this water pump pulley and take it off. I've already loosened up the bolts so it's easy. Sometimes you have to take a screwdriver and just pry on that, just enough to pop it off. We have to take this idler out of the way. 13 millimeter socket or wrench. Go counterclockwise. Always try to grab it with two hands. Through the years, I've discovered that there's pieces on the back of a lot of the pulleys, like this spacer. You don't want to lose that, because you're going to need that. That picks up the space where the bolt bottoms out on the block so that can spin freely. Without that, that bolt would bottom out, and this would be rubbing up against the cover. It's pretty important.
We have to move this bracket from the front of the timing cover area. There is four mounting bolts. There's one, two, three. You can't really see the head of it. It's right down there. Then four. The fourth one, and that is a Torx head, so that is a T50. The rest are 13 millimeter socket. I'm going to loosen up the top ones, take them out, and then I'm going to raise the vehicle up. The engine is going to drop down, so the front of this is going to be open in the fender well. Let's see if they're the same length. They are not. So what I like to do is separate things, set them up the way I received them and took them out.
Let's see if we can loosen this bottom one from here. I know for that T, the Torx head one, I have to lower it. I can't get my ratchet and socket in there at the same time. I will start it with the Torx head, and then go clockwise in my pattern of the way I lay the bolts. I know that it goes this long one, and then the short one. Two of these are the same length. It's pretty self-explanatory anyways, but it's always good to have a pattern of how you're going to do things. Now we're going to raise our vehicle up.
Now with the car up in the air, and the engine has dropped down, I can take the water pump pulley out with ease. I have that one mounting bolt still exposed. That's the T50. That is our front mount cover, also acts like a timing belt guide. Timing belt slides in on this side and this side. Just guides it in there. There it is. There's the belt exposed. To do the timing belt on this Ford engine Focus, you need this cam bar alignment tool. There's the part number from OTC on it. This is the crank alignment pin.
I'm going to take the harmonic balancer off. The crank bolt is an 18 millimeter socket. I'm going to spin it right off. Now see the keyway? The keyway is what we're going to use for an alignment mark to make sure this is on top dead center. It's going to be one of the ways. Now you can just grab it with your hand and pull it off. Just wiggle back and forth, even pressure on both sides. There you go. You don't need a tool or a puller.
While we have it in our hands, always examine the rubber damper part of it. I've seen them through the years. They get real dry rot and crack. Had people come in with an engine shake. People have done tuneups because the engine, they thought it was misfiring, and it wasn't. It was actually the harmonic balancer was breaking free. Oil will do that, damage it. This one looks okay. I've got no gasket sticking out. I've seen the rubber push itself right out. We'll just set this aside.
Keep a hand on the bolt, because we're going to use that bolt. We're going to install the bolt again. This belt is in such bad shape. I'm going to take the bottom cover off too while we're down here. I think I see just one, two. Eight millimeter socket and we'll take that right off. There we go. This is our lower timing belt cover, and you can see all the timing belt material with road dirt in there. There's pieces of rubber. This belt is about ready to shred apart. More pieces of the rubber. Some of it's the cover too. The plastic of this cover has been deteriorating due to the oil. I do have a crank seal that I'm going to replace. You're always going to want to clean all this out before we get into it too deep anyways.
This is the keyway that we want to have at 12 o'clock straight up and down. Now note the tilt of the engine, and the alignment of the cam heads. It's dual overhead cam on this one, so you're going to want them straight up noontime at the cams. It's not going to be like that. It's going to be heading towards the cams and straight up. I'm going to put the bolt back on so that I can turn this by hand, and get that keyway up in that area. You always want to turn clockwise, never counterclockwise, unless your car specifically says to do so. Now I know the keyway. I can feel it. It's right here where it says front. The keyway is right at ... almost between the F and the R. We might not be on top dead center yet, but I'm going to put this straight up. Then when I get up there, I'll know where my cams are, and we'll also show another trick of top dead center and it'll be pretty cool.
Now that we have the timing belt exposed, the next step we're going to do is we're going to have to take this valve cover off. We're going to remove the plug wires. I'm going to remove the throttle cable and the cruise control cable. If you look back here, this cable is held on with this little C-clamp. It's a C-clip lock clip. I've got a pair of needle nose. I'm going to grab onto that. Just pull it out. See? Place it someplace safe, and then all you got to do is just pull this off of that pulley, that little piton like that, and then this one simply comes off by squeezing it forward.
Once you've taken it, the banjo-style one, off of the rubber bushing and under the slide clip, you're just going to grab firmly and pull it off. It comes right out. Same with this one. Just grab and pull out. Now that rubber piece, the grommet, will fit through. Just wedge it through. Pull the cable right out. You can just follow your cable and undo any brackets or clips where it's attached. Just get it out of your way.
Now we're going to remove the spark plug wires. Those are pretty easy. Just twist and pull up at the same time. These are all great times that you can take a good visual of your parts that are additional to what you're doing. When you see oil like that on your spark plug wires, they need to be replaced. Because what happens in there, it ... the petroleum of oil will break things down. It breaks this rubber down, and eventually that spark is going to find its fastest way out. That's not going to be on the spark plug. It's going to be off the side of this boot, and you're going to have a running condition of misfire.
Misfires are not good to let them go and just say, "I know I need a tuneup," because when a car nowadays that's computerized, fuel-injected, is dumping fuel because it's misfiring, it's not burning it. It eventually will clog the convertor, and then you have numerous amounts of endless bills going into the car. I know this is going to be a misfire someday, so I have to get plug wires to replace them while I'm doing this job. These are all eight millimeter socket size for these valve cover bolts. I'm just going to start taking them off. I'm going to release the pressure on the metal first.
We have it looks like one vent hose to take off. That's no big deal. I just like to loosen them all up pretty much evenly, and then I'll take all the bolts out and lift the valve cover up. It looks like this vent hose here on the back is either going to be eight millimeter, which it is not, or flathead screwdriver. I'm opting for the flathead screwdriver. We'll get it off right away. Factory, if you still have the factory parts on your car, if it's not the age of this one, it might just be a clamp with a pair of pliers. This looks like it's been replaced at some point. It's no big deal. Just make sure that stays clear back there, and then we can take the bolts off the rest of the way. The last one.
Now, as you go around and you take these out, every car is different. A good practice is to check the length every bolt, which I did with all the other ones. I know that these are all the same length, so I don't have a one valve cover bolt that's longer than the other or shorter. We're safe in that. Now we can just lift this right up. If it doesn't lift right up, break free, I get a flathead screwdriver, a good-sized one, or a pry bar. You're just going to slightly put pressure on an edge, because that's a hard plastic cover and you don't want to chip it. These stick pretty good, because around each edge cam lobe for where the rubber gasket meets, a lot of people put RTV. Sometimes they put so much of it that it really sticks down. So be careful, and don't damage the actual cover itself. You don't want to crack it. You just want to try to break that RTV free. Find a safe way.
I found this little spot up here, or the ... shall I say the camera guy did, so I'm going to put the flat screwdriver in there and see if it will lift up without breaking that plastic here. Look at that. Genius. Let's lift her up. Notice I didn't flip it on top of that engine, because of all the road grime that's in there. You don't want that going inside your top head of your cams, head of your engine. Definitely take it aside before you tip it up.
Now that we have the cams exposed, I'm going to show you how to do top dead center with limited tools. We're going to take number one spark plug out. Number one in this case is the one closest to the timing belt. It usually is in every case, but on this particular car. I've got a little 5/8 spark plug socket. Take the spark plug right out. You can see the oil, how the valve cover was leaking and it filled up the back two spark plugs. We're going to take a little suction, or a rag and soak that up before we take those spark plugs out.
Right now we're just taking number one cylinder spark plug out so we can do top dead center. We'll look at the condition of it. It looks pretty good. Now to find top dead center without any major tools. We're going to use the 18 millimeter socket. The nut is on the crank, and just a straight screwdriver of some sort. I have a Torx. You're going to put that in the number one cylinder. It's hitting the top of the piston right there. I'm going to put the socket and extension on, and I'm going to turn this engine. See how it goes down. It's starting to go down. It's going to go all the way down.
I'm going to do a full turn, and I'm also listening for compression stroke. I'm going to hear it. Not just a slight ... sound. I'm looking for a heavy duty ... here comes the screwdriver again. I'm also looking at my keyway down there. Now see I did top dead. It's right there, and there was no compression air sound. That tells me I'm about 180 off, so we're going to go around again. We're going to listen to the noise of the compression of the air coming through that cylinder. Hear it? Keyway should be coming around. Now here comes the screwdriver. It's going to come all the way up.
Now the keyway is straight up and down. See how the screwdriver, if you can keep it ... an eye on that. I'm going to back it just a little bit, just a hair. Okay. That moved down. Now I'm going to reverse it, and I'm going to go back clockwise. As I top dead center it, the screwdriver comes to a peak, and then it doesn't move anymore even though I'm turning the crank. Right there. See it stops, and starts to go down again. That's how fast that happens. You want to have it right at that dead spot. You want it to be right at top dead center. That keyway should be straight up. There it is.
Now we've raised our vehicle up. Our crank is on top dead center, and there's the bolt right there that Ford put in there, the manufacturer, so that you could take this bolt out and put in the crank pin to line that crank out. Now this pin, I measured it, is two and a half inches long from the base here to the tip. So if you have a two and a half inch or a three inch bolt, because you're not going into a port on the crank, you're going into a dead ... it's a half keyway on that crank. This lines up. It pushes underneath it so you bottom the crank out. You don't want it to turn. Two and a half, to a three inch at the most length of a bolt. That's probably eight millimeter by 125 thread pitch.
I've already loosened it up. It's a 10 millimeter socket. I'm going to go counterclockwise here. I've already loosened it up. Back that out with your hand. It's a little short, stubby nut bolt like in ... See it? Now this pin is going to go in there so that we can assure that that crank is at top dead center and not going to move. Just hand tight. That's why it's got a neural end. You want it hand tight. Now we can go over to the crank bolt, which is an 18 millimeter. You'll feel it bottom out. 18 millimeter socket. I'm going to see if it bottoms right out. It's already there. I'm going to reverse it just a hair to show you. Bottoms right out. Perfect. That keyway, half moon, is right at 12 o'clock, right where we want it to be.
Now we're going to lower it down. We'll take the tension off the timing belt with the timing belt tensioner. We can remove the sprockets, cam sprockets. Next thing we're going to do is we're going to loosen up the cam sprockets, and I'm going to use a 15/16. That's what I've found to fit pretty good on this little lobe on this cam. You do not, I repeat do not want to put the tool in to hold these cams while you break the sprocket free, because the end of the cams here will crack. You don't want that. We're going to put that there, hold it, the cam, and we have a T55, a Torx 55 on this cam sprocket. You can loosen up the timing belt at this point, but I like to use ... I'm going to use the timing belt as a little bit of tension so the cam doesn't turn.
Let's see if I can get in there. Okay, I'm going to use a half inch breaker bar or a ratchet. There we go. There's one. We'll break the back one free. Perfect. So here on the timing belt side, we had the timing belt tensioner. That's this right here. This is just an idler pulley. We're going to loosen up the tensioner. The hex key right here is six millimeter, and that's a 10 millimeter socket. I'm going to loosen up the 10 millimeter. We don't care about any tension right now because we're taking that out. That six mil over here is going to be for basically putting it together, but I'm going to take some of the tension off of it because I can. Now I'll just keep that, take this bolt completely out. If you get a good timing kit, it's going to come with everything. It's going to come with the pulleys, the belt.
That's what you want to do. You always want to do everything together if you can, because it's wear condition. The belt wears into the pulleys. You put a new belt on without the pulleys. It might not last as long as it should, could end up damaging the belt. On this car, it is an interference engine. Like I said earlier, interference means if this isn't timed right with that crank, the valves will be off center. They'll end up hitting the top of the piston, and you'll bend a valve. Then that's a big repair. There we go. Take that tensioner right out of there. That's what it looks like. Bolt goes right through. There is the alignment mechanism. We'll show you when we install it.
Now we can take the belt right off and out of the way. We'll get a good exam of that in a minute. I'm going to take this idler timing belt idler pulley off. It's a 15 millimeter socket. Now, like I said earlier on something else I took off here, you've got spaces on the back like when I did the serp belt idler pulley. Always put your hand in the back there to catch it. You don't want it that spacer falls down. Should be no big deal, but there's your spacer. Make sure you transfer that over to the new pulley.
Okay, let's look at this belt. That's obviously severely worn. Severely worn. That is crazy that that didn't snap. Sometimes, most of the time I see, is the notches here come off. See how that's torn right in there right now? Every single one is like that. They shouldn't look like that. What happens is the gear mechanism from the power of the crank, when you go to accelerate, ends up ripping this right off so you have a whole stripped part of the belt on the inside. Then doesn't work anymore. Car comes to a stop. You'll crank over, and you'll go, "What's ... why is it not starting?" That's why. That will just deteriorate.
Now we can take the cam sprockets off. I've already loosened them up. 55 Torx bit on the top there. I like to keep things in sequence, so I'm going to make sure that this stays on the right side of my assembly. I'm going to put it down like that, know that that's the cam sprocket for the front cam. Take the back one off. You see how they spin freely? There is no keyway on these. That's what you have the bar in the back for, to line up the cams.
Now we're going to install the cam alignment tool that comes with the timing kit for Ford engines. I have a master kit, so I have a whole bunch of different pieces that go for timing on Fords. Put my wrench in there again, see if I can turn this, line this up. Let's get the back one here. I'm going to make sure that the surface of the head is clean for that cam alignment tool to lay flat. You want it to lay as flat as it can. Make sure it gets good connection in there. Just getting off all the old gunk, making sure it doesn't fall down in on the cylinder. Okay. Make sure that straight edge is nice and clean. Clearing this bracket.
Okay, so I've got that one lined up. Now I'm going to move this cam and get this one lined up. I did grab a little brass punch to see if I can tap it. It's a really nice, tight fit. That's what you want anyways. You don't want these cams moving. Now the piece is in place. These cams are lined up to proper timing. I have the pin down below, that 18 millimeter wrench. Grab that crank, and we're going to confirm that it's bottomed out before we put the belt on. It is. You want it bottomed out on that bolt.
Now we're ready to change our seals. Here are our cam seals, and I'm going to take and remove them out with a flathead screwdriver, a little small one. Just pop it in there. You don't want to damage the aluminum housing, so that's why you just go real gentle. Make sure you're just prying on the actual seal. That's the old seal. Same on this side. There we go. Now I'm going to take that same flathead screwdriver and our rag, and I'm just going to clean in here. Just gently go around and get any loose oils or debris that's in there. You want that nice and clean. If you find a burr or anything on this cam ... See how old it is? It's got some high miles on there, so it's got a nice ridge.
I'm going to take some parts cleaner and soak this rag, tip of the rag. I'm going to put it in there, and you'll watch that piece come real clean. I'm not going to use sandpaper. I don't want anything abrasive. I want the thing just to come spotless so that doesn't make a ridge. Cleans that up pretty good, makes it smooth. This is not a job you want to redo because the seal didn't make a good connection, and oil's spewing out.
So before I install my cam seal, I like to put a clear silicone base right in here, because I want it to glide in there. I don't want it to be dry, because I don't want it to roll the spring. There's a metal spring in there. I don't want that to roll, pop out. I have seen that happen. Keep the seal part, this part where it meets the aluminum, dry, because you just want it to glide over the actual cam itself. There's a couple of ways to do these. Line it up, just wiggle it around, feel that seal go right. You don't want that seal to roll. There we go. Try to line it up evenly.
So if you're lucky enough to have a socket that will clear this cam, then feel free to use it because it will give it even pressure all the way around. Well, I don't have one, and I seem to have misplaced my cam tool seal installer, so I'm going to use a brass punch. I'm going to make sure the ends are round and not sharp. I don't want to be on the end part of that seal. I want to be right off here, and give it some equal tap all the way around. It should pretty much fall right into place. You don't want to hammer it too much. Hear it bottom out? Make sure it's equal all the way around. You can do that also with your finger. If you bring your finger around, you'll feel ... Make sure there's no edge, aluminum edge, popping out. That feels real good. I'm going to give it a little more down there. Perfect. We're going to do the same thing to that one.
So before I install the cam sprockets, I did take a little parts cleaner and just clean this out. You can see how the old one looks with all the road debris, and a little bit of the timing belt old rubber on there. That one's going to get cleaned up. First, I'm just going to put the front one on. It is a free floater, so I'm just going to hand-tighten this because we want this to move once we put the belt on there. The alignment part of it, the timing, comes from the actual tool back there. This is ... makes installing a timing belt on this engine so much easier, because you don't have to line up all the neural and pick up the slack like on a normal timing belt. I like that design. All right, so I'm going to go clean this and be right back.
I'm going to take the crank bolt back out, 18 millimeter, and I'm going to do it real quick so it doesn't turn the crank too much. Didn't turn it at all. That's great. You can grab that sprocket, slide it right off, and then you have a shield here for the seal. We're going to slide that off so we can take the seal out and change that. Should be a keyway to line it up. There's your crank seal. That would be called the front crank seal. The rear crank seal is what they refer to as the rear main seal. That you have to take the transmission out, or the engine, separate it from the transmission. We're not doing that today. We're just going to replace the crank seal because we're putting a new timing belt on.
Now the old front crank seal in there, that's when I'm going to clean this, because I don't want it to ruin the new seal with the cleaner, but I don't want any of this debris going inside the oil crank case. I just want to spray it down and clean it. I got a catch basin underneath. There's a lot of old grease and road debris, a lot of the rubber from that timing belt still in here. You want to make sure you have no big pieces of debris, because if that gets stuck in between the belt and the crank, it could do some damage to that timing belt. You can just keep cleaning it to your satisfaction, because I don't know how dirty your timing belt area is going to be. Obviously, every one is going to be different.
Now with a small flat edge screwdriver, or if you have a seal remover, just lightly pull in there. These will pop out real easy. The key is you don't want to go on the outside of the seal, because this is aluminum. You do not want to scratch that. If you scratch that, that will end up leaking. It comes off pretty easy. This seal is hard, so that means that it was leaking that oil. You can see all that oil there. It is petrified. It probably has tons of little micro cracks in it that we can't physically see, but I can feel all ... that's really ... that rubber is worn out. Before we install a new seal, I'm just going to try to clean up any debris in there. Just take a clean rag, slide it around. Looking good.
Before I install my crank seal, I like to install or place clear silicone paste just on the inner seal where it's going to meet that crank. Not on the outside, because that's where the rubber, you want it dry to make a nice seal. I want this to slide over because you can see in there, there's a rubber spring. Oh my god. As you can see inside the rubber part, there's a spring. That's what holds that seal tight onto that crank. So dry rubber, it could ... has a chance to pop that out. If you don't see it, you don't catch it, you put this job together. As soon as you start that car up, that oil is just going to shoot right out. I just put a little bit of that. You can use, if you have at home, you have Vaseline. If you don't have silicone paste, a light coat of Vaseline will work also.
Just line it up. I like to rock it back and just slide it on. Work it around. You can, if you have to, use that small screwdriver and very carefully guide that on. They do make a seal tool that has round edges to it so it will not damage, but it's not something that everyone's going to have. So if you have a pocket screwdriver, as long as you are gentle with it and you can feel how it works, you want to make sure that that's up there on that ridge. Now I can take my brass punch and work that around. Like I said before, use your finger. You can feel right here it's raised up, and over here it's flush. I'm just working over this side again.
Before we install the lower crank sprocket and washer, we're going to wash this. The good thing is that this has markings on from the ... being so old. You can tell that that's the side that faces out at you. Another way would be looking for the rounded side. It flares in towards the block. That's a good way to indicate it too. Let's clean the sprocket. You don't want any debris left on these sprocket gears right there. See that? Okay.
We're going to line up that keyway, push it all the way back. It doesn't matter now. It can spin around. Dry off our gear sprocket. Line up that keyway. It'll slide right on. There we go. Now we can put the timing belt on, then the lower cover. First, what we're going to have to do is clean up our timing cover. This is the lower end. This is the upper part. Let's go clean them up.
Here we have our timing belt kit, the one we took off, and the kit we have purchased from 1A Auto. Now this kit is a brand new timing belt, and it comes with three timing belt pulleys. You have your adjuster, and the idler pulley. It also came with this little extra one. It's for a different application, but the belt itself is the same size as ours, and these two are the same. It's a multiple kit, different for different styles. This one we don't need on this dual overhead cam with the 2.0, so I'm going to discard that. We're left with what we took out.
Here we have the idler pulley from the old one, and here we have the new one. It comes with a bolt. The new one comes with a bolt on that because it's locked in there. It's got a little piton in there that holds that bolt from coming out. Same with the new one. Here we have the timing belt tensioner, new idler pulley, new bearing, mechanism. You got to transfer the bolt from this one over. Pretty easy. Easy peasy, ready to go. You can see this comes with the actual alignment tool. It's got the pin, and the degree angle, six millimeter Allen head, and the degree to turn it once you bolt it in. The kit comes with directions. You also can read or listen to me. You get your choice. Do both. If you like this kit, pick it up at 1aauto.com, and hope your belt doesn't look like this.
A quick way to measure any belt, whether it's a drive belt or a timing belt, if you want to make sure you have the proper kit. I like to line them up side by side, and they'll be the same length. You might have a little bit more. That's due to stretching, because the belt is pretty old, as you can see the condition of it. But this is pretty accurate, so I know the belt is the right one. Kit is the right one, so we're going to install it.
We're going to install the new belt. Just slide it up in the top, line it up in the gears. It doesn't really matter, because we're going to finish it from the top and put the lower cover on. Put your two bolts in. These are the eight millimeter socket. I'm just going to bottom it out, and then I'm going to tighten them up. As you can see, this cover has seen better days. It is missing quite a bit. Because this car is an old one, and has been discontinued from the dealer, and to try to find one in a salvage yard, it's pretty slim. They usually leave it on the engine.
Obviously, it rode before. Yes, road dirt is going to get in there, and the weather is going to get in there. There's not much else you can do. You can't try to build something. If it breaks, and falls apart, and gets in there and hits that timing belt, you're pretty much done. Good news is this is just a summer beater sports car. This is for the winter, I mean. This is a winter beater, because he has a sports car in the summer. It works. We'll do our best. But if you at home, you have a hole in your lower cover like this, really don't try to build something. Because if it happens to fall in there and hits that belt, you're out an engine if you break a valve.
I'm just going to tighten up this cover so I can put the harmonic balancer back on. Line the keyway up, slide it right in there. Grab your crank bolt. I'm just going to hand-tighten it. 18 millimeter wrench. Make sure that it hasn't moved. I want to make sure that it's still bottomed out on that pin that we have. Yeah, the crank is not moving. Now we can lower it down.
Now before we put the timing belt tensioner side on, this is the adjuster. See the metal tab that comes out? There's a little cut in the shield right there. Make sure that lines up in there. Hold it flush while you tighten the bolt down by hand. That is going to be holding the back part of the adjuster, so when you put the tension on with the six millimeter hex, the proper tension, on the timing belt. I'm just going to snug that. Now we can put the belt on, put it on counterclockwise. It doesn't really matter because it's just going to ... it's everything is free flowing right now.
Now we can grab the belt idler, line up the threads, tighten that by hand. Make sure you don't cross-thread it with the pressure from the belt. Pull up on it. Make sure you feel it start and not cross-thread. It's 15 millimeter. We're going to torque that to 18 foot-pounds. I have my torque wrench set for 18 foot-pounds. Perfect. Now we're going to adjust the timing mark on that tensioner. Okay.
Now with the six millimeter Allen head, we're going to turn this thing counterclockwise until we see the alignment tool in here line right up. See the arrow on that hole right there? You want it to be right there, not past it. That's way too tight. So counterclockwise, put the arrow right in the center of that tab. Once that's lined up, 18 foot-pounds on your torque wrench, 10 millimeter socket. I'm going to hold it there with my six millimeter Allen head and tighten this up. I reverse the turn on my ratchet so that I can put pressure against it while I torque down the bolt. Good to go. I'm just going to pry it out. Slide it right out. There you go. T55, I'm just going to bottom it out. Do not turn it. Mine is ... I seem to get a 15/16 wrench in here pretty good. I'm going to hold that while I torque this down to 50 foot-pounds. Move over to the back cam and do the same.
So now that the timing belt is in and all tightened down, we're going to remove this crank pin tool. Just turn it out, pull it back out of the way, and now we can replace the bolt that belongs in there. That's a 10 millimeter socket or a wrench. Just going to snug it up. Once it's down hand-tight, we'll just give it a little quick turn. Now I've got my 10 millimeter socket on there, and I'm just going to snug it right down. There's no pressure behind it. It's just a hole for the actual alignment tool.
Now that we have the crank pin tool out, everything is going to be able to be turned without any stoppage or breakage. I got my 18 millimeter socket in extension. I'm going to put it on the crank bolt down here. Like I said, everything's torqued. We've already done that. I'm going to turn it clockwise several times. I want to rotate my engine. I'm keeping an eye right here on my tensioner.
You want this hex washer to stay at four o'clock and not move. Now your alignment pin back here is going to move back and forth with the spring tension of the belt, but this should not move. You can hear your compression in the engine. Like I said, you want to do this several times. Make sure what you're checking for is that washer not here ... not moving, and make sure this keeps a good tension at all times, no matter what position the engine is in. If that loosens up on you, then you're going to have to double check everything. Go back to square one and start all over.
Now we're clear to install the top cover. I'm going to bring that right around and put in my four bolts. These are the four bolts that are the same length. You have two in the front, and then two in the back. Just put them in finger-tight, and then we're going to tighten them right up. This particular car was ... had one missing, probably from the last person, so I'm going to go get myself a bolt. It should be a 6 millimeter by 125 pitch. I'm going to get an aftermarket bolt and put it in there. Now I have the cover in place with all four bolts. There's the aftermarket one I installed here. I'm only going to put them down so much, so they don't fall out. We're going to leave it loose because now we can clean the valve cover, install the valve cover, and then tighten that up.
Here we have the valve cover. First thing I'm going to do is take the old gasket off. You can see somebody used a lot of RTV, black RTV here. Experience. One, rubber gasket and RTV don't like to mix. The RTV should only be used if you look on an engine. RTV with a rubber gasket, and even a cork gasket should only be used where there is a seam in the aluminum or the steel. You have a seam here because you have caps, bearing caps. You put a dab there, there, there and there. An eighth of an inch and that's it.
You don't put it all the way around this way. This is not the proper way. If you buy the correct gasket and you torque the cover to the manufacturer's specifications, you do not need to put RTV all the way around. This actually expands the rubber sometimes and causes damage. It also makes it so that it's harder for the next person, because now I have to clean all the silicone out to do this job properly. I'm going to take a small screwdriver and pull out the valve cover gasket, which is a one piece system. It goes all the way around.
You see what I mean by the RTV is holding it in there? That's not a proper way to put this gasket in. You should only have sealant here and here, dabs where the seams meet. If you had a split head and there's a seam here, put the RTV there also, so wherever there is a seam on the surface. That seam, I mean by where the two pieces of metal meet. Wow. More is not always better.
This is a hardened fiber plastic cover. It's not a metal cover. The best way to get this out is if you have a brass brush, because the brass brush will ... bristles will not crack the plastic or eat away at it. They're a soft metal, so that's a good way to clean this out, or you could take your time and do what I'm doing here. I'm going to run a small screwdriver along inside the channel and see if I can get all of this out of here. Then I'll put it in a parts cleaner that I have. If you're at home and you don't, you're going to have to spray it with parts cleaner.
Just keep scraping, and don't give up, because you want to do the job right. That's why this ... these chambers in here are probably filled with oil. People will think, "Oh, the rubber gasket wasn't sealing," so they probably took it apart and they just filled this with RTV along the tracks here so that the oil would stop flowing in there. As you can see, it didn't work. More than likely, they didn't have the proper torque specs for this, and they over torqued it. When you over torque something, it actually squeezes the gasket flatter, which can make oil go past it.
Now we're going to clean up the top of the head here where the valve cover meets. I have a scraper, so I'm just going to lightly run it across here, and I'm going to remove all this RTV that was placed in this place. Please do not get anything inside the heads. That's the goal here is to not have it go down inside. I'm always going to try to scrape away from it, and the road dirt and the oils that get left behind. You can use a razor blade if you're really gentle, because aluminum ... the razor blade is nice and sharp, so it will actually stop and gouge the aluminum. We don't want that. Like this rubber piece, make sure it goes away.
If it's a big piece of silicone or RTV that falls down into the pan, it won't damage anything as far as metal goes, but what it does is it clogs the pickup screen, and then the pickup screen, the oil doesn't go past it. Then you lose oil pressure, and then that will damage the metal. Here I have a piece of emery cloth. It's 400 grit, so it's not too coarse. I'm just going to clean the surface, because I want a smooth surface for my new gasket. I'm going to do this all the way around the whole top of the head here where the cam cover meets. To clean up that mess, I'll take a clean rag, spray some parts cleaner on it, and just re-wipe after that I've sanded to pick up any grit and make it a clean, smooth surface. I'm going to do that all the way around until I got a nice surface, then I'll install a valve cover.
All right, so now if you don't have a parts cleaner, obviously it's not something you would carry. This is a parts cleaner. What I would do is I would spray in here, and here's that brass brush I was talking about. I would just work this back and forth. You can see how it just slowly eats up the RTV, the rubber gasket. You want all of it gone, which I've already done. Make sure you get it out of the actual grooves where the gasket sits. You don't want anything interrupting this proper seal. So clean that part, and then clean all the grub out of here. So how clean it is on the surface for looks, that's up to you. You got to let it dry, so what I like to do is I'll just hose this off and let it dry, blow it dry with the airgun or air dry.
Now we have our valve cover. It's nice and clean. I'm going to install our new gasket. I'm going to start down here. You can see the pattern, how it has the inverted down here, and then the exverted half loops through the half moons. You can see how it's curved. It's pretty simple to figure this one out. Just push, tap it down lightly. Follow it around, and there's a little notch right there. Make sure that goes right in that groove. You're going to end up going back around, confirming everything a couple of times. Just like cutting wood, right? Measure twice before you cut.
You don't want this gasket just thrown in there, because if it folds over you're going to have a mess. Follow it all the way around. I'm going to show you the points of where to place the RTV. Not like the last person. That was a mess. That took some time to clean. It will pop back out, so I like to just level it firm down. There's notches right here and there, there and there. Make sure it's all down in place. It feels good. Now I'm good to get the RTV.
So I'm going to, because it doesn't have a funnel piece on it, I'm going to put it on the end of my screwdriver, about that much. I'm going to place it right where I want that RTV, right on the cam cover right there. There's four places to put it, because it's a dual cam. If you have a single cam, you're just going to do it twice on the cam cover. Put a little more there. Now you only got a few minutes, 5 to 10 minutes, before that starts to congeal, so make sure you get your cover all ready to place down on it. I've already sanded, cleaned that area.
So before we get ready to place our valve cover down, we're going to take oil out of those cylinder ... the spark plug holes. I'm just going to take a rag down there. I don't want to make a mess and blow a blowgun down there, because that'll be not pretty. I'm going to try to get most of it up this way. If you have a little vacuum system that you can put down there, not a car vacuum but an actual liquid vacuum, go ahead and use it. But mostly, you probably won't have that, so I'm just going to use a rag and a screwdriver. Wherever there's oil, try to soak it up. Once we know it's soaked up, you can feel free, as long as the spark plug is tight, to spray some parts cleaner down there, and a rag over it, and just give it a little bit of a shot of air if you have some. If not, let it evaporate in time. I'm going to get another rag. Found a clean spot or something.
Make sure you pick up after yourself on that. You don't want to leave anything. This oil will burn and smell. You just did a job. You want to take pride. Make sure it doesn't smell. Heaven forbid, if you don't pick this up, it's going to ruin the spark plug wires. Then you're going to say, "Geez, do I have a leak after the job I just did, or is that the old stuff?" Obviously, you want to pick it up.
Before we put our valve cover on, I'm going to put the number one spark plug back in. Tighten that down here in tight, then I'm going to torque that to 11 foot-pounds. Beautiful. The area's all clean. Our spark plug is back in. Our RTV is down. Now I'm ready to place this valve cover right back in its spot. Push it down firmly, and then we have all the bolts. They're all the same length, so ... It's an eight millimeter socket, and we're going to go from the center out with torquing. Eight millimeter socket, and I'm just going to literally snug them down. The torque is seven newton meters, so you just want to literally bottom the bolt on that cover. Go from the inside out pattern, and then we'll get our torque wrench. Do the same, but the torque it at seven.
This says the first stage is two newton meters. I don't know about you, but that torque wrench doesn't go down that low. It's pretty low. We're going to go to the second stage, which is seven newton meters. Okay, seven newton meters, eight millimeter socket. You could really snug it down. I just didn't want to over torque it. The reason why they go from the center out on things with gaskets is that you're pushing everything outward. Where this is a rubber gasket, you want to make sure it doesn't fold over and it seats properly. Then you're always going to check your torque twice.
So once you're done, you've gone around once, start again at the center and just double check your torque. Always try to keep the same pattern. So if you have to write it down, write it down. Some places, some parts on cars, they have a schematic already for you. This one didn't. It just said from the center out. Then what I like to do, on the corners I'll just alternate from this side to that side. Okay, so we're going to start again real quick. Center. Make sure we get nothing out of it. Wonderful.
Last thing is don't forget to hook up your PCV line to the valve cover. This one is just a flathead screwdriver. You might have a pair of pliers style. Snug it down. It's stripped. There we go. Now I'm going to install the plug wires. Now, if your vehicle ... examine the parts obviously, before you put them back in. This particular car I'm going to replace the plug wires, because see the oil that was where that chamber was leaking into? Oil-soaked. This is going to swell up, and it's going to cause the spark to shoot down the loosened rubber and ground out on the block. That'll cause a misfire eventually, plus it looks like it had an animal living, and ate a little bit of rubber right here.
We don't know what else is compromised, so we're just going to replace these plug wires and go from there. Shortest one, I'm going to say that's going to be the closest cylinder right here, which is cylinder four. I'm going to pop that right down until I hear it click. The next one, this is the next shortest one. I'm going to alter the angle of the plug wires. That's on the one.
Now we're going to come over to our coil, and this one has been marked for us so that's nice. If you didn't have one that's marked, then mark it on a piece of paper. Some people put a sharpie on the back of the wires here. They follow it and trace it, place one, two, three four. This one has been done. See how it says four here, two there? They marked it with lines, the single one line there. They got a lot of silicone on that end, so I don't have to add any. Here we have number four. That's the shortest one. That's going to go right here. Push it down. Cylinder three is right here, and I'm going to run that wire over, click it in. Cylinder two is going to run down through the back here, and then cylinder one. I'm going to run it right through here.
Now this package came with new plug wire clips. It's pretty important to keep your plug wires separated, and not overlapping and touching. In the old days, they told us that that would actually interfere with the spark. I'm going to bring this underneath, keep it separated. See, it makes it look clean too.
Now we're going to tighten the timing cover with the four bolts that are the eight millimeter socket. The torque on this also says seven newton meters. I'm just going to tighten it down. Now we're going to put our cruise control and our throttle cable back on. That's actually the kick down cable. I do believe it's the shifter kick down, so that one's going to go on this notch that's right here. Lock it in. This is going to get pushed in like that, and then we have the throttle cable. Same thing. Run that down.
Now see the rubber boot stuck to the actual throttle? I couldn't get that off. I don't want to damage it, so I'm actually going to get some silicone spray, and I'm going to spray this square so I can get it to squeeze in a little bit easier. Got a flathead screwdriver to help. There we go. Perfect. Now I'm going to spray that little grommet. Hopefully I can get this to slide, snap right down on ... yeah, perfect. You can see this little cable burr. He does need a new throttle cable. That's a good sign it needs it. But it's not here yet, so I'm just going to show you how to take one off and put it back on. Once it gets here, I'll replace it. So here is our C, C-lock. It's a little clamp-like. That's going to go right there. Good to go.
Now it's time to put our timing belt/motor mount aluminum cover on. It's got the cutout right here for where the belt splits right down there, so it's easy to install. Out of all the bolts, the Torx head one is the bottom right, down by the water pump. You're going to pre put that in, line that up, and start that with your finger. That's a T50, Torx bit 50. I'm going to get my other bolts. Two are the same, one really long. Obviously, I'm going to put that long one going with this one. Then one down here, so there's four bolts total. I'm just going to hand-tighten these, and then we'll torque it to the manufacturer's spec.
Now we're going to tighten the four bolts, that one Torx bit, and three 13 millimeter socket-sized head bolts to 50 newton meters. That one's the difficult one. There we go. Then the T50 down below. Now you have your engine's jack still on the oil pan, so you can raise and lower that. If it's difficult for you to get to it, feel free to jack it up as much as you can. Obviously, you don't listen for cracking. If you can't get to it still, then we're going to lower it and raise the vehicle. See how that ... this just won't fit in there? We're going to have to raise the vehicle up. Now it's much easier to get to. That's that.
While we're here, I'm going to torque the crank to the manufacturer's specs also. I'm going to use what they call a strap wrench to hold around the harmonic balancer. I'm going to probably end up using the lower part of the subframe to support that. 18 millimeter socket, and I have my torque wrench set to 87 and 92 foot-pounds, so I've got it at 90, right in the middle. I'm going to bring this around until it bottoms out here, because there's no physical way I could probably hold that. The reason why I don't want to use an air gun is some cranks are hollow, believe it or not, to a certain depth. If you use an air gun too much, and you over-tighten a crank bolt, you could crack the center of the crank. So if the manufacturer says to torque it, if you can do it, I say do it without the gun, because you don't want to damage your crank.
Now we can put the two studs in before we install the mount. So this is an inverted torque, that special socket, and that's a ... they call it an E10. It actually has a spacer right here, so you're going to bottom that out and snug it up. You're going to do it to both bolts, the same thing. Now we can install our serp belt idler pulley. It goes right there. Take advantage of the engine being up in the air like this so we can really tighten that down. Bottom that out. That's a 13 millimeter. 13 millimeter socket, torque wrench is set at 40 newton meters. That's just the way the directions are for this, because it's considered ... even though it's a Ford, it's actually an imported engine, so they go with newton meters. You can always cross it over on a chart to go to inch-pounds or foot-pounds. Maybe I can give you a little help right here. 354 inch-pounds, 29.5 foot-pounds.
Let's put the water pump pulley on. Line up those. There's three bolt holes. That's it. Little eight millimeter bolts thread-wise. I do believe it's a 10 millimeter socket or wrench. Now we're going to install the serp belt, reinstall it. On this particular car, it's going to go S around the water pump and the crank like this. It's going to go down on the tensioner, up on the alternator. Vertically challenged, like me. Up over the power steering pump. I'm going to take it back up the water pump to get it to go around the AC unit. Now I can slide it right on that water pump.
Now I have my 14 millimeter on the tensioner. I'm going to put my hand right here on the belt around the water pump, and I'm going to give the belt some slack and slide it around the water pump pulley. Now we haven't torqued the water pump pulley bolt yet. That has to happen, but I'm using the belt to help me center it to give it some strength. Double check your belt. Make sure it's in all the grooves on all the pulleys, it's not off the ridge. It looks good. Okay, let's tighten up the water pump bolt. The water pump pulley bolt is 24 newton meters, or 18 foot-pounds.
I'm going to take my 10 millimeter socket and my torque wrench, and I'm going to use a flathead pry bar or a screwdriver, whatever you have handy. I'm going to use that to wedge it to hold these actual bolts if this pulley starts to spin, just like that. You're just wedging it between two bolts. Let's see if we can get it right here like that. Now with that in that position, I can hold the pulley. I've got one. Rotate it, get it in position for the next one. Okay, one more. There you go. All three water pump pulley bolts tightened to 24 newton meters.
Now we've lowered the car back down, and we still have a jack on the engine supporting it. We're going to put our timing belt area motor mount on with the bracket. Slide it right through there. Bring it right over those two studs that go on the motor mount. Everything lines up pretty good. There we go. I'm going to put the two nuts on, on the engine side. It's 18 millimeter socket, and that is torqued to 80 newton meters. I'll give you the foot-pounds in a second. I'm just going to hand-tighten this, these two nuts down here. Then its torque is 80 newton meters, which comes out to 59 foot-pounds. It looks like I'm definitely going to be lined up with everything once I lower this, so I can feel confident enough to tighten these and not worry about having to loosen them back up.
Now I'm going to lower the jack with the engine on it to line up the bolts' holes on the actual subframe so I can start them. It's 15 millimeter socket. Get the other two in place. Oh, might need a bigger extension. Okay, I'm just going to put the power steering reservoir back in place. There we go. There's three rubber bushings on here. You want to make sure they're lined up in the little slots that are cut out for them. There we go. There's one down below, one here, and one in the back. It'll just pop right down.
Let's get the overflow tank repositioned. You've got these plastic clips that hold the actual lines together. Get that clicked in. Now there is a plastic liner line up tool on this side, right on the strut tower. That's going to go there, and it lines up the ear for the one bolt left. It's a little sheet metal bolt. Or screw, sorry. I just put the bolt on an extension. It is a 10 millimeter socket. There you go. I'm just going to snug it down. I don't worry about torquing anything like this. Now we're going to torque the wheels to 94 foot-pounds. That is the manufacturer's specification. 19 millimeter socket. Double check. Now let's take this thing for a road test.
Thanks for watching. Visit 1aauto.com, your place for DIY auto repairs, for great parts, great service and more content.

How to Replace Timing Chain 1996-99 GMC K1500 5-7l
Watch this video to learn how change a worn or damaged timing chain. 1A Auto's mechanics will show you how to replace the timing chain on your 96-99 Chevy or GMC C-Series or K-Series pickup truck.
