How to Replace Timing Belt 2005-08 Audi A4 Sedan Wagon
Created on: 2016-05-25
Watch this video to learn how change a loose or snapped timing belt. 1A Auto's mechanics will show you how to replace the timing belt on the 05-08 Audi A4.
-
step 1 :Removing the Belly Pan and Bumper Cover
- Remove the three T30 Torx screws from the top of the bumper
- Loosen the two T30 Torx screws on the sides of the bumper
- Remove the quarter turn flat blade fasteners at the bottom of the bumper
- Remove the quarter-turn plastic fasteners from the bottom of the bumper with a flat blade screwdriver
- Remove the Phillips head screw from the front of each wheel well
- Remove the T25 screws inside the wheel wells
- Support the belly pan
- Pull the inner fenders away from the bumper
- Remove the two T25 screws behind each inner fender
- Remove the two 10mm bolts inside each wheel well
- Pull the belly pan down and off
- Disconnect the sides of the bumper
- Pull the bumper off
- Disconnect the wiring harness from the bumper
-
step 2 :Positioning the Front Lock Carrier
- Remove the two Phillips head screws that hold the air duct into the front lock
- Remove the air duct
- Release the horn wiring connectors using a right angle pick
- Remove the bolts from the impact brace with a 10mm triple square bit and a ratchet
- Pull the rebar off the front of the car
- Remove the 13mm bolt from each impact brace
- Remove the 10mm bolt from each impact brace
- Remove the three T30 Torx bits from each side of the front lock carrier
- Pull the weatherstripping off the front lock
- Pull the front lock carrier forward
- Insert a Phillips head screw on each side of the carrier to hold it in place
- This is the Audi service position
- Disconnect the lock wiring harnesses
- Twist the cap off the coolant tank
- Have a drain pan ready
- Open the coolant drain by hand
- Allow the coolant to drain
- Disconnect the upper radiator hose from the radiator
- Lift the hood latch cable out of its retainer
- Remove the placeholding screws from the bumper
- Hold the bumper in place with bungee cords
- Disconnect the headlight wiring harness
- Lift the front lock off of the bushing and allow it to hang
-
step 3 :Removing the Serpentine Belt
- Make note of the serpentine belt routing
- Loosen the serpentine belt tensioner with a 17mm wrench
- Pull the serpentine belt off the pulleys
-
step 4 :Accessing the Timing Cover
- Remove the three 13mm bolts form the serpentine belt tensioner
- Pull off the serpentine belt tensioner
- Loosen the radiator hose clamp with a flat blade screwdriver
- Have a drain pan ready
- Disconnect the radiator hose
-
step 5 :Removing the Timing Covers
- Remove the two T30 Torx screws at the top of the upper timing cover
- Pull off the upper timing cover
- Hold the crank pulley with a 19mm 12-point socket and a breaker bar
- Loosen the six 10mm triple square bolts from the crank pulley
- Turn the crank pulley clockwise to line up the dead center marks
- Remove the crank pulley bolts
- Pull off the crank pulley
- Remove the seven T30 bolts from the lower timing cover
- Remove the lower timing cover
-
step 6 :Removing the Timing Belt
- Mark one tooth of the crankshaft gear with a paint marker
- Mark where that tooth lines up with, with the marker
- Note the timing belt routing before removing the belt
- Note the direction of rotation if you are going to reuse the belt
- Loosen the 13 millimeter nut on the timing tensioner pulley
- Carefully, pull the belt off without moving the crank or cam gears
-
step 7 :Removing the Water Pump
- Remove the 13mm nut from the timing tensioner
- Pull off the timing tensioner
- Note which idler pulley is which
- Remove the top idler pulley with a 13mm socket and ratchet
- Remove the bottom idler pulley with a 12mm socket and ratchet
- Remove the three 10 millimeter bolts holding your water pump to the engine block
- Have a drain pan ready
- Pull off the water pump
-
step 8 :Installing the Water Pump
- Make sure the water pump mounting hole is clean
- Insert the water pump O-ring
- Install your new o-ring onto the new water pump
- Insert the water pump into the motor
- Insert the 10mm bolts into the water pump
- Tighten the 10mm bolts to 11 foot-pounds of torque
-
step 9 :Installing the Timing Belt
- Install the lower idler pulley with a 12 millimeter socket
- Tighten the 12mm bolt to 26 foot-pounds
- Reinstall your upper idler pulley with the 13 millimeter socket
- Torque the 13mm bolt to 18 foot-pounds
- Put the timing belt tensioner into place
- Start the nut onto the tensioner
- Clean the timing belt mounting area with brake cleaner
- Allow the brake cleaner to dry
- Loop the timing belt around the crank gear
- Bring it around the lower idler pulley
- Bring it around the belt tensioner
- Loop the timing belt around the cam gear
- Bring under the upper idler pulley
- Bring it over the water pump gear
- Make sure the timing marks are still lined up
- Insert an 8mm Allen wrench into the tensioner
- Turn the tensioner until the notch lines up with the tab on its ring
- Tighten he tensioner belt to 18 foot-pounds
- Rotate the engine by hand
- Make sure the timing marks line up every two rotations of the crank
-
step 10 :Installing the Timing Covers
- Put the lower timing cover into place
- Insert the seven T30 bolts into the lower timing cover
- Line up the crank pulley hole with the crank gear stud
- Start the 10mm 12-point bolts into the crank pulley
- Check that the timing marks are still lined up
- Hold the crank pulley with a 19mm socket and breaker bar
- Tighten the 10mm 12-point bolts to 17 foot-pounds in a cross pattern
- Put the upper timing cover into place using the locating tabs
- Insert the two T30 screws into the upper timing cover
-
step 11 :Installing the Serpentine Belt
- Reconnect the radiator hose
- Tighten the radiator hose clamp with a flat blade screwdriver
- Fill out the timing mileage sticker
- Stick the sticker to the upper timing cover
- Put the serpentine belt tensioner into place
- Insert the three 13mm bolts into the tensioner
- Tighten the 13mm bolts to 30 foot-pounds
- Loop the serpentine belt around the crank pulley
- Bring it under the tensioner
- Loop it around the A/C compressor
- Bring it around the water pump
- Bring it around the water power steering pulley
- Use a 17mm wrench to turn the tensioner
- Pull the belt over the alternator pulley
- Check that the belt is routed correctly
-
step 12 :Repositioning the Front Lock
- Put the engine cover into place
- Lift the front lock onto the rubber bushing
- Connect the headlight harnesses
- Remove the bungee cords
- Slide the front lock into the Audi service position
- Insert a screw into each side of the bumper
- Connect the upper radiator hose to the radiator
- Hook the hood latch cable into place
- Reconnect the lock wiring harnesses
- Remove the screws from the front lock
- Push the front lock into its original position
- Insert one screw into each side of the front lock
-
step 13 :Installing the Impact Braces
- Insert the impact braces into place
- The passenger side impact brace has a tow hook point in near the threads
- Fasten the 10mm nut onto the impact brace
- Insert the 13mm bolt into the impact brace
- Torque the 13mm bolts to 37 foot-pounds
- Mount the front rebar
- Insert the 10mm triple square bolts into the rebar, starting with the passenger side
- Torque the bolts to 19 foot-pounds
-
step 14 :Installing the Bumper and Belly Pan
- Connect the horn wiring harnesses on either side
- Insert the T30 screws that hold the bumper to the front lock
- Insert the remaining bolts at the top of the front lock
- Reconnect the fog light wiring harness
- Lift the bumper cover up into place
- Install the three T30 bolts into the top of the bumper cover
- Install the two 10mm bolts inside the wheel well
- Insert the two T25 screws that hold the bumper to the inner fender
- Push the inner fender into place
- Reinstall the inner fender fasteners
- Slide the belly pan into place
- Insert the fasteners into the belly pan
- Insert the screws into the top of the bumper
- Insert the air duct into place
- Insert the two Phillips screws to the air duct
- Press the weatherstrip into place
-
step 15 :Refilling the Coolant
- Make sure the radiator drain is closed
- Insert a funnel into the reservoir
- Fill the reservoir with G-12 Volkswagen or Audi approved coolant
- Run the vehicle with the cap off
- Let the air bubbles out of the tank
- Fill the tank as it empties until there are no more bubbles
- Once the heat/air has stabilized, remove the funnel and reinstall the cap
- Turn the vehicle off
Tools needed
-
Socket Extensions
T25 Torx Socket
Pick
M10 12 Point Bit
10mm Triple Square Driver
Bungee Cord
Drain Pan
Ratchet
Marker / Writing Utensil
11mm Socket
12mm Socket
13mm Socket
14mm Socket
Torque Wrench
17mm Wrench
15mm Socket
16mm Socket
17mm Socket
18mm Socket
19mm Socket
Brake Parts Cleaner
Flat Blade Screwdriver
Phillips Head Screwdriver
8mm Allen Wrench
T30 Bit
10mm Socket
1/2 Inch Breaker Bar
Brought to you by 1AAuto.com, your source for quality replacement parts and the best service on the Internet.
Hi, I'm Mike from 1A Auto. I hope this how-to video helps you out, and next time you need parts for your vehicle, think of 1AAuto.com. Thanks.
In this video we're going to show you how to change a timing belt. This is a 2007 A4 with a 2.0 liter turbocharged engine. This is the same for a few different Audis from 2006 to 2008 with this motor in it.
The items you'll need are a new timing belt kit from 1AAuto.com and various tools, T 25-30 torx bits, screwdrivers, 10-19 millimeter sockets with ratchets and extensions, pick tools, a 10 millimeter triple square bit, 17 millimeter wrench, 8 millimeter Allen key, drain bucket, brake cleaner or other solvent, and more engine coolant.
Open your hood and locate your three T30 torx screws at the top of the bumper. You're going to go ahead and remove those. There are two T30 torx screws inside these holes on either side of the bumper. You'll need to use a quarter inch drive and a long extension. You don't need to remove the bolt fully. Two turns should be enough.
Remove the quarter turn flat blade fasteners at the bottom of the bumper. Normally there are three here. There are several underneath. A lot of these bumpers are missing these fasteners. They've become cracked, damaged, lost, what have you. Just find all the ones you can. A
There are a few more at the back, and a couple of Phillips – occasionally these are Torx – at the front of the wheel wells. Remove the T25 screws inside the wheel well. Some of ours are Phillips. Some are missing. Just make sure you really check the inside of the liner to find out where they all are.
As you undo the lower screws, the belly pan will hang on one side. Be sure to support it before moving the screws on the opposite side. Remove the push pin fastener from the back side of the wheel well. Release the inner wheel well from the lip of the fender. Remove the two T25 Torx screws revealed when you remove the fender liner. Remove the two 10 millimeter nuts that hold the bumper cover in place. Repeat these steps on the opposite side.
Though some fasteners may be different, the procedure is the same. Releasing the last quarter turn fastener will allow you to remove the belly pan from the bottom of the car.
Disconnect the sides of your bumper. Be sure to support it so it doesn't fall. Disconnect the connector to the bumper.
Remove the two Phillips head screws that hold the air duct into the front lock. Remove the air duct. Using a right angle pick, release the connector on the horn to give you a better view. Just hook the pick through and pull back to release the connector. We'll do the same thing on the other side. Using a 10 millimeter triple square, remove the bolts that secure the rebar to the impact braces. Remove this same bolt on the opposite side. Be sure to support he rebar when you get to the end of the bolt so it doesn't fall off. Remove the rebar from the front of the car.
Remove the impact braces with a 13 millimeter socket and a 10 millimeter. Remove the three T30 Torx bits on the front lock carrier. Remove the same three bolts on the opposite side. Remove the weather strip from the top of the front lock. Slide the top portion of the carrier forward. Reinstall the bolt in the rear hole of the carrier where the front screw used to sit. Go ahead and leave that finger-tight and repeat it on the opposite side.
Now that we've reached Audi's front lock carrier service position, we have a little more room to work on the serpentine belt, pulleys, accessories, timing belt, and anything else you might want a few more inches of room to work on up front. By adding a few quick, easy steps to this position we can remove the lock a lot farther out, create a lot more room to work.
Start by disconnecting the radiator connectors on the driver's side and sliding the lock side of the harness out of its retainers. Remove the cap on your expansion tank. Locate the coolant drain on the bottom of your radiator on the driver's side. We're going to use a 3/8” fuel line on the fitting into a drain bucket. Open the drain and allow your coolant to drain.
You can then remove the top radiator hose. Lift the back of the hood latch cable out of its retainer. Undo the screw holding your front lock into the service position. Give yourself some room to hook a bungee cord into the fender in the front of the lock. Repeat that step on the opposite side, disconnecting the headlight harnesses from the bottom of the headlights. Lift the front lock off of the bushing and allow it to hang. Now you have much easier access to the timing belt components.
Using a 17 millimeter open end wrench, remove the tension from your serpentine belt. Remove the belt from your accessory pulleys. Be sure that you have your vehicles' belt path somewhere, either on the vehicle, in the owner's manual, or written down, before removing the belt.
Remove the three 13 millimeter bolts securing the top of your serpentine belt tensioner to your accessory bracket. Use a flat blade screwdriver to remove the coolant hose that crosses the front of the timing cover. If it's stuck on there, carefully wiggle it with a pair of pliers to break it loose. Be careful not to clamp down too hard because the hard pipe is plastic. Make sure you have a catch pan or drain bucket below the vehicle in case any more coolant comes out while you're working.
Pop off your top engine cover and remove the two T30 Torx screws at the top of the upper timing cover. Using the 19 millimeter 12-point socket and a breaker bar ratchet to hold the center of the crank pulley, use a 10 millimeter triple square to break the bolts loose that secure the crank pulley to the crank gear. Don't remove any of the bolts completely just yet. Once all the hardware is loose, rotate your crank clockwise until your top dead center marks line up. Ensure that both marks are aligned before removing your belt.
Now that the engine is timed, you can remove the 6 bolts holding your crank pulley to your crank gear. If you can't remove the pulley by hand, a few taps with a hammer should free it up. Remove the seven T30 screws holding the lower timing cover to the motor. Remove the lower timing cover.
Somebody has been in here to do the timing belt before. It is a good idea to mark your crank gear so you don't have to constantly reinstall the lower timing cover and harmonic balancer to check that your crank is in time. These marks are very large and easy to put slightly out of line. We're going to make a mark here with a paint marker across one tooth of the crank gear and make a thin, vertical mark just behind it, to ensure that our crank is in time before reinstalling our cover and harmonic balancer to check.
Make sure you mark the belt path either with a diagram or making your own. We're going to loosen the 13 millimeter nut on the tensioner pulley. Release the tension and take the belt off, careful not to throw your crank or cam out of line. If you plan to reuse your timing belt, be sure to mark the direction of rotation. If it's not installed in the same rotation it can cause the belt to fail.
With the belt off you can finish removing the tensioner, careful not to lose the nut and washer on the end of the stud.
Remove the two idler pulleys, being sure to note that the top idler pulley is set farther back toward the motor than the lower one. The lower pulley has a deep bevel. These ones happen to be color coded, red and black, but that may not be the same for all pulleys.
Remove the top pulley with a 13 millimeter socket and ratchet. Remove the lower pulley with a 12 millimeter socket and ratchet.
Remove the three 10 millimeter bolts holding your water pump to the engine block. It's important that you change out your water pump every time you do a timing belt, even if it hasn't failed. This is a pretty in-depth job. It's something you want to take care of while you're in here anyway. Work your water pump out of the front of the engine. That's why we keep a drain bucket under the motor.
Make sure that the hole for your water pump is clear of any burrs or debris. Install your new o-ring onto the new water pump. Install the water pump back into the motor. Make sure that the position for your idler pulley bolt is in the right place. Torque the water pump bolts to 11 foot pounds.
Here we have our old part from the vehicle, the 2007 Audi A4 behind me. Here we have our new timing belt kit from 1AAuto.com. See we have the same tensioners, the same idler pulleys. Our belt is the same size, width, and tooth count. That’s very important to synchronize these motors. This belt from 1A Auto is exactly what you need to get you through your next service interval.
Install your lower idler pulley with a 12 millimeter socket. Be sure to use both the new pulley and bolt supplied with your kit. Torque that bolt to 26 foot-pounds. Reinstall your upper idler pulley with the 13 millimeter socket. Torque that bolt to 18 foot pounds.
Reinstall this flat piece of the pulley into the corresponding hole in the motor. Put the nut and washer on hand tight so we can still rotate our tensioner. We'll tighten this up when we're ready to tension the belt.
Before installing your belt make sure that any surface the belt may come in contact with is free of coolant, oil, solvents, or anything that may be harmful to the rubber in the belt. We're going to spray it down with a solvent. We're going to spray if off with some compressed air. You may just have to wait for it to dry if you don't have access.
Install the bottom of the belt around your crank gear, over your lower idler pulley, and into your belt tensioner. Pull out as much slack as you can without rotating the cam gear. Install into the cam, onto your water pump, under your upper idler pulley. Ensure that your timing marks are still aligned.
Using an 8 millimeter Allen key, rotate your belt tensioner until this tab lines up with the notch on the inner ring. Tighten the nut on the tensioner to 18 foot-pounds.
Rotate the motor a few times by hand and ensure that every two rotations of the crank all your timing marks and tensioner mark still line up properly. Be sure that the last 45 degrees of the second rotation are not interrupted. After one complete rotation, our cam mark, tensioner mark and crank mark are all lined up properly. Rotate it a few more times by hand before reinstalling the rest of your components.
It's normal to feel resistance when rotating as each piston reaches its compression stroke, but any kind of binding you feel should be looked into. Misalignment of the cam or crank can result in valves hitting the pistons, not allowing the engine to turn over, or damaging internal engine components. After a few more rotations our tension, cam and crank marks are still lining up.
Reinstall the lower cover and tighten up the bolts. When reinstalling the harmonic balancer or crank pulley onto the crank gear, you'll notice the offset hole in the corresponding stud on the crank gear. Be sure that these line up properly.
Install a few of those 12 point bolts just hand tight to ensure the alignment, and check just one more time with the factory marks that your crank, tension and cam pulleys are all in proper alignment. Ours look good, so we'll keep going with the pulley bolts.
Use a 19 millimeter socket and breaker bar to keep your crank shaft from rotating while you torque the crank shaft pulley to gear bolts to 17 foot pounds in a cross pattern.
Reinstall your upper timing cover into your lower cover, being sure that these grooves line into these slots and these tabs behind the lower cover here. Reinstall your 2 T30 bolts at the top of the cover.
Reconnect your cooling hose and tighten up your clamp with a flat blade screwdriver.
Our belt kit includes a mileage marker sticker. We'll go ahead and install that just below the engine information sticker on the upper timing cover.
Reinstall your serpentine belt tensioner to the bracket. Make sure that your engine hook point is on the outside of your tensioner. Torque the tensioner to 30 foot-pounds.
Reinstall your serpentine belt over the top of the crank pulley, under the tensioner, and on the other side, under the A/C compressor, around the water pump, under the power steering pulley. Using a 17 millimeter wrench to release the tension, install it over your alternator. Ensure that your path is correct and that the belt is properly seated on all the pulleys.
Pop the top engine cover back into place. Lift up on your front lock and allow it to rest on the rubber bushing. Reconnect your headlight harnesses. Disconnect your bungee cords. Slide the front lock back into the Audi service position and install your two screws finger tight.
Reconnect your top radiator hose until it clicks. Be sure that your cable for your hood latch release is fully extended. Lock these tabs into the back of the latch and hook this underneath.
Reconnect the smaller of your two lock harness connectors with the flat side facing down into the retainer. Reconnect it, slide in the top connector, and reconnect.
To remove the front lock carrier from the Audi service position, remove your two screws, slide your carrier back into place, reinstall one screw on each side finger tight to hold it.
Reinstall your impact braces starting with the 10 millimeter nut on the stud to allow you to lift up and align your 13 millimeter bolts more easily. Reinstall the passenger side using the same steps. The brackets are directional and the passenger side can be easily identified by the threads for the toe hook point. With both sides installed, tighten up both 10 millimeter nuts and six 13 millimeter bolts. Torque the 13 millimeter bolts on the impact absorbers to 37 foot-pounds. Mount your front rebar to the impact braces. The passenger side is a fixed point while the driver's side is on a slotted hole. We'll start with the passenger side. It's done with a 10 millimeter triple square. Torque these bolts to 19 foot-pounds.
Reconnect your horns on either side of the bumper rebar. Line up the front fender to front lock bolt holes. Tighten down your T30 screw. Repeat this step on the opposite side. You may have to push up on the lock to align the holes. Reinstall the remaining bolts in the top of the lock. Tighten them down.
Reconnect the bumper harness on the driver's side before you install your bumper onto the front lock carrier, ensuring that the studs for the bumper line up and the tabs snap into place on both sides. Reinstall the T30 bolts in the top of the bumper. Reinstall the 10 millimeter bolts securing the bumper to the fenders. Reinstall the two T25 Torx bits that secure the back of the bumper to the fender stays.
Secure the lower part of the fender skin in place. Snap your fender liner back behind the lip of the fender and reinstall the rest of the hardware. Reinstall the black push pin at the back of the fender liner. Repeat these steps on the opposite side.
If the lower skirt of the fender liner has fallen out, it slides behind the back of the fender liner. One screw goes through the fender liner and into the lower skirt. One goes through the skirt and fender liner and attaches to the bumper.
Slide the plastic belly pan between the bumper and the bottom of the lock. Reinstall whatever fasteners you had to remove for the belly pan. In our case they're mostly quarter turn flat blades. Yours may be secured with something different.
Tighten the screws on the bumper clamps down below. Reinstall the air duct. It snaps down into the air box. The front is held to the front lock by two Phillips head screws. Reinstall the weather strip with the larger portion facing up. There's a groove that snaps right over the inside edge of the fender along the front lock and all the way around.
Ensure that the drain plug on your radiator is closed, that all your lines are connected and clamped down appropriately, install your funnel, and fill your car with G12 Volkswagen and Audi approved coolant. When the reservoir is full and the level is no longer dropping into the rest of the cooling system, with the cap off, run the vehicle and allow all the air bubbles to make their way out of the expansion tank. Your coolant level will drop when this happens. Constantly keep that level up in the tank until you have no more air bubbles and no more draining of the coolant down into the system.
Once your coolant level, your engine temperature, and your heat have all stabilized for a few minutes, you're safe to remove your funnel. Reinstall your cap and shut your vehicle off. If the level stays normal after shut down, you're good to go.
Thanks for tuning in. We hope this video helps you out. Brought to you by www.1AAuto.com, your source for quality replacement parts and the best service on the Internet. Please feel free to call us toll-free, 888-844-3393. We're the company that's here for you on the Internet and in person.
Shop Products

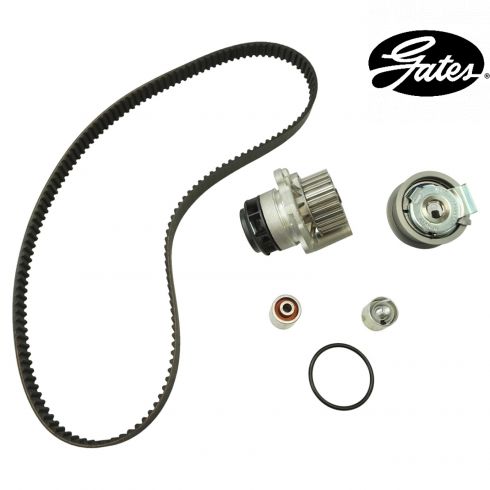
VW Audi Timing Belt Kit with Water Pump Gates TCKWP334
Part Details:
- Plastic Water Pump Impeller

How To Replace Toyota Tundra Timing Belt 2002 V8 Disassemble Front of Engine PART 1 from 1A Auto
Learn how to replace the timing belt in your 00-09 Toyota Tundra. Part 1 of a multi-part video
