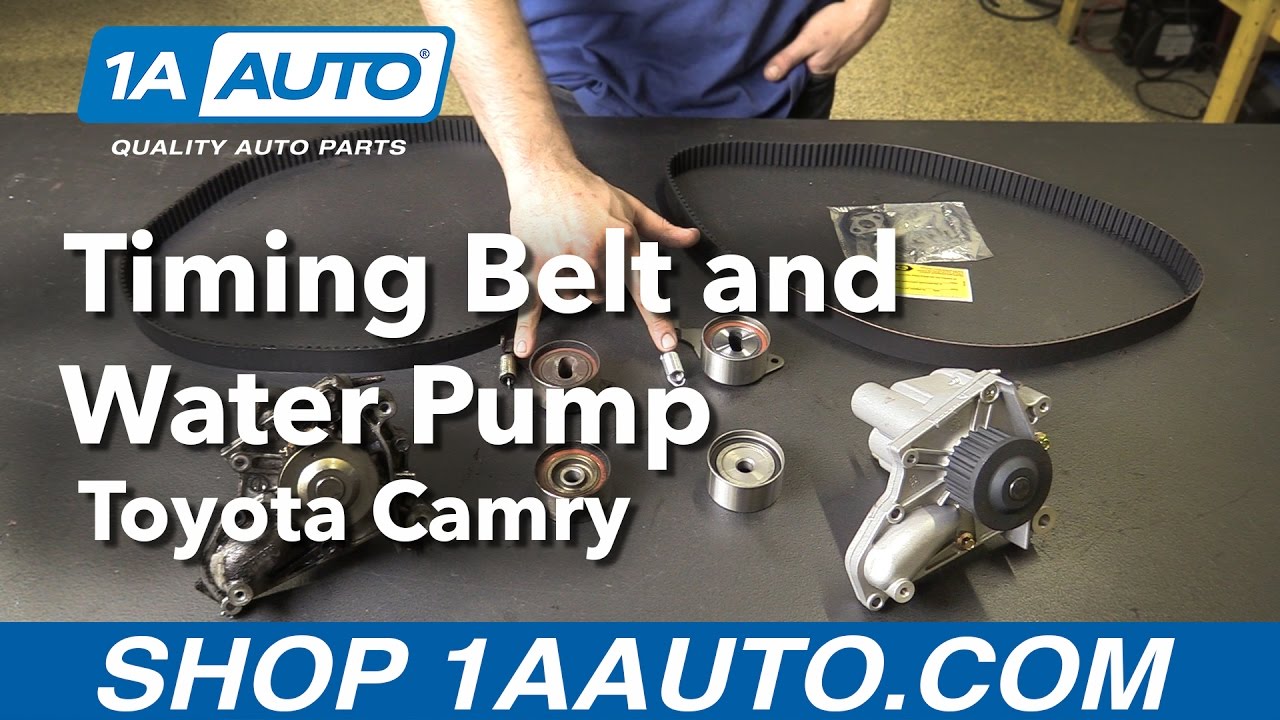
How to Replace Timing Belt and Water Pump 1992-2001 Toyota Camry Sedan
Created on: 2016-12-06
Watch this video to learn how to replace your water pump and timing belt. The experts at 1A Auto show how to replace a leaking water pump or do timing belt maintenance on your 93-02 Toyota Camry.
-
step 1 :Disconnecting the Battery
- Disconnect the negative battery terminal with a 10mm wrench
- Hang the terminal off to the side
-
step 2 :Removing the Dog Bone Mount
- Remove the 15mm bolts from the dog bone mount
- Remove the 14mm bolts from the dog bone mount
- Pry the dog bone up and out
- Remove the two 14mm securing the bracket to the engine brace
-
step 3 :Removing the Alternator
- Pry off the alternator terminal cap
- Pry out the wiring harness from the alternator
- Remove the 10mm nut on top of the alternator
- Disconnect the wiring harness from the back
- Release the A/C connector
- Move the wiring harness out of the way
- Familiarize yourself with the route of the serpentine belt
- Loosen the 12mm bolt on the tensioner a few turns
- Loosen the 14mm bolt on the pivot point a few turns
- Remove the belt
- Remove the bolts from the alternator
- Work the alternator out of the pivot bracket by hand or with a small pry bar
- Remove the top 14mm bolt securing the dog bone bracket to the engine
-
step 4 :Removing the Wheel
- Loosen the 21mm lug nuts with the vehicle on the ground
- Raise the vehicle with a floor jack and jack stands
- Remove the lug nuts
- Pull off the wheel
-
step 5 :Removing the Power Steering Belt
- Remove the two 10mm bolts from the splash shield in the wheel well
- Remove the splash shield
- Remove the lower 14mm bolt securing the dog bone bracket to the engine
- Loosen the power steering pump 12mm tensioner bolt
- Loosen the 12mm bolt at the top pivot of the pump
- Remove the belt from the pump and balancer pulley
-
step 6 :Removing the Upper Timing Belt Cover
- Pop all of the wire harness retainers out of the timing belt cover
- Disconnect the ground connections
- Remove the 10mm bolts around the timing cover
-
Do not pry from behind the harmonic balancer
step 7 :Removing the Balancer Pulley
- Align the white mark on the balancer with the white zero on the timing cover with a 19mm socket and breaker bar, keep spinning clockwise if missed
- Remove the 19mm bolt in the center of the harmonic balancer
- Tap the side of the harmonic balancer with a hammer without touching the rubber
- Partially install the center bolt
- Install a two jaw puller with the jaws behind the pulley
- Remove the center bolt
- Slide the balancer off
-
Do not pry from behind the harmonic balancer
step 8 :Removing the Lower Timing Belt Cover
- Remove the 10mm hardware on the lower timing cover
- Pop the cable out of the lower timing cover
- Remove the timing cover
-
Do not pry from behind the harmonic balancer
step 9 :Removing the Coolant
- Have a drain pan ready
- Open the petcock and fully drain the coolant
-
Do not pry from behind the harmonic balancer
step 10 :Removing the Timing Belt
- Loosen the 14mm bolt on the tensioner pulley
- Wedge the tensioner pulley out
- Slide the timing belt off of the smooth pulleys
- Remove the 14mm bolt
- Remove the spring from the tensioner off its stud
- Remove the tensioner
-
Do not pry from behind the harmonic balancer
step 11 :Removing the Water Pump
- Remove the 14mm bolt from the idler pulley
- Have a drain pan ready
- Remove the two 10mm nuts securing the water neck
- Place the water neck and thermostat to the side
- Remove the two 10mm nuts securing the coolant pipes into the water pump
- Remove the 12mm bolt at the bottom of the alternator tensioner bracket
- Disconnect the crank position sensor
- Disconnect the harness from the bracket
- Remove the three 10mm bolts from the water pump
- Pry the pump off of the water lines with a small flat blade screwdriver
- Remove the water pump
-
Do not pry from behind the harmonic balancer
step 12 :Installing the Water Pump
- Check that all of the old gaskets and O-rings have been removed from the block and lines
- Spray down the side of the block with brake cleaner or engine degreaser
- Attach the new gaskets to the new water pump
- Attach the new O-ring to the water pipe
- Attach the new gasket to the thermostat
- Attach the water pump to the engine
- Tighten the three 10mm bolts to the water pump
- Reinstall the two nuts to the water flange
- Insert the thermostat into the water neck
- Connect the pipe and the 10mm nuts
-
Do not pry from behind the harmonic balancer
step 13 :Installing the Timing Belt
- Insert the idler pulley and its 14mm bolt into place
- Torque the idler pulley to 31 foot-pounds
- Insert the tensioner pulley to the engine block
- Connect the spring to the tensioner
- Hand tighten the 14mm bolt to the tensioner pulley
- Make sure the timing park is aligned with the hole in the cam sprocket
- Push the lever on the tensioner all the way
- Tighten the 14mm bolt
- Install the belt around the crank gear and oil pump
- Snake the belt around the top of the idler pulley
- Snake the belt under the bottom of the water pump pulley
- Pull the belt over the top of the tensioner pulley without rotating it
- Pull the belt around the cam sprocket without rotating it
-
Do not pry from behind the harmonic balancer
step 14 :Installing the Lower Belt Timing Cover
- Insert the lower timing cover into place
- Tighten the 10mm bolts to the cover
-
Do not pry from behind the harmonic balancer
step 15 :Installing the Balancer Pulley
- Install the harmonic balancer onto the crank
- Reinstall the 19mm bolt and washer
-
Do not pry from behind the harmonic balancer
step 16 :Installing the Upper Timing Belt Cover
- Loosen the tensioner bolt until it puts tension onto the belt
- Rotate the engine clockwise twice from the harmonic balancer along the 0 degree mark
- Counterhold the crank pulley with a breaker bar
- Lift the pulley at 7/8 of a turn or 45 degrees from top dead center
- Torque the tensioner pulley to 31 foot-pounds
- Rotate the engine twice over to ensure the timing stayed in place
- Insert the timing cover into place
- Reinstall the 10mm hardware
-
Do not pry from behind the harmonic balancer
step 17 :Installing the Power Steering Belt
- Reinstall the power steering belt with the grooves on the back side of the balancer
- Bring the belt around the power steering pulley
- Place a pry bar between the block and tab near the slide near the power steering pulley to add tension
- Add tension
- Tighten the bottom power steering bolt
-
Do not pry from behind the harmonic balancer
step 18 :Installing the Dog Bone Mount
- Install the dog bone mount bracket
- Hand tighten the 14mm bolt on top
- Reinstall the two 14mm bolts into the bottom of the bracket
- Tighten the top 14mm bolt with a ratchet and socket
- Reinstall the base plate
- Hand tighten the 14mm bolts to the bracket
- Reinstall the dog bone
- Tighten the 14mm bolts to it
- Tighten the 14mm bolts to the bracket
- Reconnect the grounds
- Reconnect the crank position sensor retainer
- Install the 12mm bolt through the bracket and water pump by hand
- Sent the crank position connector sensor down through the bracket
- Snap the harness into its retainers
- Plug in the sensor
-
Do not pry from behind the harmonic balancer
step 19 :Installing the Alternator
- Remove the 8mm nut from the retainer and transfer it to the new one if needed
- Insert the alternator into the bracket
- Hand-tighten the 14mm bolt
- Hand-tighten the 12mm adjusting screw
- Do not tighten them all the way
- Loop the belt around the crank pulley
- Bring it under the A/C compressor
- Pull the belt over the alternator
- Loosen the adjustor if needed
- Tighten the 12mm adjustor bolt clockwise
- Tighten the 12mm bolt beneath the adjustor bolt
- Tighten the 14mm bolt that mounts the alternator to the engine
- Reconnect the 10mm negative battery terminal
- Start the vehicle and listen for slipping or squeaking
- Press the wiring harness onto the bracket
- Connect the wiring harness
- Insert the terminal wire into place
- Tighten the 10mm bolt to the terminal wire
- Replace the terminal wire cover
-
Do not pry from behind the harmonic balancer
step 20 :Installing the Wheel
- Reinstall the splash shield and two 10mm bolts
- Slide the wheel into place
- Start the lug nuts by hand
- Tighten the lug nuts preliminarily
- Lower the vehicle to the ground
- Tighten the lug nuts to 76 foot-pounds in a crossing or star pattern
- Reinstall your hubcap
-
Do not pry from behind the harmonic balancer
step 21 :Connecting the Battery
- Connect the negative battery terminal with a 10mm wrench
-
Do not pry from behind the harmonic balancer
step 22 :Refilling the Coolant
- Tighten the radiator drain plug
- Place a funnel in the radiator
- Fill it with the correct fluid 50/50 mix
- Start the vehicle
- Let the engine reach operating temperature
- Let the coolant bleed and top off if necessary
Tools needed
-
Socket Extensions
Torque Wrench
Hammer
Pry Bar
Jack Stands
Brake Parts Cleaner
2 Jaw Gear Puller
Flat Blade Screwdriver
Paper Towels
Ratchet
Floor Jack
1/2 Inch Breaker Bar
Complete Metric Socket Set
Hi, I'm Mike from 1AAuto. We've been selling auto parts for over 30 years! We're dedicated to delivering quality auto parts, expert customer service, and fast and free shipping, all backed by our 100% satisfaction guarantee. So visit us at 1AAuto.com, your trusted source for quality auto parts.
In this video, we're going to be working with our 1998 Toyota Camry 2.2-liter. We're going to show you how to remove and replace your timing belt and water pump. This should be done in a regular service interval.
If you like this video, please click subscribe. We have a ton more information on this car, as well as many other makes and models. If you need these parts for your vehicle, you can follow the link down in the description over to 1AAuto.com.
Here are the items you'll need for this repair: 10-21mm wrenches, sockets, ratchet, socket extension, breaker bar, torque wrench, hammer, pry bar, two jaw puller, brake cleaner, paper towels, flat blade screwdriver, brake cleaner, coolant, drain pan, jack and jack stands
Open the hood and secure the hood prop. Disconnect the negative battery terminal before starting by loosening the bolt with a 10 millimeter wrench, removing the terminal and hanging it off to the side where there's no risk of a coming back in contact with the battery.
Remove the dog bone mount with a 15 millimeter socket and ratchet. There's one bolt through the mount and into the body here and another on the engine side of the bracket. Remove the two 14 millimeter bolts securing the dog bone mount into the body and the bracket on the engine. We'll do this using a socket and ratchet. You may need a small pry bar to help work the dog bone, first out of the mount and then out of the body. Remove the two 14 millimeter bolts securing the dog bone bracket to the engine brace. We'll do this using a 14 millimeter socket ratchet and extension. Remove the bracket from the vehicle.
Remove the harness from the alternator bracket by lifting out on this tab and sliding it off. Using a small flat blade screwdriver, pop the cover off of the power lead on the alternator. Remove the 10 millimeter nut on the top [choosing 00:02:48] the 10 millimeter socket and ratchet. Remove the lead from the alternator. Push down and remove the connector from the back. You'll also have to reach down the A/C compressor. Push down and release this connector so you can hang this whole harness out of your way. Loosen the 12 millimeter bolt on the tensioner as well as the 14 millimeter bolt on the pivot. Then we'll loosen the belt on our alternator and remove it.
Make sure you have a belt path drawn somewhere on the vehicle or that you keep track of how the belt was removed. There's no need to remove any of this hardware fully just yet. We're just going to loosen it up. Once the belt is loose, you can remove it from the pulleys and place it off to the side. Finish removing the bolt from the bottom side of the alternator at the tensioner slide. Also remove the 14 millimeter bolt on the pivot side. Remove the alternator from the vehicle. You may have to wiggle it out of its mount a little bit or you can use a small pry bar and carefully pop it out.
Remove the two 14 millimeter securing the dog bone bracket to the engine. There's one here at the top and that you can't see it, but if you follow all the way down the bracket with your hand, at the bottom, you'll feel the 14 millimeter bolt there are well. We're going to use a 14 millimeter socket and ratchet for this but we may need to use a smaller ratchet or wrench for the bottom one.
We're going to raise and support our vehicle to make it easier to access the bottom bolt on the dog bone bracket support. Remove the lug nuts with a 21 millimeter socket and braker bar. You just want to break them loose about one turn for now. We'll finish removing them when the vehicle's in the air. With the vehicle in the air, either on a lift or if you're doing this at home, on a jack and jack stands, go ahead and finish removing the lug nuts followed by the wheel and tire.
Inside of your wheel well is this little splash shield which prevents water from getting up on to your belt along with road dirt and debris. This comes out with these two 10 millimeter bolts at the top which we'll remove with our socket and ratchet. Once those bolts are out, pull down and remove the splash shield. Remove these two 14 millimeter bolts from the bottom of the dog bone mount bracket. These are pretty tough to get at. If you have a ratchet and wrench, now is a great time to utilize that. Otherwise, you'll have to do it with a wrench or a very small socket and ratchet. Remove that bracket. Loosen the tensioner bolt for the power steering pump down here at the bottom. You can reach this with a 12 millimeter socket or ratchet in a good size extension. Loosen that up a couple of turns to make sure that pump moves nice and smooth.
We'll also have to loosen this 12mm bolt at the pivot, up at the very top of the pump. That, you usually have to get at with a 12mm wrench. You have to be patient, because you can only get a couple of turns at a time out of this one. Twelve millimeter wrench on that nut. You can usually just push the pump in. Remove the belt from the pump side first, and then off of the balancer.
Pop all of the wire harness retainers off of the timing belt cover. You can use a small flat blade screwdriver to push it on the tabs. There's also one at the top here. Simply pry out and off to the threads. Another one on the opposite side of the rear of the engine. We'll disconnect the ground connections at the top. Make sure these go back together. Now, we'll go around the timing cover and remove all of the 10 millimeter bolts. Once the cover is off, we'll show you this to give you a better idea of where all the hardware is since it's hard to see in the vehicle. Once all of the bolts are out, pull the timing cover back in the way. Remove it from the engine.
To give you a better idea of what's going on, we have two longer 10 millimeter bolts at the top, a longer 10 millimeter bolt here, as well as a smaller 10 millimeter down in this corner. Before removing the harmonic balancer or the lower timing cover, we want to align this white mark on the balancer. Just a little notch that I've highlighted with the white zero, which I've also highlighted on the timing cover. Use a 19 millimeter socket and a breaker bar to align those marks. If you overshoot it, we want to make sure you rotate the crank again clockwise. You don't want to spin these motors backwards. At the same time, this should align the hole in your camp pulley with a notch in the back which I've also highlighted.
Remove the 19 millimeter bolt in the center of the harmonic balancer. Occasionally, you can grab these with a strap wrench or an old belt and vice grips and break that bolt loose with a 19 millimeter socket and a breaker bar. However, ours has been on there for a long and isn't budging, so we're going to have to remove it with an impact gun. Once the bolt is out, you may be able to tap back and forth on the harmonic balancer to make it work off. Be sure that you hit this inner edge because the outer edge is separated with this rubber bushing. This rubber can become damaged if you tap the outside.
Because we have a plastic timing cover, we can't pry on the back side of the pulley. Without the special puller tool, we can try to use a two-jaw puller with the center bolt partially installed. This will prevent us from damaging the threads inside of the pulley. Set the jaws of the puller behind the pulley. Tighten up the center bolt by hand until they're locked against the back. Actually, we don't even need to use a ratchet this time, our pulley is actually sliding off nicely. Now that we've got it started, we can remove the puller. Take the center bolt back out, slide our balancer off the rest of the way. Remove all of the 10 millimeter hardware with a socket and ratchet on the lower timing cover. Again, these are tricky to see, so we'll show you the cover when it's out and you can get a better idea of the layout of the hardware. With the cover released, pop the cable retainer off over here with a flat blade screwdriver. Release the cable from the hook at the top. Remove your cover.
Now, you can see, we have five 10 millimeter bolts that hold it into place. Place a drain bucket underneath the pet cock. The pet cock for the radiator is located here at the bottom just below the driver side fan. There's an opening in the skid plate where the coolant can drain out. All you have to do is turn the pet cock counterclockwise until coolant starts to flow out of it. Allow the radiator and engine to drain fully.
Loosen the 14 millimeter bolt on the tensioner pulley for the timing belt with a wrench. With the tensioner pulley loosened, you should be able to slide the belt off of the smooth pulleys and remove it from the vehicle. Once the belt is off, finish removing the 14 millimeter bolt for the tensioner. Remove the spring for the tensioner by lifting it up off of its stud. Remove the tensioner from the motor. We'll also remove the 14 millimeter bolt in the center of the idler pulley toward the bottom of the motor. You can do this with the same 14 millimeter wrench.
Finally, we'll remove the water pump, and even though we've drained the radiator and its contents, we'll still want to place the drain bucket underneath the motor just to be safe. Remove the two 10 millimeter nuts securing the water neck on to the water pump. Do this using the 10 millimeter deep socket and ratchet. Remove the water neck. Place it off to the side as well as the thermostat. It simply pulls out. Remove the two 10 millimeter nuts securing these coolant pipes into the back of the water pump. Again, we're going to use a socket and ratchet here. You may have to use a wrench if its too tight.
Remove the 12 millimeter bolt at the bottom of the alternator tensioner bracket with a socket and ratchet. Once the bolt is out, you may want to disconnect the crank position sensor here as well as disconnecting the harness from the bracket. Now hang that off to the side and remove the 10 millimeter bolt securing the water on to the motor. There are five of them. We'll show you where those are once it comes out and it's easier to see. Once the bolts have been removed, you can work the pump off of the water lines at the back, you may need a small flat blade screwdriver to help pry these off. Remove the water pump from the vehicle.
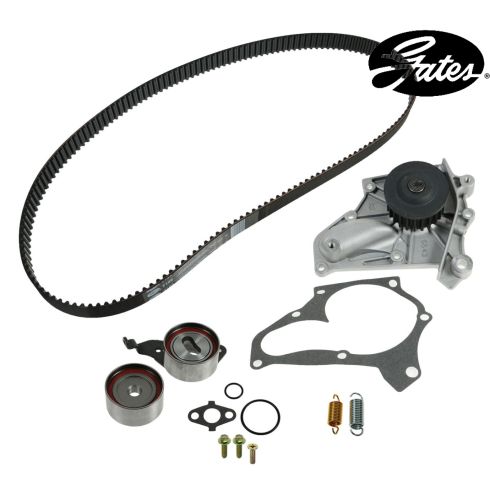
Here, we have our old timing belt kit that we've removed from our vehicle and our new parts from 1AAuto.com. As you can see, all of our parts are exactly the same. We have the same idler puller, same tensioner, a new spring for our tensioner, a new water pump assembly with all the hardware already installed. A new timing belt which is the exact same length, diameter and tooth count which is critical to keep the vehicle timed properly as well as a new set of gaskets for our water pump and related components and a nice little reminder sticker to show us when we did the belt and keep an eye on that maintenance marker.
What your timing belt does is along with rotating your water pump to ensure coolant flow through your engine, it keeps the cam and crank synchronized together to make sure that your pistons and valves are working together in the proper time to ensure proper combustion and the engine running properly. Timing belts should be replaced at a regular interval which can usually be found inside of your vehicle's owner's manual. It is critical that these be replaced because they may make no noise or show any odd signs, but with age, oil contamination and stretching can cause critical engine failure. If you want to make sure that your vehicle runs properly and has a long life, these parts from 1AAuto are going to go in direct fit just like your original equipment. Keep you engine timed and your coolant pumping and fix you up right.
Make sure the block has all of the old gaskets and O-rings removed from the water pump. You have one there. Our gasket for this hose came off on the water pump. We'll remove the O-ring from the other water line here and spray down the side of the block with a break cleaner or engine degreaser. Be sure that drain bucket is still underneath the motor to catch any debris and runoff. Once you've sprayed it down, get in there with rags or paper towels. Just wipe off as much of the debris as you can. Be careful not to move the crank or cam pulleys in this process.
Our new water pump comes with some new gaskets. Place this one over the studs. The larger of the two O-rings will set down into this groove here, make sure that stays in place. We'll put this O-ring on to the water pipe when we go to reinstall. We got a new thermostat gasket. Anytime you drain the cooling system, I recommend you change the thermostat anyway just because it's in there and it's easy to do and it's cheap insurance to make sure that your motor doesn't overheat.
If you are reusing it, and ours is recent so that's all right. We'll remove the old gasket, the new one has a channel in it. Slide around our thermostat. Now that's ready to install after our water pump goes in. Your O-ring on to the top coolant pipe here. Reinstall your water pump. Line up the studs into the two-bolt flange on the water pipe. Slide the O-ring into place, and reinstall your three 10 millimeter bolts. Tighten that hardware down with your 10 millimeter socket and ratchet. Reinstall the two nuts on to the back of the water flange. Tighten them down with a 10 millimeter wrench. Reinstall your thermostat facing this way into the water neck. Make sure it stays in place while you set the water neck back on to the pump. Reinstall your two 10 millimeter nuts. Tighten them down with a socket and ratchet or a wrench.
Reinstall the idler pulley with this 14 millimeter bolt. This is the one that goes below the water pump. Torque the idler pulley bolt to 31 foot-pounds using a 14 millimeter socket and a torque wrench. You can then install the tensioner pulley which sits over the stud just below the crank pulley. Before installing the bolt, you want to put the spring on to the other end of the tensioner. Set it through the hooked portion of the pulley and over the stud. Reinstall your 14 millimeter bolt in the center but we won't be tightening that down until we've installed our belt.
Be sure that the engine timing mark on the top of the engine is aligned with the hole in the cam sprocket. You can see it here that I've highlighted in white. This being aligned means that you cam is also at top dead center or zero degrees, that we can install our timing belt and have everything be aligned properly. Using the small flat blade screwdriver or pry bar, push the lever on the tensioner all the way down until you can't get it to move anymore. Tighten the bolt to keep the tensioner locked in place. We can now reinstall our timing belt.
Install your timing belt around the crank gear at the bottom, as well as around the oil pump. It will then go under the idler pulley around the top of it and under the water pump, then go over the top of the tensioner pulley, being careful not to catch it in the spring. Around the cam sprocket, being careful not to rotate that either. Reinstall the lower timing cover and all of the 10 millimeter hardware.
Install the harmonic balancer with the keyway on to the flat stock on the crank. Reinstall the 19mm bolt and washer. Loosen the tensioner bolt until it puts tension under the belt. We'll now rotate the engine from the harmonic balancer twice from that zero degree mark using a 19 millimeter socket, a long extension, and a breaker bar. Be sure that you only rotate the engine clockwise when doing this. Bring it right back to the zero mark.
Now that we've checked our alignment marks and know they're good, we'll make another full rotation of the crank from zero to zero. We'll go around again, seven eighths of a turn, which is designated by that long black mark in the center of our timing cover. At this point, counter holding the crank pulley with your breaker bar and with the pulley at seven eighths of a turn or 45 degrees before top dead center. We'll torque the tensioner pulley to 31 foot-pounds and rotate the engine twice over again to ensure that our timing stayed in place. We'll start at zero which should be aligned with our upper mark. We'll make tow more rotations clockwise from zero to zero. Confirm that timing mark before reinstalling our cover and finishing our assembly. Check your marks again. If everything lines up, we'll install the rest of our timing cover. Reinstall your upper timing cover.
Reinstall all of the 10 millimeter hardware. Reinstall the power steering belt first over the harmonic balancer. Remember it sits into the groove on the back side of the balancer, then place it over the power steering pulley. I find the easiest way to put tension on the belt is to put a pry bar between the block and the tab where the slide is for the tensioner. Tighten the belt up by prying out against it. When it's nice and tight, catch your 12 millimeter socket and ratchet and extension on there. Tighten that bottom bolt down.
Reinstall the dog bone mount bracket. We'll install the 14 millimeter bolt in the top just hand tight for now. This will make it easier to line up the bottom bolts but still give us some room to swing it around in case we have to move it a little. Reinstall the two 14 millimeter bolts into the bottom of the dog bone bracket. Once the bottom of the bracket is tight, tighten down the 14 millimeter at the top with a socket and ratchet. We'll reinstall the base plate to that dog bone bracket as well. Get those bolts started by hand.
Reinstall the dog bone. Start the 14 millimeter bolt through the body. We left this bracket loose to make it easier to line up the other side. Tighten the dog bone into place with a 14 millimeter socket and ratchet. Once the dog bone is in tight, use an extension and a 14, tighten down the bracket bolts.
Once all of this is installed, you can reconnect your grounds. These connectors are female and male on opposite sides so you can't mix those up. We'll reconnect the retainer harness for our crank position sensor. Lining it back up into the clip here. Line up the bottom and install the 12 millimeter bolt that goes through the bracket and the water pump into the block. We won't tighten that until our alternator is on and we're confident that everything is in the right place. Send your crank position sensor connector back down between the bracket here. Pull the connector harness through. Snap it back into its retainers. Pull your sensor back in.
Reinstall the alternator into its pivot and install the 14 millimeter bolt through the front. Start that bolt in but don't tighten it fully just yet. Lift up on the back of the alternator, line up the adjuster block and send your 12 millimeter bolt back through and into the alternator. Bring this down almost tight. Leave a little slack on it. We can now finish tightening down the 12 millimeter bolt at the base of the adjuster bracket.
Reinstall the serpentine belt which goes under the A/C compressor as well as under the crank and over the alternator pulley. Tighten the 12 millimeter tensioner bolt at the top until the belt is tight. Once the belt is tight, you can tighten the 12 millimeter bolt on the back side of the adjuster block. Tighten down the base of the alternator as well. Reattach the alternator harness, the electrical connector snaps into the back. Install the power terminal back on to the alternator. Make sure that the plastic cap is on the wire. Tighten down the 10 millimeter nut on the top. Snap the cover back on. Don't forget the connector to the A/C at the bottom.
Reinstall your splash shield on the bottom along with the two 10 millimeter bolts. Be sure to tighten these down with a 10 millimeter socket and ratchet.
Reinstall your wheel and tire. Get the five 19 millimeter lug nuts on as tight as you can by hand. With the weight of the vehicle back on the tires, torque your lug nuts to 76 foot-pounds with a torque wrench and a 21 millimeter socket. Always tighten your lug nuts in a cross pattern. Tightening them in a circle can cause them to pinch on one side, create a vibration while driving, or possibly make the wheel loosen and fall off.
Reinstall you negative battery terminal. Tighten it down with a 10 millimeter wrench.
Be sure the drain plug on the bottom of your radiator is tight. Place the funnel on the radiator and fill it with proper Toyota-approved coolant mixed 50/50 with water. Once it's full, we'll start the vehicle, let it run, and get up to operating temperature, at which point, the thermostat will open and allow air to bleed out of the system. We'll top off the coolant if necessary.
Start your vehicle. Turn the heat on to the lowest fan speed setting and wait for the temperature to come back up to operating temperature. You can see the air bleeding out of the system here. Once the system is properly bled, you should see a full coolant level inside of the radiator. Top off your expansion tank, if necessary. Turn up the fan speed and ensure that the heat is working properly in your vehicle. Reinstall your radiator cap and drive it to ensure proper function of the cooling system. Be sure to monitor the temperature gauge and the heat to make sure the coolant is cycling properly.
Thanks for watching. Visit us at 1AAuto.com for quality auto parts, fast and free shipping, and the best customer service in the industry.
Shop Products

How to Replace Timing Belt Tensioner and Pulleys 2006-09 Subaru Outback
How to remove, install, change a worn out, damaged, or broken timing belt on 06, 07, 08, 09 Subaru Outback
