How to Replace Timing Belt and Water Pump on 1999-2006 Hyundai Elantra Part 1
Created on: 2013-07-21
If you need to replace a worn timing belt or leaking water pump, follow the steps in this video and the 1A Auto experts will lead the way
-
step 1 :Disconnecting the Battery
- Disconnect the negative battery cable with a 10mm socket and ratchet
-
step 2 :Removing the Wheel
- Loosen the lug nuts with the vehicle on the ground
- Raise the vehicle with a floor jack
- Secure the vehicle on jack stands
- Remove the lug nuts
- Pull off the wheel cover
- Pull off the wheel
-
step 3 :Removing the Splash Shield
- Remove the two 10mm bolts from the splash shield
- Pull off the splash shield
-
step 4 :Removing the Alternator Belt
- Loosen the 12mm bolt from the alternator adjuster
- Loosen the 12mm nut from the bottom of the alternator
- Take the tension off the adjuster
- Push the alternator forward
- Slide the belt off the alternator
-
step 5 :Removing the Power Steering Pump Belt
- Loosen the two 14mm bolt from the power steering pump
- Push the power steering pump back
- Pull off the power steering pump belt
-
step 6 :Removing the A/C Pulley
- Loosen the 12mm bolt from the A/C pulley adjuster
- Loosen the 14mm bolt in the A/C pulley
- Push the A/C pulley back
- Remove the A/C pulley belt
-
step 7 :Removing the Crank Pulley
- Remove the 22mm bolt from the crankshaft pulley
- Put the 22mm bolt in without the washer
- Pull off the crank pulley with a two jaw gear puller
-
step 8 :Removing the Lower Timing Cover
- Remove the crank shield
- Remove the two 10mm bolts from the lower timing cover
-
step 9 :Removing the Engine Mount
- Support the engine with the floor jack and block of wood
- Remove the two 14mm nuts and one 14mm bolt from the engine mount
- Remove the Phillips screw from the power steering reservoir
- Remove the 10mm bolt from the power steering reservoir bracket
- Remove three 14mm bolts from the bracket
- Remove the 17mm nut from the motor mount
- Pull off the engine mount bracket
- Pull out the engine mount
-
step 10 :Removing the Upper Timing Cover
- Remove the 14mm bolt from the timing cover bracket
- Pull off the timing cover bracket
- Remove the two 14mm bolts from the side timing cover bracket
- Remove the six 10mm bolts from the timing cover
- Pull off the upper timing cover
-
step 11 :Removing the Water Pump
- Put the water pump belt back on
- Have an assistant hold the belt taut
- Remove the four bolts from the water pump pulley
- Remove the water pump pulley and the belt
-
step 12 :Removing the Lower Timing Cover
- Remove the 10mm bolt from the lower timing cover
- Remove the lower timing cover
-
step 13 :Adjusting the Timing Marks
- Insert the 22mm bolt into the crank
- Turn the timing belt with a 22mm socket and ratchet to line up the timing marks
- Line up the mark on the crank gear with the mark on the engine block
- Line up the cam gear hole with the cam carrier mark
- Use a flashlight as necessary to aid visibility
-
step 14 :Removing the Timing Belt Tensioner
- Remove the 14mm bolt from the tensioner
- Pull off the tensioner
-
step 15 :Removing the Timing Belt Idler Pulley
- Remove the bolt from the idler pulley
-
step 16 :Removing the Timing Belt
- Slip off the timing belt
-
step 17 :Continuing the Repair
- This is Part 1 of a two part video
- Please consult Part 2 for further instructions
- Perform the steps outlined in Part 2
Tools needed
-
20mm Socket
12mm Socket
13mm Socket
A Piece of Pipe (for leverage)
Socket Extensions
14mm Socket
15mm Socket
16mm Socket
17mm Socket
Jack Stands
18mm Socket
19mm Socket
Block of Wood
2 Jaw Gear Puller
21mm Socket
8mm Socket
9mm Socket
10mm Socket
Ratchet
Floor Jack
Flashlight
Assistant
1/2 Inch Breaker Bar
11mm Socket
Brought to you by 1AAuto.com, your source for quality replacement parts and the best service on the Internet.
Hi, I'm Don from 1A Auto. I hope this how-to video helps you out, and next time you need parts for your vehicle, think of 1AAuto.com. Thanks.
This is part one of a two part video. We basically take the timing belt off. This is a 2005 Hyundai Elantra and this procedure is the same for any '99 to '06 Elantra that has the 2.0 liter, single overhead cam, four cylinder. Tools you'll need are floor jack and jack stands, and 8mm to 21mm sockets. You'll need an impact wrench and sockets, and a two jaw gear puller. A flashlight will help and you'll need a breaker bar or pipe for some extra leverage.
Using a 10mm socket wrench, remove the negative from the battery. Set that aside.
Start by removing one of the front wheels and if you don't have the benefits of air tools, you'll want to start with the vehicle on the ground, loosen the lug nuts then jack up and secure the vehicle on jack stands and remove the lug nuts, the wheel cover and wheel and tire.
You're going to remove the splash shield that's behind the passenger's side tire. Two 10mm bolts hold it in place. Just ignore the fact that in here the tire is still on there. I just use some different footage. I've located the 12mm bolt that holds the adjuster on the alternator. I'm going to slack off that. I'm using a pipe for extra leverage. I've located the lower nut for the alternator right here, right next to the oil filter. Use my 12mm and my pipe for extra leverage. I'm taking the tension off the adjuster with a 12mm wrench. With my tensioner loose, I can push the alternator forward and sneak the belt off.
I've located the bolt for the power steering pump; it's a 14mm. Use a wrench and you can always use the open wrench and break it free. I located the lower power steering bolt and I'm going to use a 14mm socket with an extension to get to this and, like the upper one, just loosen it up. You'll see, now, that the pump is loose. I'm going to walk the belt off.
Locate your A/C belt tensioner pulley and the 12mm adjuster right here. You want to loosen this up. Now go ahead and loosen up this 14mm bolt in the center of the pulley. Go ahead and loosen it up until you got enough room to get your belt off.
I've got a 22mm socket and impact wrench. I'm going to use it to take off the crank pulley. I'm using a two jaw puller and you can see that I put the bolt back in without the washer so that the pulley itself will slide over the bolt as I screw this on.
Take the shield off. Behind the crank pulley, there are two more 10mm bolts for the lower timing cover.
We've got the car support with the lift and you can do it with jack stands and then we're going to have to support the engine because we're going to remove the motor mount. Get the jack and the wood to contact the engine and then give it one more pump and that should be enough just to hold it up. Locate your three upper motor bolts and nuts. It's actually two nuts and a bolt. It's a 14mm in terms of those. We'll fast forward here as we remove those nuts and bolts. Now we're just loosening up that tensioner bolt more.
I'm removing the Phillips head screw that holds the power steering reservoir. Lift it up, slide it out of the way. Locate this 10mm here that's on the bottom of the power steering reservoir clamp and remove that. You've got one, two, three 14mm bolts. We'll fast forward here as we remove those three bolts. Now, with a 17mm socket, I'm going to take the nut off the top of the motor mount. Now, I can pull the engine motor and bracket off and slide the engine mount out of the way. Locate the 14mm bolt that holds our bracket in place. Speed up as here we remove that 14mm bolt and the bracket. Two 10mm bolts hold on this bracket. Speed up as we remove that bracket. You're going to find that six 10mm bolts that hold onto your timing cover: one, two, three, four, five, six. We'll speed up here. Use a 10mm socket with a ratchet to remove those bolts that hold the timing cover. Now, we're going to remove the lower timing chain cover and there's one bolt and sorry we didn't get a better picture of this but there's one bolt towards the rear of the engine that you can get to. We're just using a 10mm socket and ratchet to remove that.
We've jacked up the engine just a little bit more to get access to the four bolts that hold the water pump fully on and I temporarily put the belt back on here. All right so I've got Mike holding the belt and I'm going to quickly turn my wrench. Just have a helper hold the belt, which holds that pulley in position and you should be able to loosen up the four bolts that hold that water pump pulley on, remove the bolts and then remove that pulley. I'm unbolting the last 10mm timing cover bolt. It's right underneath the water pump. I'm sliding the lower timing cover off. Pull it out from below.
In order to line up my cams, I'm going to put the bolt back in the crank so that I can put my 22mm socket in and turn it to where my marks line up. The two marks that we're going to want to line up are . one is on the gear here on the crankshaft and the other is on the engine block itself so when we spin it clockwise, those are going to have to match up. At the same time that the crank marks line up, we're going to have to mark up the little hole here on the cam with the cam carrier mark in red there. It's a little hard to see. We couldn't get the lighting quite right but if you shine a light through that small hole in the cam gear it should come out right on that red mark. Then there's the white dot which I really couldn't get a good angle on. There's a white dot on the gear on the crank and there's also a white dot right on the engine itself and those should line up.
I've got a 14mm socket on the belt tensioner, I'm just going to loosen it. I'm going to remove the idler, which is down in here. I'm just going to fast forward it here as we undo the bolt that holds that idler pulley in.With these out of the way, we can slip the belt right off and take it out. That's as good a place as any to stop part one of the video and then in part two we'll put the timing belt back on and put everything back together.
We hope this video helps you out. Brought to you by www.1AAuto.com, your source for quality replacement parts and the best service on the Internet. Please feel free to call us toll-free, 888-844-3393. We're the company that's here for you on the Internet and in person.

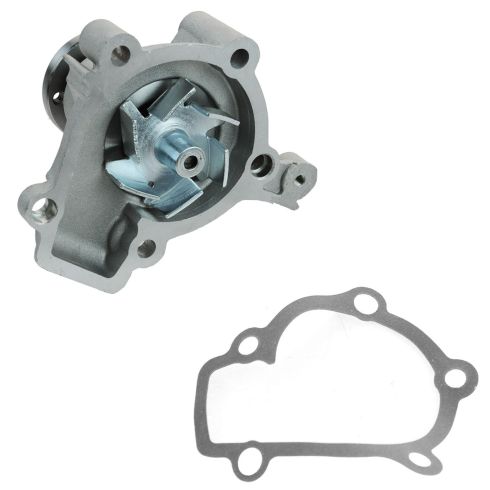
Hyundai Kia Engine Water Pump TRQ WPA07382
Part Details:
- 6
- 5
- Standard
- No
- 60 mm
- 4
- Aluminum
- No
- 2
- No
- No
- 3.39 in
- No
- Cold Rolled Steel

How to Replace Timing Chain Set 2002-05 Mercury Mountaineer - Part 3
Time to replace the timing chain? This video has all the steps to help you DIY
