How To Replace Trunk Latch 2006-12 Chevy Impala
Created on: 2013-08-28
Check out this video on how to replace the trunk hatch on your 06-12 Chevy Impala.
-
step 1 :Removing the Trunk Lid Liner
- Open the trunk
- Pry the four clips out of the trunk lid liner with pliers
- Pull down the trunk lid liner
-
step 2 :Removing the Trunk Latch
- Remove the three 10mm bolts from the trunk latch
- Pull out the trunk latch
- Disconnect the trunk latch wiring connector with a flat blade screwdriver
-
step 3 :Installing the Trunk Latch
- Connect the trunk latch wiring connector
- Put the trunk latch into place
- Insert the three 10mm bolts into the trunk latch
-
step 4 :Reinstalling the Trunk Lid Liner
- Push the liner into place
- Pull the emergency trunk latch handle through the trunk lid liner
- Push the four plastic pins into the trunk lid liner
Tools needed
-
Flat Blade Screwdriver
10mm Socket
Slip-Joint Pliers
Ratchet
Brought to you by 1AAuto.com, your source for quality replacement parts and the best service on the Internet.
Hi, I'm Don from 1A Auto. I hope this how-to video helps you out, and next time you need parts for your vehicle, think of 1AAuto.com. Thanks.
In this video, we're going to show you how to replace the trunk latch on a 2006 Chevy Impala. It's pretty much the same for many of the model years 2006 through 2012 of the Chevy Impala. You'll need a 10mm socket and socket wrench and a pocket screwdriver.
Open the trunk, so that we can remove the liner on the trunk lid there. There are four plastic push pins that hold up that section of the trunk lid liner. I'm going to use a pair of pliers to get in between the plastic and the carpeting area there. As I do it, I'm going to be careful not to break it. I'm just using enough force to get my pliers underneath the lip of the little push pin and pull out those four. Now go ahead and peel down the trunk liner, pulling it around those two rubber stops there and then those two indents. Pull those out, and hold it down.
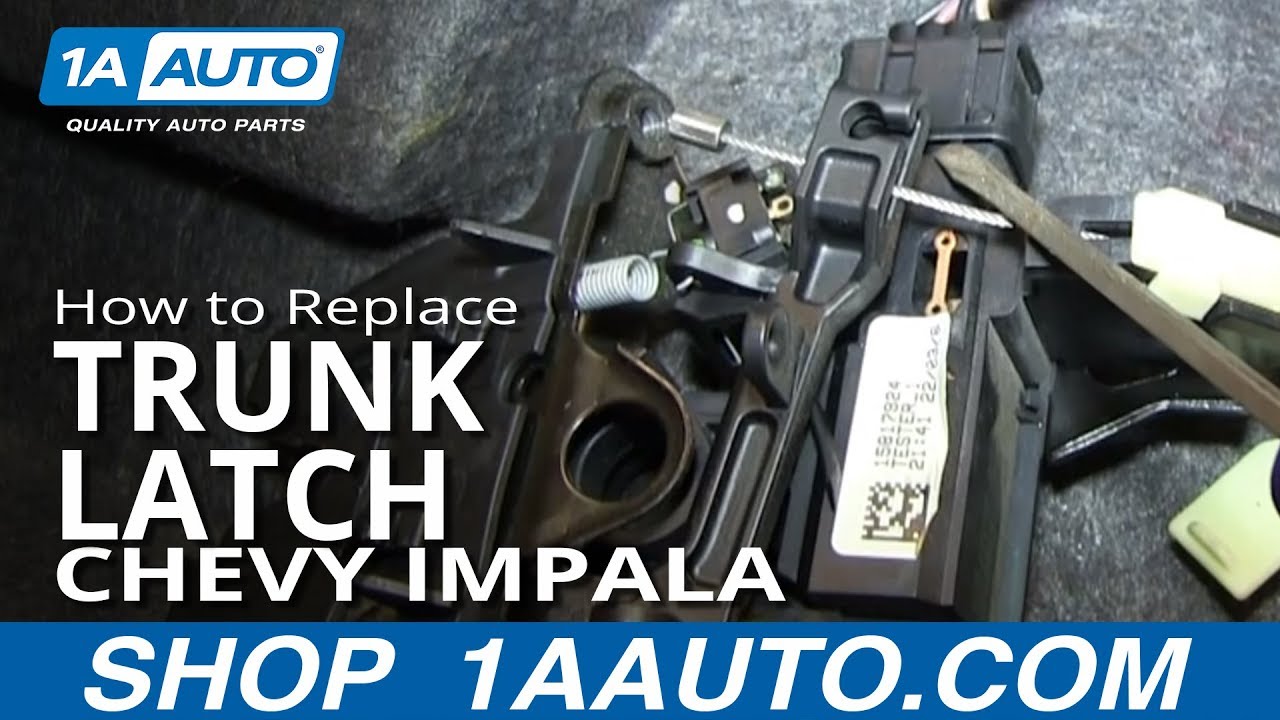
With the trunk liner down, you can locate the three 10mm screws that hold the trunk latch in place. I'll go ahead and fast forward as I remove those three. Now, go ahead and pull the trunk latch assembly out. Your two tabs on the top of that, you can just push in. Then you'll notice the connector. I'm going to show you a still frame of where I'm going to use a little pocket screwdriver to pry up on that connector and over those two posts. Here I am doing it and you pull it up a little bit, not too much to break the connector, and then pull it apart.
Going back in, I'm going to connect the harness there, put it back in, make sure that the holes line up in the trunk lid. Then I'm going to go ahead and reinstall the three 10mm screws. I'll fast-forward as I do that. Reinstall the trunk lid carpeting. Make sure to get it around those rubber stops. Then once you've got that in place, push everything in so it lines up, and definitely make sure that your emergency release cable handle is accessible. Then go ahead and reinstall the plastic push pins, the four of them that you took out.
We hope this video helps you out. Brought to you by www.1AAuto.com, your source for quality replacement parts and the best service on the Internet. Please feel free to call us toll-free, 888-844-3393. We're the company that's here for you on the Internet and in person.

How to Replace Liftglass Release Switch 2007-14 Chevrolet Suburban
How to repair, install, fix, change or replace a damaged, worn out, faulty or shorted liftglass switch on 07, 08, 09, 10, 11, 12, 13, 14 Chevy Suburban
