
How to Replace Turn Signal Bulb Socket 1998-2012 Ford Ranger
Created on: 2016-09-29
New Bulb Socket from 1AAuto.com How to repair, install, fix, change or replace the turn signal bulb socket on 01 Ford Ranger
-
step 1 :Removing the Headlight
- Remove the three 5 1/2mm bolts from the headlight bracket
- Remove the plastic cover from the top of the headlight
- Lift up the two tabs to a balanced point
- Pull the headlight out
-
step 2 :Replacing the Turn Signal Bulbs
- Turn the base of the bulbs counterclockwise
- Lift the tabs and disconnect the wiring harnesses from the old bulbs
- Remove the old bulbs
- Insert the new bulbs
- Connect the new bulb to the wiring harness
- Turn the base of the new bulbs clockwise
-
step 3 :Installing the New Headlight
- Insert the headlight into place
- Press the tabs down
- Insert the plastic cover into place
- Replace the 5 1/2mm bolts into the headlight bracket
Tools needed
-
Socket Extensions
5.5mm Socket
Ratchet
Brought to you by 1AAuto.com, your source for quality replacement parts and the best service on the Internet.
Hi, I'm Mike from 1A Auto. I hope this how-to video helps you out, and next time you need parts for your vehicle, think of 1AAuto.com. Thanks!
In this video, we're going to be working with our 2001 Ford Ranger. We're going to show you how to remove your headlight assembly so you can access your turn signal bulb socket. We're going to be working on the passenger side, but this process is the same for the driver's side.
If you like this video, please click subscribe. We have a ton more information on this truck, as well as many other makes and models. If you need this part for your vehicle, you can follow the link down in the description over to 1AAuto.com.
Here are the items you'll need for this repair: 5.5mm, ratchet, and socket extensions.
Remove the three 5 1/2 millimeter bolts on the top cover for the headlight with a socket, ratchet, and extension. Then remove the plastic cover from the top of the headlight. There's a metal tab on the inside here under that cover. We'll lift up there. Don't lock it all the way up. You want to let it sit at that float point there. Get the one on the opposite side here. Same thing: lift up and hit that balance point. You might have to wiggle them a little if the headlight is not coming out smoothly.
Once you have the headlight removed, the turn signal comes out with a quarter turn counterclockwise. There's a tab on each side here that we'll lift up on and remove the socket and bulb from the wiring harness. Remove the bulb.
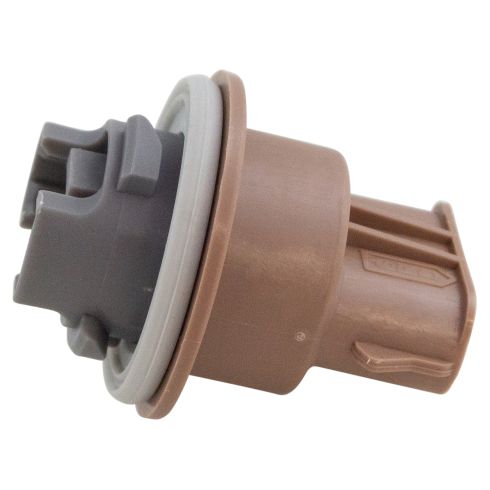
What happens with these is corrosion can build up in there from moisture. If this little rubber seal here goes bad or is not installed correctly, moisture can build up and corrode these terminals, causing your turn signals or parking lights to be dim or not functioning. Sometimes, the bottom of the bulb will get corroded in here. You'll go to take your bulb out, and it can break in your hand. It can be a real pain to get all those parts, broken glass, and stuck metal out of there.
Fortunately, we have a new socket from 1AAuto. As you can see, it's exactly the same, with the three screw-in tabs for the back, the terminals on the inside, and the same three pin connector on the back.
Our bulb is okay, so we'll just reinstall it. Bulb snaps into place. You'll see we have this notch in the top of the connector and these two tabs on one side. Those will go into that notch. Pop it in until it clicks back into the retainer. Reinstall your bulb socket, quarter turn clockwise.
Reinstall the headlight assembly into the truck. To give you a better idea of how these headlight retainers work: you'll see the hole here where our plastic retainer is going to slide in on the back of the headlight. This is with that slide in the floating position. If you pull too far up, the metal comes through the opening and will still hold the bottom of the retainer. Let's see: key hole, when you slide down, that thinner portion locks over the top. When we hit this nice middle point here is when our headlight comes out nice and smooth.
Install the sockets into your new headlight. Socket goes in, and a quarter turn clockwise locks it in place. The headlight pops in. The collar goes over the tabs and locks on clockwise.
Now, we'll line up these pins into the openings. Again, you might have to wiggle those slides a little to get them to go in. Once they're over, lock the tab back down into place and ensure your headlight is in straight and secure. Reinstall the plastic cover over the top of the headlight. Tighten it down with a socket, ratchet, and extension with your 5 1/2 millimeter screws.
Thanks for watching. Any time you need parts for your car, please visit 1AAuto.com. Also, check out our other helpful how-to as well as diagnosis videos.
Thanks for tuning in. We hope this video helped you out. Next time you need parts for your car, please visit 1AAuto.com. Also check out our other helpful how-to and diagnosis videos.
Shop Products

How to Fix Engine Start Problem 1993-97 Dodge Intrepid
If you are having trouble getting your Dodge Intrepid started, check out this video for some helpful tips!
