
How To Replace Upper Auxiliary Transmission Cooler Line 2000-06 Chevy Tahoe
Created on: 2020-12-08
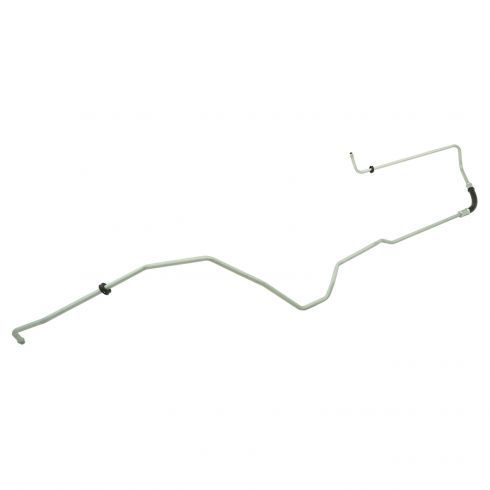
This video shows you how to install new lines from TRQ that are made to fit the specifications of your 2000-2006 Chevy Tahoe.
Tools needed
-
Torque Wrench
Hammer
Socket Extensions
Channel-Lock Pliers
18mm Wrench
Pry Bar
18mm Socket
Trim Tool Set
Pick
Socket Driver
Phillips Head Screwdriver
10mm Socket
Ratchet
Needle nose pliers
Take this cover off. You wanna take all these pushpins off. Just use a trim tool. Pop the center part up and then underneath the rest of it. Do the same with the other ones.
Now take this cover off. Take this bolt out. Use a 10-millimeter socket. Now there's plastic retainers that hold the grille on. Use a Phillips head screwdriver and just push and twist. You only have to twist it a little bit. See how that's loose. And there's another one down here. That should be loose. And over here.
That one's loose. And over here. That's all loose. Now just grab the trim. And you have to just pull it out over here. Now with all those loose, then just grab this panel right here and just pull straight forward just like that. If you struggle with getting your fingers in there, you can pull the light out. There's just two pins. Pull straight up. Pull the light out. Do the same on the other side. Now take these two lines off. Just take this plastic cover. Slide it down. You can use a screwdriver or a pick tool. And there's a little clip here. Take that clip out. Use the pick tool. Slide that clip out. Do the same on this side.
And then wiggle these lines off. And slide it out and do the same for the other side. There we go. With these lines disconnected from the cooler, now I can use a trim tool and just get underneath here. There's this cover that goes across here. We wanna remove that a little bit so that we can get the lines past it. So just push. Take this pushpin out right here. And if you want to, you could take this one out as well and move this wire. I'll just take this wire off this retainer right there. I can slide this out of the way. That way you can get the lines straight down.
Now we're gonna remove this lower line right here. There's a little cover. This comes off just like the other ones. Slide this cover off and use a pick. And take the clip out. There we go. Get underneath it. And there we go. Got the clip out. Now grab the line and just wiggle it out.
And now there's...these lines are clipped in right here so take a pick or a screwdriver and just get those out of the clips. Even if you're not doing both of them, just move that one out of the way. And this is the smaller one. Slide this one out. There we go. Next to the transmission there's a cover right here. Use a 10-millimeter socket. Take these two bolts out.
And take this plate down. And the same kinda fittings. There's just a little cap or a cover. Take that off on both of those and then the little clips. Take a pick and take those clips out. All right. There's the clip. And just grab the line and slide it out. We might have some fluid come out so we might want a drain bucket underneath. There's a clip right here that connects the two lines together. Go ahead and disconnect that clip. You can use a screwdriver or a pick. And just pop that off. And there's a clip right here where it mounts to a bracket. Just slide the line out of that clip. Just like that. You could use a pair of pliers. And then also up here there's another clip that ties these together. Right there. Just take that one off as well.
Use a pick tool or a screwdriver. And take that off. Now just slide this hose down. We can try twisting it a little bit to get it past. Now with the bends in a line what you could do is bend this out of the way. What I'm gonna do is actually take this bracket out right here, this crossmember and I'm gonna drop the front differential down just a little bit. Just taking these two nuts out. All right, I'm gonna take these two nuts and bolts out using 18-millimeter wrench and 18-millimeter socket. And right here an 18-millimeter wrench and socket. Take these two out.
I'm taking these bolts out and slide this down. And then I'm gonna take these two nuts out and I'm just gonna support the differential. I'm just using my hand but you could use a jack or a screw jack there. Let me just tip it down. All right. Now the differential didn't come down too much but that's okay. I'm just gonna try to slide this line forward. Just like this. And I just got just enough clearance to pull it out. I got the clip out and now I'm gonna pull the line up. It's up there. Then there's that clip up here that you're gonna pull off. You can use pliers on this one. Just slide it out of that bracket. And now I'll take this line. Just slide this back. Just like this. We get some fluid out of there.
And slide it forward. You're gonna have to twist it a little bit. And just slide it forward just like that. Now before I install the lines, I'm gonna put these clips back in the fittings. Do the same on the bottom one. That's good. Now I'll take the line and slide it the same way the old one came out. I gotta twist it a little bit.
There we go. That's all the way back. When that's all the way back, then we'll take this front part. We wanna go over this crossmember right here and then slide it up in the cooler. And we'll attach that later. Now take the line and clip it into the fitting. Make sure that locks in place. And then put that little cover over. That's good. Now over to this bracket and just lock it in place. Now take the lower line and slide it the same way it came out. You just have to twist it a little bit.
Let's see. And slide this part up here. And slide it into the fitting on the side of the transmission and then put this cover on. Make sure it locks in place. And snap it into this bracket just like that. Now take these brackets and just put these together like that. One right there and then there's one in the back here over near the starter. And lock it in place. And now push the differential back up. If you needed to drop this more, you could've taken those other bolts out but we didn't have to. And put the nut on. And this nut as well. And then tighten these down. Now put this crossmember bracket up. Put the bolts through. And get these ones started as well. Now tighten these bolts up. And the same with these ones.
Now we can take the side cover, put that back on the transmission. Get the bolts started. And tighten them down. Now we're gonna put this clip on the lower fitting. Just slide it like that and then roll it around. Then take the line. Line it up. Push it in, snap it in place and then put this lock on. Just like that.
Now over here you wanna put this clip in, put the line through this clip right here. Now get that lined up with the cooler. And lock it in. And put this cover over. Now just take this pipe, line it up with the fitting. And lock it in place. Make sure the clip's all the way down. That looks good. Double-check and then put this cap over. That looks good. And take this panel right here and push the pushpins back down. Push that pin down and push this wiring harness through that clip. Lock it in place. Now take the grille and just slide it in position. Push these clips in on the side. Make sure all these line up.
And take a Phillips head screwdriver and just twist these. There's four of them. This just locks it in. All right, that's good. And take this bolt. Get that started. And tighten it down. And put this cover on. Line it up. And put all the pushpins in. Lock them down.
Shop Products

How to Replace Heavy Duty Cooling Inlet Upper Transmission Cooler Line 2000-06 GMC Yukon
Watch this video to learn how to install a new heavy duty inlet transmission cooler line on your 2000-06 GMC Yukon.
