How to Replace Upper Engine Mount 2001-05 Honda Civic
Created on: 2016-05-06
This video has the steps, tips, and torque specs for replacing the upper engine mount on the 01-05 Honda Civic
-
step 1 :Removing the Upper Engine Motor Mount
- Carefully jack up underneath the oil pan with a piece of wood
- Push back the power steering reservoir tab and move the reservoir over
- Remove the two 10mm bolts atop the ABS module
- Pry off the safety and ABS connector
- Remove the three 15mm nuts from the motor mount bracket
- Remove the motor mount bracket
- Loosen the lower 10mm nut at bottom of the ABS
- Inspect the ABS pump lines for corrosion
- Remove the 14mm motor mount bolts
- Remove the motor mount
-
step 2 :Reinstalling the Upper Engine Motor Mount
- Insert the new motor mount into place
- Tighten the three 14mm bolts
- Torque the motor mount bolts to 32 foot-pounds
- Reinstall the two 10mm bolt atop the ABS pump
- Tighten the 10mm bolt at the bottom of the ABS pump
- Reinstall the motor mount bracket
- Tighten the three 15mm nuts to the motor mount bracket
- Torque the motor mount bracket nuts to 45 foot-pounds
- Reconnect the ABS pump wiring harness
- Insert the power steering pump reservoir onto the bracket
- Lower the engine jack
Tools needed
-
Socket Extensions
Flat Blade Screwdriver
Torque Wrench
14mm Socket
15mm Socket
Rust Penetrant
Jack Stands
10mm Wrench
10mm Socket
Ratchet
Floor Jack
Brought to you by 1AAuto.com, your source for quality replacement parts and the best service on the Internet.
Hi, I'm Mike from 1A Auto. I hope this how-to video helps you out, and next time you need parts for your vehicle, think of 1AAuto.com. Thanks.
In this video, we're going to show you how to place the upper engine mount. This is a 2003 Honda Civic with the 1.7-liter motor. It's pretty much the same for any 2001 through 2005 Civic with the 1.7-liter 4-cylinder. You'll need a new upper engine mount from 1aauto.com; 10 and 14mm sockets as well as a 15mm deep socket, ratchets and extensions, 10mm wrench, jack and jack stands, penetrating oil, flat head screwdriver, and a torque wrench.
Now we'll be using the piece of wood on a floor jack to jack up against the bottom of the oil pan. Always be careful not to use too much pressure, because an aluminum oil pan can crack. Just jack it up a little to support the motor while we disconnect the mount.
We need to move the power steering reservoir out of the way by pushing this tab backwards, lifting it up, placing it off to the side without tipping it over. Remove the two 10mm bolts that hold the ABS module in place. Using a flat head screwdriver, pry out the safety on the connector for the ABS pump. Move the connector off to the side.
Remove the three 15mm nuts. Remove the engine bracket from the engine and mount. Set it to the side.
Loosen the 10mm nut securing the bottom of the ABS pump bracket to the body. Inspect your brake lines at the ABS pump to make sure that there's no corrosion or nothing that will kink or damage the lines.
Using a 14mm socket and an extension, move the pump until you can reach the mount bolt. If the hardware's out, remove the motor mount from the frame.
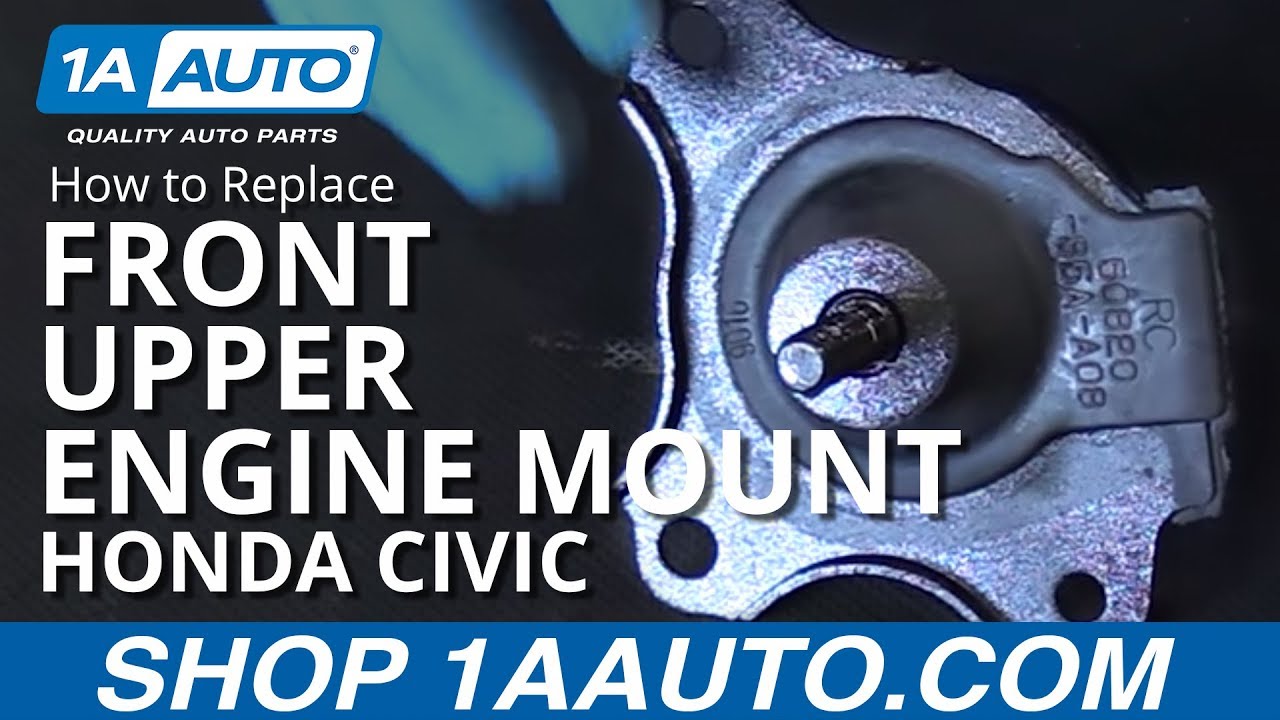
Here we have our old part from the vehicle and our new part from 1AAuto.com. As you can see, we have the same size and mounting locations, same studs. Underneath is just a little bit different, but it's not going to affect the install.
Our new part will still be a direct fit and will go in just the way it should.
Install your new motor mount into the frame rail. Line up your bolt positions. Reinstall your three 14mm bolts. Torque your motor mount bolts to 32 foot-pounds.
Reinstall the two 10mm bolts at the top of the ABS pump before tightening the bottom. Tighten the 10mm bolt at the bottom of the ABS pump.
Reinstall your motor mount bracket onto the studs. Reattach the three 15mm nuts. Torque the nuts on the motor mount bracket to 45 foot-pounds.
Reinstall your ABS pump connector. Put your power steering pump reservoir back on the bracket. Lower the jack.
Thanks for tuning in. We hope this video helped you out. Next time you need parts for your car, please visit 1AAuto.com. Also check out our other helpful how-to and diagnosis videos.
Shop Products


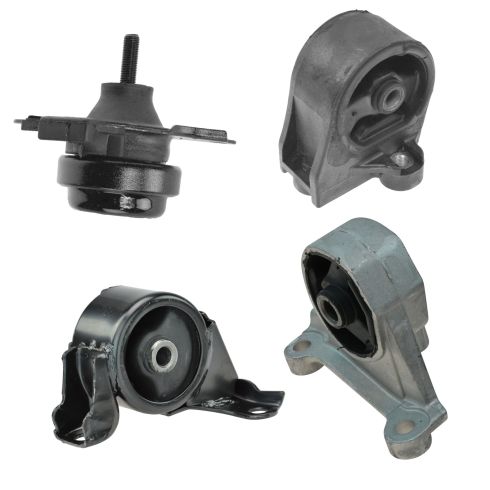
2001-05 Honda Civic L4 1.7L Manual Transmission 4 Piece Engine & Transmission Mount Kit TRQ MTA34441
Part Details:
- 4 Piece
- (1) Transmission Mount
- (1) Rear Engine Mount
- (2) Front Lower Engine Mounts

How to Replace Front Engine Mount 2002-06 Nissan Altima
Got a bad engine mount? Follow the steps in this video and replace it yourself!
