
How to Replace Upstream O2 Oxygen Sensor 2004-07 Toyota Highlander L4 2-4L
Created on: 2018-01-23
How to remove, install, change or replace an upstream oxygen O2 sensor on 04, 05, 06, 07 Toyota Highlander
-
step 1 :Removing the Upstream Oxygen (O2) Sensor
- Unclip the O2 sensor wiring harness from the radiator hose
- Disconnect the O2 sensor electrical connector
- If you are reusing your O2 sensor, remove it with an O2 sensor socket
- If you are not reusing your O2 sensor, cut the wire with wire cutters
- Remove the O2 sensor with a 7/8" deep socket
-
step 2 :Installing the Upstream O2 Sensor
- Thread the O2 sensor into the exhaust
- Tighten the O2 sensor with an O2 sensor socket
- Pull the wiring harness into place
- Connect the O2 sensor electrical connector
- Clip the wiring harness to the radiator hose
Tools needed
-
Socket Extensions
Flat Blade Screwdriver
7/8 Inch Socket
O2 Sensor Socket
Ratchet
Wire Cutters
Hi. I'm Mike from 1AAuto. We've been selling auto parts for over 30 years!
The front O2 sensor is located here before the cat and the wire for the connector followed up here to the side of the engine. We've removed the engine cover. You could do this without removing the engine cover. This just makes it easier to see.
It is clipped to the radiator hose. We'll squeeze these tabs. Just using a flat bladed screwdriver, try to pry this apart. It's kind of stuck. Usually, these come apart pretty easily. So I'll squeeze the two tabs together and then pry it on this. Squeeze them together. We'll keep prying. That will come apart. You can see how it works. So it clips together and you just squeeze these tabs together. It's just filled with dirt. It's hard to get apart. Put that aside to reuse it.
You need to unlock the O2 sensor connector up here. So you can either push in on this lock. See, it's going to move that tab up. You might not move it up enough. Take a small flat bladed screwdriver. Sort of pry it up and at the same time, pull the connector out just like that.
Our oxygen sensor socket is too wide to fit in this shielded oxygen sensor. You can get a thin walled oxygen sensor socket if you need to remove this oxygen sensor and reuse it if you are replacing the cat. I plan on using the same size socket but in a thin walled, just a regular version. However, the wires are in the way. So again, if you want to reuse your O2 sensor, this would not be the way to remove it, but if you need to just get it out because it's failed and you got to replace it with a new one, you can do this. So I'm going to cut the wires. Take that harness out of there. I'm using a 7/8” extra deep socket and a breaker bar. Put into place. Break it free. Spin it out. You can see this had a shield on it.
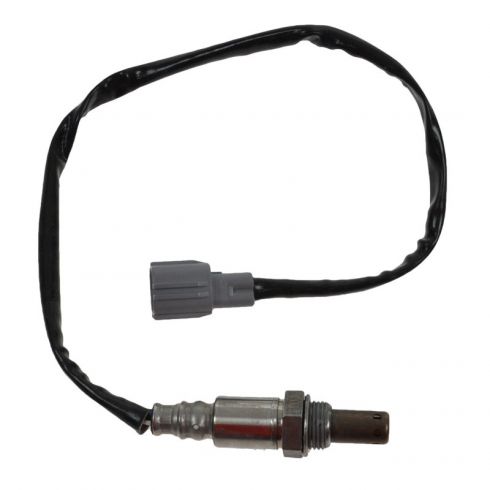
Here's the original O2 sensor. Had a shield on it. There's a brand new one from 1AAuto.com. Doesn't have a shield on it. Not a big deal. You don't 100% need that. Obviously, I cut this to get it off. The harness is the same length with the same style connector. This'll thread right in and work great for us. So it already comes with anti-seize applied to the threads.
Thread it in by hand. Now we can use our actual oxygen sensor socket and I will tighten it down. Basically, just feel the crush ring that's on the end of it. It'll start to crush and right there, that's perfect.
Run the wire back up underneath the upper radiator hose. Then well plug the connector back in. That's keyed. It can only go in one way. I'm going to hold it from the back. It'll click when it locks into place. Take our little wire holder. Get the wire up and away from the exhaust and just clip it in place just like the original. The O2 sensor's replaced.
Thanks for watching. Visit us at 1AAuto.com for quality auto parts, fast and free shipping, and the best customer service in the industry.
Shop Products


Toyota Lexus Pontiac O2 Oxygen Sensor Walker Products 250-54007
Part Details:
- Air / Fuel Ratio
- Direct Fit Replacement - Guaranteed to fit and function for your specific application
- Quality Tested - built to a strict level of product standards.
- Square
- M18
- 18 mm
- Threaded
- Male
- Specific
- 510 mm
- 4
- Heated

How to Replace Downstream O2 Oxygen Sensor 2000-02 Chevy Suburban
This video will show where each oxygen sensor is located and also how to replace the Bank 2 sensor 2 oxygen sensor if it turned on the check engine light
