
How to Replace Water Pump 2000-06 Chevy Tahoe
Created on: 2020-11-30
This video shows you how to install a TRQ water pump in your 2000-2006 Chevy Tahoe.
Tools needed
-
14mm Wrench
Razor Blade / Gasket Scraper
Socket Extensions
Pry Bar
Trim Tool Set
Pocket Screwdriver
Flat Blade Screwdriver
Socket Driver
Paper Towels
8mm Socket
Hose Clamp Pliers
10mm Socket
Ratchet
You don't have to remove the tire to access the lower radiator hose but we took it off so you can see. Lower radiator hose is right here. Now there's no drain on this radiator so we're gonna have to take off that hose. I'm just gonna use a hose clamp tool, just move this wire out of my way. I'm just gonna use a trim tool, just remove this retainer for this wire and just slide that out of the way. Now I can access the clamp. And slide the hose clamp tool or the clamp. Make sure you have a drain bucket underneath. Loosen that up. And just try to twist the hose back and forth. Just be careful, you don't wanna splash too much coolant on you. Just gonna use a pry bar just to pry it out a little. You can use a straight-blade screwdriver. Just going back and forth. There we go. Once you get this started, you might wanna lower the vehicle.
And one thing I forgot to mention, make sure you do this while the engine is cool, you don't wanna do this with hot coolant. And just slide this off. And there we go. Now remove this cover using 8-millimeter socket to loosen up this bolt. And slide the cover out. Now we're gonna remove this snorkel. There is a bracket right here that attaches to the upper radiator hose. This one's broken, but if yours is there, just use a screwdriver or a trim tool and remove that. And loosen up these one clamps with a 8-millimeter socket or a straight-blade screwdriver and also this one over here. Now slide this snorkel off, right there and then off the throttle body and slide it out. Now disconnect the mass airflow sensor. There's a little lock tab on here, slide that back, and then push down on the terminal lock, right there. Then grab the airbox, you can pull it straight up and then wiggle it out. These are the tabs that hold it down. Now we're gonna take the belt off. Normally, the adapter, you're gonna use a 15-millimeter wrench or a serpentine belt tool that has the 15-millimeter adapter. This tensioner actually uses a 14-millimeter so I'm gonna put that on, loosen this up, slide the belt off the idler arm right here. Then loosen the tension on the tensioner and you can take the belt off completely. Keep in mind how the belt goes. You could take a picture of the belt before you take it off, that might be helpful. Now I'm gonna remove the tensioner, use a 15-millimeter socket. And there's three bolts.
And slide that out of the way. Now we're gonna start taking the hoses off the water pump. Just remove this hose from this bracket and this bracket and then use a hose clamp tool. And we can move the hose clamp up the hose a little bit just like that and try to twist the hose a little bit. There we go. And slide it off. If it doesn't come off like that, you can take a pick tool and just slide it in between the hose and the water pump. Loosen it up all the way around. Just make sure that the coolant is drained at this point. And take these hoses off as well the same way. Just use your hose clamp tool. Now I'm gonna remove the bolts for the water pump. There's three on this side and three on the other side. Use a 10-millimeter socket.
All those bolts are loose, take those out. And grab the pump and just slide it out. Now you wanna clean up the sealing surface where the water pump is gonna go. Just use a scraper. If you're careful, you can use a razor blade to scrape any excess gasket material, right there and then also right in here. And wipe it down with a rag and some brake parts cleaner. Now, if you don't have a new thermostat housing to put on your new water pump, you can transfer over the old one, just use a 10-millimeter socket. Take these bolts out. Slide that out, no need to replace the seal for the thermostat, just grab the thermostat and just pry it off. Now you wanna clean all this up. Use a scraper or some emery cloth and just clean all this corrosion up. Now just pull the seal off and whip down the thermostat. Take the new seal and it is...it does go on a certain way. Where this little breather valve is, that's where this little mark goes. And just wrap this around just like that. And there is an indent right there where that little tab goes just like that. That looks good. Slide that in position. And put my bolts in. Snug these up first. And now we'll torque those bolts to 11 foot-pounds. Now we wanna take and put some new gaskets on the water pump. If you're reusing the water pump, then you wanna clean up the surfaces where the gaskets are. And slide the bolts through. The bolts will kinda hold the gasket a little bit. Just like that.
Now carefully slide the water pump in place, making sure the gaskets don't fall off. And snug them up, snug up the bolts. Now we're gonna torque these six bolts. There's two passes so the first pass you're gonna torque them to 11 foot-pounds and then second pass tighten it to 22 foot-pounds. Now we can attach all the coolant hoses and the clamps. That's good. Do the same with the heater hoses and take the tensioner pulley and wind this up. Get the bolts started. Then torque these bolts to 37 foot-pounds. Now we can install the upper radiator hose. Just line this up, slide it down, and slide the hose clamp down in position. Now we can install the serpentine belt. Go around the crank pulley, and up around the water pump, and down around the power steering pump pulley, and up around the alternator, and then go around the tensioner, and then last is the idler pulley. So we're gonna put a little tension on the belt. And you can use your serpentine belt tool or just a wrench or a ratchet. Loosen the tension on the tensioner and slide the belt underneath. Just double-check all your pulleys. And it looks good. Now line the airbox up.
Push it down into the grommets and plug the mass airflow sensor in. Take those snorkel and line this up over the mass airflow sensor and on the throttle body. There we go. And snug the worm clamps down. And put this cover on, slide it in position and tighten it down. Now you can add the appropriate coolant, a 50/50 mix. And you wanna top this off up to where the full line is. And then you start the vehicle, let the vehicle run for about 10 minutes, monitoring the temperature gauge while you're running the vehicle and monitoring the level. You're gonna wanna top it off while it's still running. And once it's warmed up, shut the vehicle off, let it cool, put the cap on. And then after it's cooled, check the level again.


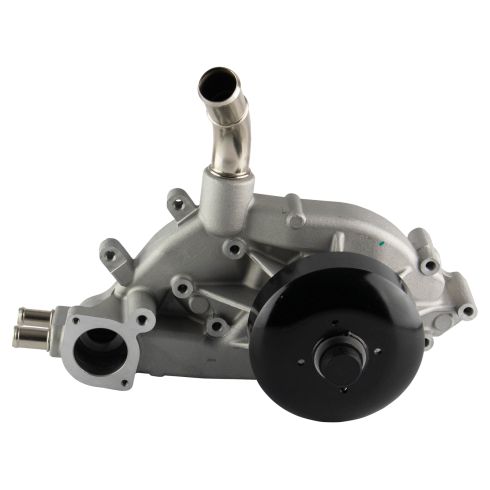
Engine Water Pump TRQ WPA07325
Part Details:
- LS Swap
- 6
- 7
- Standard
- Yes
- Aluminum
- 1
- Yes
- No
- 5.84 in
- No
- 6.57 in
- No
- Cold Rolled Steel

How to Replace Water Pump 2007-09 Toyota FJ
Check out this video to learn how to replace the water pump in your 07-09 Toyota FJ Cruiser. 1A Auto shows you how to do it yourself and save money!
