
How to Replace Water Pump 2001-05 BMW 325xi
Created on: 2020-11-03
This video shows you how to install a new water pump on your 1997-2006 BMW 3 Series.
Tools needed
-
Torque Wrench
Socket Extensions
15mm Socket
Socket Driver
Paper Towels
Fan Clutch Wrench
10mm Socket
Drain Pan
Ratchet
Trim Tool Set
T25 Torx Socket
Coolant Funnel Set
We need to take this and take off right here and the air box. First, I'll take these push pins out. Just use a trim tool. Pull these up. You can slide this out, just like that and disconnect this connector right here. Just push it down and then slide it out and grab this connector. Slide it up and just take the wires out from that bracket. I don't have to disconnect this connector and just slide it out of the way. Just like that.
Now, I'm gonna take this screw out and use a T25. And there's a push pin right here. Just use a trim tool, take this push pin out. Slide it out. Now the fan shroud is loose. Now, before I take that off, I have to loosen up the fan because you have to take them off together. Now, I'm gonna use a fan clutch tool to remove the fan or loosen it up. This happens to be a 32 millimeter and this is a pneumatic tool. And you're gonna put this on so that it actually seems like you're tightening it. It's the fan clutch's reverse thread. So just give it a couple bumps. And actually I think that's it.
So now you're gonna carefully loosen this up. You don't wanna drop the fan once it gets real loose. Yup, there we go. And that wasn't too bad. It fell a little bit. And now just take and slide them both up together. All right. Now, I'm gonna loosen these bolts up before I take the belt off. That'll just help me loosen them up. I don't wanna take them out completely, but use a 10 millimeter socket to just get them loose. It will just make it easier. That's good.
Now, I need to take some of the tension off the belt tensioner. I'm gonna use a 15 millimeter socket. And there's a little adapter right here that goes on the tensioner. And then you're gonna take an Allen wrench that fits. And as you loosen the tension, there's a little hole right here. Slide that Allen wrench through the hole, and it's just gonna lock the tensioner. Then you can take the belt off. I'm not gonna take it off completely, just off one of those, one of those pulleys and take it off the water pump.
Just push it out of the way. Now, I can take the bolts off on the pulley, and slide the pulley off. Now, before you take this off, you could drain the coolant. If you want, there is a drain on the bottom of the radiator. I'm gonna take this cap off, so there's no pressure on it. Make sure this is cool before you take that cap off. I'm not gonna drain the coolant. I'm just gonna put a bucket underneath the water pump and just drain it as I pull the pump out. Now there's some nuts around the water pump. Use a 10 millimeter socket. Take those nuts out.
All right, take those nuts out and just grab the water pump and just shake it out. Just slowly. Just put a drain bucket underneath. Just let that drain a little. All right. And just slide that out. I would take the new water pump. You wanna put the O-ring on. Just slide it over the impeller and just slide it just like that. That looks good. Now just make sure this surface area is clean right here. You can use a rag, just clean that. This looks pretty good. And then they make special lubrication for O-rings, or you can just take a little bit of coolant, just put it around the O-ring just so it slides in there a little bit better. And take the water pump with this freeze plug facing down and just rock it in slowly. That's good. And put those nuts on.
And then we're gonna torque those to 84 inch pounds. Make sure you're on inch pounds, not foot pounds. And I'll just do this in a cross pattern. Now, take the pulley. Now it only goes on one way. If you notice two of the bolt holes are closer than the other two. So line that up and get the bolts started and tighten these down. And then I'm gonna tighten these down to 89 inch pounds. And you can use a screwdriver to prevent the pulley from spinning. Just go in between two of the bolts.
Now that's on. Then we can slide the belt back in position. Slide it over the water pump first and over the tensioner. That's all lined up. Make sure it's lined up on the alternator and the power steering pump. That looks good. Now loosen the tension on the tensioner and then take that Allen wrench out and then slowly leave the tension. That looks good. Now, you just wanna clean up the serpentine belts a little bit, just spray some water, rinse off some of that coolant. Now, I will take the fan shroud and then the fan and slide them in position.
Try to slide the fan shroud down where it latches in. That's good. And remember it's reverse thread, so go to the left. All right. So it takes a little bit of effort, but just do it slowly, and slap it on. Now to tighten this fan clutch, if you have the ability to torque this, you wanna tighten that to 29 foot pounds. If you don't, then I'm just gonna use the remover tool and just give it a bump. Right. That should be good. Take these connectors and reposition them like that and reconnect this connector. Just like that. Now, take this push pin and line this up. And take the screw and get that started and tighten that down and snug it up.
All right, now, we wanna add the coolant. You wanna take this bleeder screw, just use a straight blade screwdriver, loosen up on this, and then take the appropriate coolant, and fill this up. So once you see a little bit of coolant coming out, then you wanna close this up and you want to adjust this level accordingly. There's a little dipstick here that if you look at the little chart right here, you can see where the minimum is and the maximum. You want it somewhere in between there. And then you wanna run the vehicle. You can run the vehicle with the cap off and just monitor the level and monitor the temp gauge. Make sure the temperature doesn't go into the red. Turn the heat on just slightly, low heat.
Now, if you don't have heat, you wanna shut the vehicle off, let the vehicle cool down a little bit, adjust accordingly, re-bleed the system and start over and then you should be good to go. Once the engine is up to operating temperature, shut the vehicle off and put the cap back on. Let it cool down and you can drive the vehicle, monitoring the temp gauge, and then adjust the level accordingly after it's cooled down. And take the intake, wind that up. And take the push pins. Line those up and lock them down.
Shop Products


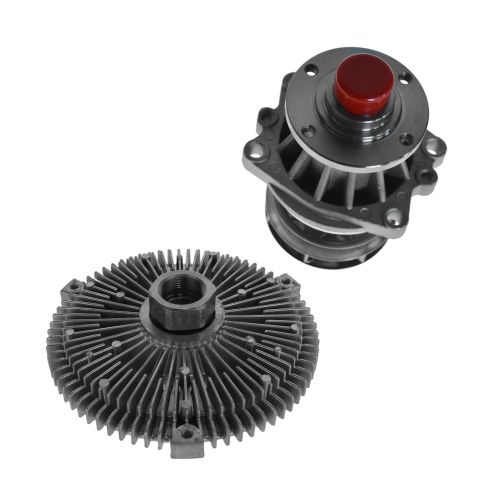
BMW 2 Piece Cooling System Service Kit TRQ WPA05232
Part Details:
- 2 Piece
- (1) Radiator Fan Clutch
- (1) Engine Water Pump
