How to Replace Water Pump 2002-10 Ford Explorer
Created on: 2017-06-06
This video will show the steps for replacing a bad water pump, including draining and refilling the coolant
-
step 1 :Draining the Coolant
- Have a drain pan ready
- Loosen the white 8mm nut on the radiator drain plug
- Close the valve
-
step 2 :Removing the Air Intake
- Disconnect the two breather hoses
- Loosen the two hose clamps with a flat blade screwdriver
- Remove the air intake
-
step 3 :Removing the Coolant and Power Steering Reservoir
- Disconnect the radiator bottle hose
- Remove the two 10mm bolts from the radiator bottle
- Remove the radiator bottle
- Remove the 8mm bolt from the power steering reservoir
- Move the power steering reservoir to the side
-
step 4 :Removing the Upper Radiator Fan Shroud
- Remove the 10mm bolt on either end of the radiator fan shroud
- Slide back the hose clamp
- Disconnect the coolant hose from the radiator
- Pull up and remove the fan shroud
-
step 5 :Removing the Fan and Fan Clutch
- Disconnect the fan connector
- Remove the 8mm bolt from the fan sensor
- Move the sensor off to the side
- Hold the water pump pulley with a wrench
- Remove the 36mm nut from the fan clutch with a thin wrench and bar for leverage
- Spin the fan clutch off
-
step 6 :Removing the Water Pump Pulley
- Remove the four 10mm bolts from the water pump pulley
- Remove the pulley
-
step 7 :Removing the Serpentine Belt
- Familiarize yourself with the route of the serpentine belt
- Insert the 3/8 inch drive ratchet into the tensioner
- Turn the tensioner clockwise to loosen the belt
- Pull the belt off the alternator
- Release the tensioner
- Pull the belt off by hand
-
step 8 :Removing the Water Pump
- Have a drain pan ready
- Remove the four 13mm bolts from the water pump
- Tap the pump with a hammer to break it free
- Loosen the pump and let the coolant drain
-
step 9 :Installing the Water Pump
- Clean off the splines with a wire brush and cleaner
- Insert the water pump into place
- Tighten the four 13mm bolts to the water pump
- Torque the bolts to 18 foot-pounds
-
step 10 :Reinstalling the Water Pump Pulley
- Insert the pulley to the engine
- Hand-tighten the bolts to the pulley
- Tighten the bolts to the pulley
-
step 11 :Reinstalling the Serpentine Belt
- Bring it around the idler pulley
- Bring it around the A/C Pulley
- Loop the belt around the crank pulley
- Bring it around the water pump
- Bring it around the power steering pulley
- Bring it around the idler pulley
- Bring it around the belt tensioner
- Pull the tensioner clockwise with the 3/8 inch ratchet
- Pull the belt over the alternator
- Release the tensioner
- Torque the water pump pulley bolts to 18 foot-pounds
-
step 12 :Installing the Fan and Fan Clutch
- Install the fan to the water pump shaft
- Hold the water pump pulley in place
- Tighten the nut with a 36mm wrench
- Connect the sensor
- Tighten the 10mm bolt to the lead
-
step 13 :Reinstalling the Fan Shroud
- Insert the shroud into place
- Tighten the 10mm bolts to the shroud
- Connect the coolant hose
- Close the hose clamp
-
step 14 :Reinstalling the Power Steering Reservoir
- Tighten the 8mm bolt to the power steering reservoir
- Tighten the 10mm bolts to the coolant
-
step 15 :Installing the Air Intake
- Connect the air intake
- Tighten the hose clamps
- Connect the PCV and breather hoses
-
step 16 :Reinstalling the Coolant Bottle
- Tighten the 10mm bolts to the coolant bottle
- Connect the hose to the radiator
- Fill the coolant and radiator to the appropriate level
- Run the engine
Tools needed
-
Socket Extensions
Torque Wrench
Flat Blade Screwdriver
8mm Allen Wrench
Paper Towels
Fan Clutch Wrench
8mm Socket
10mm Socket
Drain Pan
Ratchet
Wire Brush
Needle nose pliers
36mm Socket
3/8 Inch Socket
Hi, I'm Mike from 1AAuto. We've been selling auto parts for over 30 years! We're dedicated to delivering quality auto parts, expert customer service, and fast and free shipping, all backed by our 100% satisfaction guarantee. We've created thousands of videos to help you install our parts with confidence. That saves you time and money, so visit us at 1AAuto.com, your trusted source for quality auto parts.
In the driver's side front of your radiator, there's a drain. You can see the little drain hole here. There's usually an 8 millimeter nut here, which you can loosen. There's also an 8 millimeter Allen inside. Drain that. Loosen it up, and your fluid will start draining out.
We've actually already drained the fluid, so we're just kind of going through the motion. You're not going to see any fluid drain out, but have a drain pan underneath to collect all your coolant. While the radiator's draining, I'll remove the radiator cap, which will allow air in and the fluid to come out faster. Once your coolant's done draining, close the valve back up.
Remove your air intake tube. There are two fittings. You just press the green tab to the side, and pull them off. Again, the green tab. Pull it up and off, and then loosen your two band clamps, and pull the tube out with a flat blade screwdriver. Remove the hose from the radiator fill, and then remove the two 10 millimeter bolts that hold the bottle on. There's also a wiring harness clip back here that you'll have to pull off.
Remove the 8 millimeter bolt that holds the power steering reservoir in place. Then just pull it up and kind of set it off to the side. A 10 millimeter bolt holds the upper radiator shroud on here, and there's one right on the other side as well. We'll remove those. Use a good pair of pliers. Squeeze this clamp, and this little tab will actually lock it open. That's all right. Then twist the radiator hose and pull it off. Set it back as well. Then you can kind of pull up and back towards the engine, and pull your upper shroud up and off.
Disconnect the lead. There's just a tab right here. Push down with your thumb and separate it, and then remove this 8 millimeter bolt. Use an 8 millimeter socket with a ratchet and extension to help you out. That comes out, and just kind of pull this out. You actually can swing it off to the side to make it easier to get at your fan clutch. Once you get to this point, there are special tools designed specifically for getting the fan clutch off.
Now we need to remove the fan clutch, which is this large 36 millimeter nut here. Basically, you want to use a wrench to hold on to the pulley. You can see this wrench goes down, and it goes over the bolts. I can now hold that pulley like that. Then I have a 36 millimeter wrench that's a little thinner that fits down over. I can put a bar, for more leverage, on there. Usually, once it loosens up, you can see, now, that the fan clutch is spinning right off.
Before you take your belt off, just note how it's routed up over the alternator, under this idler, around your power steering, up over the water pump, and around the crank, up over the tensioner, and then back down around your AC, and back up and around.
We'll remove these four 10 millimeter bolts on the water pump pulley. You don't want to put the wrench on like this, because most likely it will just spin the pulley. If you put the wrench so the handle is over the center, you'll have less leverage on the pulley, and the bolts should come loose. You can leave one in just to keep the pulley in place till you take the belt off. Half inch ratchet handle in the square hole in your tensioner. Put the handle in, push down, and just take the belt off, and then slowly let your handle up. Then you just pull the belt off your water pump pulley, and then we can take this all the rest of the way out, and the pulley off. You might have to tap on the pulley with a hammer in order to get it off. Ours comes off pretty easily. Now take the belt all the way out, just so it doesn't get wet, because there's going to be water leaking out from the water pump.
Four 13 millimeter bolts still hold the water pump in place. There's one way down here. As you remove those, you'll get water from the engine leaking out, so have a drain pan underneath. You may need to tap it with a hammer to break it free. At this point, once this loosens up, you'd have a lot of antifreeze coming out. At this point it'd be draining out of your engine. Our vehicle actually has a cracked block, so we're just doing this to show you. There's the pump from our vehicle. It's in pretty rough condition. They actually have this ... There's a hole right here that, once the bearing goes bad, water will start seeping out of, and you'll get a couple drips underneath your vehicle.
The new one from 1A Auto is exactly the same. It has the same hole. It will probably outlast your vehicle, though. It's going to install just like the original, and it's going to be a perfect replacement.
There's a shipping cover here that we can remove, and then this O-ring installs on before you put it on the car. Put the O-ring on. You'll want to put a little light layer of oil around it, just to make sure it goes in correctly. Going to use some carb and choke cleaner. Get in there with a brass wire brush. Really clean up the area where the pump mounts. Follow that up with an abrasive pad. Just do a final clean up with a good, absorbent rag. Make sure you do the edge where it mounts as well. Just have a little bit of motor oil. Take it and put a nice, light coat right around, so the O-ring will go in easily.
Okay, got the pump with the O-ring installed. The hole kind of goes towards the top. You can see this hole is going to line up right there. Go in and start the bolts, and then we'll just slowly and evenly tighten the bolts up and push it into place. So we've got them in. Just going to get them evenly finger tight. Basically, just a few turns of each one, and just keep working our way around, nice and evenly. We want to tighten these to 18 foot-pounds. I'm going to tighten them to 10, first, and then I'll tighten them to 18. Now to 18.
Put our pulley back on. Stick a bolt in there. Get it started, just to kind of get it lined up. Put them in finger tight first. Then we'll just get them kind of snug, but you'll tighten them the final amount once the belt's on. Put your belt back on. Make a loop. Stick it between the idler and the pulley on the tensioner. Force it down, and put a loop around the AC. Compressor down here. Then take your belt and put it down around the crankshaft pulley, and then it comes up and around your water pump pulley. Then it goes around your power steering pulley, and underneath this idler, and underneath this idler. Then it's ready to go up onto the alternator.
Use your half inch ratchet. Put it into the tensioner pulley. Push down as far as you can, then bring this one up onto the alternator. Slowly release the tension there, and then just check and make sure it's on the alternator. Make sure it's around the crank pulley correctly, and around your A/C compressor correctly, and around your power steering, and it's in place. We'll torque these bolts now, to 18 foot-pounds. Again, if you put your wrench across the middle of the pulley, it won't spin the pulley as easily.
To reinstall, put it down in. Make sure it goes onto the water pump shaft. Be careful to make sure it goes on straight. Use the wrench to hold it in place. Again, tighten it up with the 36 millimeter wrench. Bring your bracket and lead up, and got her hooked. Hose here, it has to snake under here. Your vehicle may have a stud down here that it bolts into. Ours doesn't. Then use this 8 millimeter bolt. We'll tighten that up. Reconnect the lead. Make sure it clicks.
Feed the shroud down in. You can see there's holes in the shroud. They correspond to tabs on the lower shroud. Lower it down back, down in. Get one side, and then make sure you can feed the other side in, too. Lift it up gently, get this clip on, and make sure it goes back down correctly. You can also pull out on the lower shroud a little bit to help line things up.
Then reinstall our two 10 millimeter bolts: one on this side, and same location on the other side. We'll tighten those up.
Put your upper radiator hose back in, in place. Squeeze the clamp, bring it into place, and release. Power steering reservoir—bring it back into place. It has a little tab down here that inserts into the upper radiator shroud, and the 8 millimeter bolt that holds it.
Get your air hose back in place. Make sure it goes on there correctly. Then tighten up this one with a flat blade screwdriver. Then we connect the sensors. Make sure you hear a click.
Put your radiator overflow bottle in place. This tab goes into a slot down in here, and then this harness may be connected on here. As you can see, the clip has come undone on ours. Slide the bottle into place. Put your two 10 millimeter bolts on. Tighten those up. We'll reconnect this hose.
We'll refill the radiator first, and then fill the coolant bottle. Run the engine. Let the air bleed out of the system. Let the vehicle cool down. Refill it, and then just make sure you check your radiator fluid the first few times that you drive the vehicle. Put the cap back on once you fill it
Thanks for watching. Visit us at 1AAuto.com for quality auto parts, fast and free shipping, and the best customer service in the industry.
Shop Products
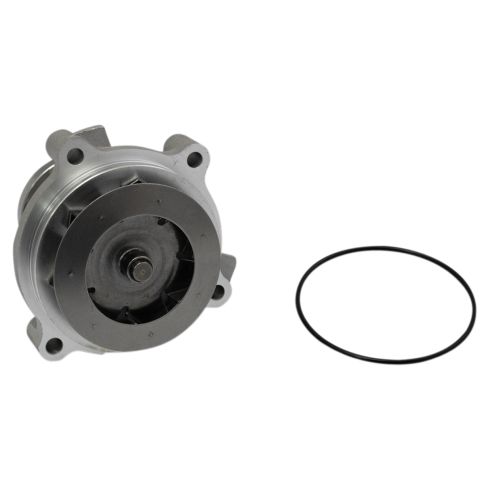
Ford Lincoln Mercury Engine Water Pump TRQ WPA07168
Part Details:
- 3.43 in
- 4
- 7
- Standard
- No
- 4
- 80 mm
- Aluminum
- No
- 2
- No
- No
- No
- Cold Rolled Steel

How To Replace Water Pump 2001-07 3-3L 3-8L Dodge Caravan
Watch this video to learn how to replace your own water pump. The experts at 1A Auto show you how to replace the water pump on your 01-07 Dodge Grand Caravan or Chrysler Town and Country.
