How to Replace Water Pump 2004-08 Ford F150
Created on: 2020-08-05
This video shows you how to install a new water pump in your 2004-08 Ford F-150.
Tools needed
-
Gloves
Hose Clamp Pliers
Drain Pan
Safety Glasses
Razor Blade / Gasket Scraper
Torque Wrench
Hammer
Socket Extensions
Rust Penetrant
Pry Bar
Coolant Funnel Set
Pick
Flat Blade Screwdriver
Socket Driver
Paper Towels
Serpentine Belt Tensioner Tool
Fan Clutch Wrench
8mm Socket
10mm Socket
Ratchet
Swivel
Okay, friends, before we get started on this job, it's important to remember that you wanna flush out your cooling system first. The reason for that is because you wanna have nice, new coolant and with your nice new part. Okay, friends, before we get started on this job, we need to talk about one thing, and that's safety. You want hand and eye protection at all times. With that said, we're gonna get under the hood along the passenger side and we're gonna drain that coolant. Okay. Obviously, you wanna make sure you have a collection bucket under there because coolant will contaminate the environment and/or stain your floor. Also, you wanna have a nice directional hose like this. This is gonna make it easy to direct the coolant when it comes out of the petcock. I'm just gonna slide that right onto the petcock tube here and then I'm gonna aim it towards where my bucket's gonna be. That's gonna help me out. At this point, we're gonna loosen up this little nut right there, and that's gonna allow the fluid to come out. Get this nice and loose. That feels pretty good. As the fluid starts coming out, now we're gonna make our way over to the driver's side and open up the radiator cap. We'll just open this up. Set it aside. While we have that coolant draining, we're gonna start taking this plastic off of here. If you look along the top, you're gonna see these little push clips.
In the center, there's a Phillips-head. You can use a Phillips-head screwdriver or for me, I usually like to try to get underneath the center, twist, and pop it up. This actually works much better, overall, and once you get it up and out of there, you can, of course, take off the outer piece as well, and I just kinda put them together so they're good for safe keeping. We're gonna remove them all and then we'll get this right off of there. Okay. Get this outta here. Let's get our coolant hoses off of here. Some coolant might come out. Let's get the upper hose from the passenger side. To get the fan shroud out of here, we're gonna need to get the fan off, of course, at the same time. To do that, you would use a 36-millimeter and you can either use a wrench if you have a big old wrench and maybe a hammer of some sort to bonk this free or you can use the special tool that's made for it. It's a fanning clutch tool. Just gonna go right over that nut for the fan clutch and then drive it counterclockwise. Go ahead and spin this off of here. There we are. Looking along the side/ top of the fan shroud, you're gonna see there's two mounting bolts, one on the driver side and one on the passenger side. Remove them both. At this point, we can wiggle this around. We're gonna try to sneak it outta here.
Now that we have all that out of the way, we have a nice clear view of our belt and, of course, the tensioner. Take note of the direction that the belt goes in and/or the routing and then, of course, we're also gonna come right here to the tensioner with our serpentine belt tool and we're gonna remove that serpentine belt. We'll get this right out of the way and, of course, get our tool off there. Now, we're gonna get the pulley off of the water pump. To do that, I like to use a nice flat-head screwdriver and I'll come across the bolt just like this. Then I'll use my 10-millimeter over here and that'll make it so it's holding the water pump and I can loosen it at the same time. I'm gonna leave that bolt right in there just like that. It's gonna give me something nice to grip onto, and now the next bolt is gonna be even easier. Nice little hammer. I'm just gonna use a tiny bit of penetrant. Now, I'm gonna use my pry bar and I'm gonna try to get this pulley off of here. Okay. It's definitely moving. There we are. Set this aside. Now, we're gonna go ahead and use a forky tool or pretty much anything you've got and we're just gonna get the wiring off of this bracket right here. Just pull that down. At this point, I like to spray the area down with a little bit of penetrant.
I'm gonna go along the area where the bolt is, see if I can get down near where the bracket goes to where the water pump is. And then also, if you were to pay attention to this tube and go below this, you're gonna see the area where the tube goes into the water pump. That's gonna be super important to try to get a little bit of penetrant in. I'm gonna use my 8-millimeter. I'm gonna break this bolt free. Switch tools so I have a little bit more space. Now, I'm gonna try to shake this around a little bit. As you can tell, it doesn't wanna break free. That's very common. I'm just gonna get the wiring out of the way. I'm gonna use a small hammer. Just give it a couple of loving bonks. I'm trying to see if this is gonna wanna break free. It doesn't seem as though it is. The only thing that seems to be happening is this is bending. So, as you can tell, when you try to remove this tube from the actual water pump itself, the tube is supposed to be steel and the water pump is, of course, aluminum. When you put steel into aluminum, they corrode. It's not gonna wanna come out of there. It's having a very big issue trying to come out and, of course, it's also generally gonna be rusted in this way. As we were trying to get it out, we noticed that the rust, kinda, formed a hole right along here, right where you can see. And at this point, this is completely trash.
So, there's no reason why you wouldn't wanna replace that at the same time as the water pump. So, next, what we're gonna do is get this tube out of the way because we wanna get to a hose that's located under there and it's just much easier overall. I'm gonna loosen this clamp and then I'm gonna press on this green tab all the way like that and remove this line from the intake. Draw this off of here and just, kinda, set it aside. So, just real quick, here's the new tube. You can see we have this thick hose that comes over like that. That's actually gonna be this hose right here and it leads right underneath the throttle body. The other smaller hose or longer hose but thinner comes all the way up, let me find it real quick, along here and then if I give it a tug, you can see it along the back side of the intake there. So, we would just disconnect it right there, draw it out of here, and do the same thing right there. And then we can just get this right out of the way. To remove this clamp, sometimes you can squeeze it with your fingers, some pliers, or even a clamp tool. I'm just gonna use the clamp tool because why not? Slide that clamp so it's away from the end of the hose. Now, we wanna try to break this free but you definitely don't wanna break the metal part that it's connected onto. Just keep that in mind.
If it seems like it's stuck on there, it couldn't hurt to just use a pick, get underneath there a little bit, try to break it free before you go ahead and tug. I just like to take the clamp right off here before I get the hose out. Now, I'm just gonna grab onto the hose down here and I'll draw it right outta there. That's the reason for taking the clamp off. It's one less thing to get caught on everything on the way out. Now let's work on the thicker hose. Like I said, it's right underneath the throttle body. Give it a nice squeeze. I'm gonna try to push the clamp down and off the hose if possible. Once you have the clamp off of here, you could try using some pliers to see if you can break it free. I can get it to spin a little bit but it really doesn't wanna come off, especially when I tug on it. You could also use a pick like this. Try to get in between the tube and the hose itself. See if you can get out anything that might be causing it to be stuck up on there. If this doesn't work for some reason, maybe you're having a hard time getting a pick in there or you don't even have one, you could, of course, just use something as simple as a razor blade or a knife of some sort and very carefully just cut the hose. There we are. If your tube looks like it's in poor condition, go ahead and try to scrape it clean and then, of course, use some sandpaper if you need to. Let's get this hose off of here as well.
Let's use our pick. See if we can get under this. Feels like it's starting to come up. Next, we're gonna take off this bracket right here. You can see that there's two studs with nuts on them. We're gonna spray those with a little bit of penetrant for good measure. Let's remove those nuts. So, next, we're gonna take off the bolts right here. This one as you can tell, the power steering pump pulley is in the way. Just use a wrench and we'll try getting it outta there. As you can tell, this bolt comes right through here and then all the way over to there which is where the threaded area is. I'm gonna spray down the entire area. There we are. Okay. So, we got that nice and loose. At this point, you would notice that you'll be able to move this bracket around which is great, but I'm just gonna go ahead and put that back on there just like that so I can remove this clamp and get our lower hose off of here. Let's loosen this. Slide that clamp right down. So, now it's gonna be time to take our bolts out of our water pump. An easy way to remember where each one of those bolts or even nuts goes is to put them right into or near your new water pump and then, of course, once you clean everything down and it comes time to put on the new water pump, we'll just swap them over to the old one. Get this outta here.
So, now just keep in mind that we used our 15-millimeter to remove these two from this side right here on the driver side. If you were to look over on the passenger side, you're gonna see two more 15-millimeter fasteners. So, now I'm just gonna use a swivel socket and an extension and I'll get to this one. Now we're gonna use our 10-millimeter and start removing the rest of the bolts. Now that we have all the bolts out, just keep in mind, there's gonna be a lot of coolant that comes outta here. Of course, we have our collection bucket under there but just double-check to make sure it's lined up. I'm gonna give this a light bonk. I'm just gonna draw this off of here and, of course, be careful for our wiring and anything that we might get caught on. Let's slide this right out of here. Before we go ahead and install our brand new water pump, we wanna make sure that we have the area that it's gonna be mounted to as clean as possible. You don't want any raised areas and you definitely don't want any leftover gasket on there. Use your rag. That's gonna help you take a look. Anything you happen to see, use a nice razor blade or a scraper, whatever you happen to have, and just clean it up. So, I cleaned up the whole area where the mounting surface is gonna be and something else I'd like to note is while you're removing your mounting bolts, if you happen to notice that some of the studs pulled out, you need to go ahead and make sure you put those back in.
If you were to hold the stud in something like a vise or even some locking pliers, you should be able to remove the nuts. There should be a stud here, here, and here. That's three on the passenger side. And then over on the driver side, you're gonna have another one here and then there's gonna be one right here but this one's actually gonna go on after we have the gasket and the water pump on there. Now it's gonna be time to install our gasket. So, I'm just gonna take it and it should fit right over those studs. If for some reason it doesn't seem like it wants to fit over them, more than likely you just have it backwards. Here we are. Okay, friends, now it's gonna be time to get our brand new water pump inside the vehicle. Now, line up this with the studs as much as possible and then, of course, we'll slide it in. Get the bracket right out of the way. As you slide this in, you wanna make sure that your wiring harness is clear. This one right here is right behind there. I did that so you can see that that would be very bad. Get that right out of the way. There we are. I'm gonna start on some of these nuts so it can't go anywhere. Now it's gonna be time to tighten up our mounting bolts and nuts. With that said, the torque for them is gonna be 21 foot-pounds which really isn't very much. So, all we're gonna do right now is bottom them out and then we'll torque them.
Let's torque all these to 21 foot-pounds. Let's get this bracket on here. Should line up perfectly. If you notice it's sitting a little off-kilter, more than likely it's because you switched these two studs on accident. Now we're gonna torque these to 21 foot-pounds. So, now we're just gonna torque these bolts to 35 foot-pounds. Now it's gonna be time to get our tube into the water pump. Make sure you put a little bit of lubricant on your gasket right there. You can use a little bit of grease or maybe even a little bit of engine oil. Just come right along here. Line it up. We want the hole that's facing in towards the engine to line up with the hole in the water pump and this one that's farthest towards me or the radiator would be the one that's gonna be sticking out past the water pump area. Just line this up. Give it a little wiggle. It should slide right on down. Now, we're gonna take our mounting bolt, put it all the way in, bottom it out, and then we'll torque it to manufacturer specifications. Torque this to 89 inch-pounds. I'm just gonna take off this clamp and I'll reinstall it once we get this around the back side of the intake. Okay. So, the way that I put the hose down through here, it's much easier if you just go along the side of the coil and along the intake and just, kinda, like, bring your hands along here and then once you have it towards the back so you can grab it with your right hand, make sure that you push it underneath the intake so it'll be nice and safe under there.
Once you've done that, it should come right up here, and then, of course, we're gonna put back on our clamp and slide it right on. There we are. So, now let's get this wide hose on there. I'm squeezing the clamp. If you wanna use a little bit of lubricant on the end of that tube, it's probably a good idea. It'll help you get it on there. Start it on. Squeeze my clamp and hopefully put it on the rest of the way. There we are. Make sure it's on. That feels good. Let's get this hose on there now. Just gonna try to set that right back where I got it from. Obviously, we don't want our wires hanging around like this. Take this piece. Put it on the stud. Put this piece right in there. That feels good. If either of them are broken, just use a wire tie. They need to be secure. Let's get this lower hose on here. Of course, we'll get our clamp up here. As you tighten this, you wanna make sure that the hose stays all the way level, of course. Make sure it's nice and tight. Give that a nice wiggle. That's nice and tight. Now it's gonna be time to get our water pump pulley on here, start in all of our bolts, and then we'll snug them up and torque them to 89 inch-pounds. I'm just gonna take my screwdriver and go right through here like this. It's gonna give me something to pry against. Let's get this back on here. Snug it up. Make sure it's nice and tight. Reconnect this in. Listen for a click. Let's go ahead and get this off of here.
Just a little rubber boot protects the threads. Now it's gonna be time to get our serpentine belt on the vehicle. Take a quick look at the way that I have the belt routed. Comes around the crank, up and over the water pump, to the power steering pump, all the way across to your idler pulley, over that to the alternator. Comes around that alternator then down and around your serpentine belt tensioner here and then we have our other idler pulley and then, of course, back around to the crank. With it set up the way I have it, at this point, I'm gonna relieve tension on the belt tensioner here and continue putting the belt over the last pulley which I left as the power steering pump. We'll get this just like that. Now you need to double-check your belt. Make sure it's sitting perfectly around all of your pulleys. If it seems like it's falling off on one side or you can see a rib on one of your pulleys, you know your belt's not on properly. Make sure you feel down and underneath your crank right here. That's super important and, of course, the power steering pump. That looks great. Okay. Let's squeeze this clamp and put our lower hose on there all the way on and, of course, release the clamp. Make sure it's nice and tight. Now it's gonna be time to get our fan shroud and our fan back into the vehicle. I like to put them in both at the same time just like this.
As you go down, just be careful not to let anything hit up against those radiator fins. There we are. I'm just gonna try to get this shroud so it's not falling down too much on me. And now, of course, we'll start on our fan. The hardest part is just getting this started. You have to find that first thread. Once it's on, we'll just bottom it out and then we'll snug it up. Now, we're gonna take our two mounting bolts. We'll start one end on this side, one end on the other side, and then we'll snug them up. Time for the upper radiator hose. I always just try to line it up as close as possible to how I removed it. Awesome. Okay, friends, now it's gonna be time to fill our cooling system. There's a couple different ways you can go about doing this. You can use a funnel and try to fill it up. Of course, run it for a little bit. You're gonna have to keep refilling it and keeping an eye on the fluid. You could also use a vacuum bleeder. That's the best way because it'll make sure it gets out all the air. I'm gonna go with the assumption you don't have the special tool. So, I'm just gonna go ahead and show you to fill it up with the funnel just like this. As you fill it, you wanna make sure that you fill it with the manufacturer-specified fluid which would be Ford gold. You can also use a universal coolant such as like a vanilla but you definitely don't wanna use green or Dex-Cool. With that said, go ahead and fill it up. Burp out all the fluid. Watch your thermostat. Check for leaks. Take it for a road test.
Shop Products
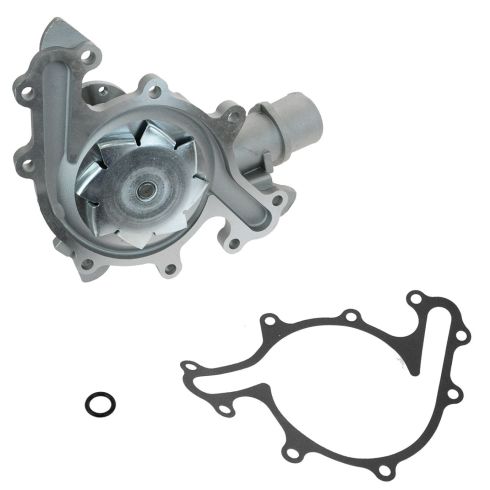
Ford Engine Water Pump TRQ WPA07380
Part Details:
- 8
- Standard
- No
- 60 mm
- 4
- Aluminum
- 5.63 in
- No
- 9
- 2
- No
- No
- No
- Cold Rolled Steel

How to Replace Water Pump Gasket 1999-2007 Chevy Silverado
This video shows you how to install new water pump gaskets on your 1999-2007 Chevy Silverado.
