How to Replace Window Regulator 2002-09 Chevy Trailblazer
Created on: 2011-05-24
Find out how to remove the door panel and the window regulator with this video if yours is rusty, jammed, or broken
-
step 1 :Remove the window regulator
- Use a flat blade screwdriver to pry up the switch panel
- Unplug the wiring harness connections from the switch panel.
- Pry up the bezel around the door latch using your flat blade driver.
- Remove the two 10 mm bolts tucked in the door pull using your socket and ratchet.
- Pull off the door panel, pulling directly outward to unclip the clips.
- Peel back your water shield carefully so you don’t tear it.
-
step 2 :Remove the window regulator
- Roll or pull your window all the way up and tape it up.
- Now you can unbolt the window from the regulator through the access ports in the door.
- Unbolt the 10 mm bolts in the door secure the regulator.
- Unplug the wiring harness to the window regulator motor.
- Pull the window regulator out of the door panel.
-
step 3 :Install the new window regulator
- Slide the new regulator into the door panel
- Bolt the tracks and motor in using your 10 mm socket and ratchet.
- Plug in your switch panel to the window regulator and roll the regulator up so you can bolt the window to it.
- Test your window to make sure it rolls up and down properly.
- Unplug the switch panel.
-
step 4 :Install the door panel
- Replace the water shield.
- See our other videos for more detailed reassembly instructions.
Tools needed
-
Socket Extensions
Flat Blade Screwdriver
Painter's Tape
10mm Socket
Ratchet
Brought to you by 1AAuto.com, your source for quality replacement parts and the best service on the internet. Hi, I'm Mike Green, I'm one of the owners of 1A Auto. I want to help you save time and money repairing and maintaining your vehicle. I'm going to use my 20 plus years experience restoring and repairing cars trucks like this to show you the correct way to install parts from 1AAuto.com. The right part, installed correctly, that's going to save you time and money. Thank you and enjoy the video.
In this video we're going to show you how to replace your front window regulator in this 2004 Chevy Trail Blazer. This is the same for any Trail Blazer, Envoy, Ascender 97X, Bravada, and Rainier. Any of these mid-sized GM SUVs. The only tools you'll need are a small and medium size flat blade screwdriver and a 10mm socket, ratchet, and extension. You might want some painter's tape to help you hold your window.
Start with a regular screwdriver, put it up under, quick little pry. Same thing here, pry that up. You can see it just has two clips, front and back. Then you want to turn it over here and you want to unplug all these harnesses. Basically, you just have little thumb tabs, pull them up. Skip that one, this one pulls out very easy. Use your screwdriver, just pry that up a little bit, and pull that off. Then over here, screwdriver on this tab, pry it up a little bit, rip it right out. This comes out. Around your door handle here, you're going to see some little tabs or little slots, you can insert a small screwdriver. Push down with your screwdriver and then pull out with your hand, work your hand underneath. Now the tab right back here, push down pull out. Then there's a couple up top, those ones you push up. One more right here. This whole thing comes out and if you have the memory seat and everything, you can now just pull this whole harness right up and out. Now there are two 10 mm bolts, one there and then one way down in there. 10 mm socket with a extension and ratchet, this one's really easy to get to. Pull it up and out. This one, I'm going to start it, screw it as much as I can.
I just felt it fall, which is okay. Once you have those out, then you can start up here with your hand, just work it underneath this triangle, pull out, and then just work your hand under the door panel. It will get harder and harder to slide under. Then you just pull, keep working your hand under. Pull, work your hand under, pull ... actually here is my bolt from that arm rest. Work our hand under, pull out, and your door panel comes off. We're going to pull back your water shield. You want to pull back carefully, you don't want to rip it. Now with your water shield pulled back, your regulator is held on by a few 10mm bolts, here, here. One up here and one down here. Then this bolt holds your window motor on. As well as ... there are two bolts that hold the regulator to the window. With the window all the way up, you can see one here. Then if you pull this back, there's one right here. Now if your window regulator is broken, usually you can move your window up and down by hand. You can move these into a position where you can get to them and loosen this. That's what we're going to do first.
We're going to loosen these two nuts. Now what we're going to do is, we're going to loosen this bolt. We're going to remove this bolt. We're going to remove this bolt. Remove this bolt, and loosen this bolt. We already know that my regulator is working fine so I'm going to ... so you can see my regulator came right down and my window is still held up. Just for safety sake, I'm going to put a piece of tape to hold that window in place. If your window motor is broken, we saw the regulator with the motor. What you could do if your motor breaks, you can cut one of these cables and then you can move the regulator up and down. Now I'm just going to use a screwdriver to help me push on the tab and disconnect the lead to the window motor. Now the regulator comes up. This is the tricky part. Maneuvering this thing out of here, out of the door. There's my original regulator, new regulator from 1A Auto. You can see everything is all the same. What I am going to do is remove these 10 mm bolts up here, then just transfer them to the same spot on my new regulator. I'm just going to make sure the regulator gets ... the regulator needs to get on the correct side of the window. I'm just going to work it up into place here. I'm just going to fast forward here as I put the other three bolts back in and then tighten all five of them up with my 10 mm socket and ratchet.
We can plug in our lead. We're going to run my window up. I'm going to loosen up this bolt. Make sure this one is nice and loose. I'm going to remove the tape. Let my window slide down, make sure it goes properly into these clips. Now I'm going to force my window all the way up. Now I'm going to tighten up these two nuts. You will notice it goes a little slower on the way up, that's just because the car is not on and the motor is not getting the amperage it needs. There we go, now we can put our water shield back up in place. One thing you want to make sure, is this hole right here is nice and clear. I'm going to fast forward here through putting the door panel back. Just in the interest to keeping the video a little bit on the short side. Once you get it off it's pretty easy to get back on. If you do want to see this in real speed or regular speed, just check out our other video for the Trail Blazer front door panel remove and replace.
We hope this helps you out. Brought to you by www.1AAuto.com, your source for quality replacement parts and the best service on the internet. Please feel free to call us toll free, 888-844-3393. We're the company that's here for you on the internet and in person.
Shop Products


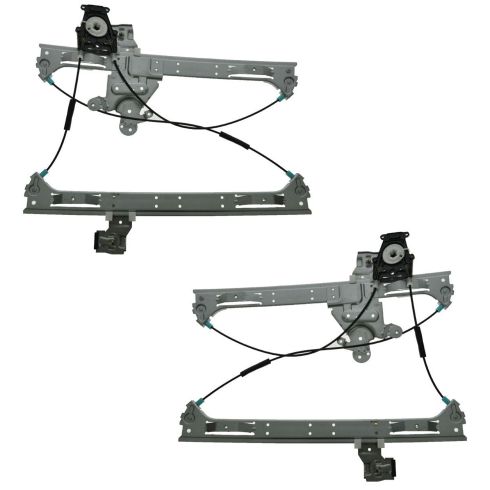
Front Driver & Passenger Side Power 2 Piece Window Regulator Set TRQ WRA50768
Part Details:
- Power
- without Motor
- 2 Piece
- (1) Front Passenger Side Window Regulator
- (1) Front Driver Side Window Regulator

How to Replace Front Window Regulator 1999-2007 Chevy Silverado
This video shows you how to install a new window regulator on your 1999-07 Chevy Silverado.
