How to Replace Window Regulator 2004-15 Nissan Titan
Created on: 2014-04-15
If your power window is slow or stuck, check out this video to learn how to replace the window regulator in your 04-15 Nissan Titan.
-
step 1 :Removing the Door Panel
- Pry off the trim panel inside the door panel with a flat blade screwdriver
- Pry off the door pull trim panel with a flat blade screwdriver
- Remove the 10mm bolt inside the door handle
- Remove the two 10mm bolts from inside the door pull
- Pry off the window switch pack with a flat blade screwdriver
- Disconnect the window switch wiring harnesses
- Pry off the door panel by hand
- Lift the door panel up off the window sill
- Disconnect the courtesy light wiring harness
- Pull the door handle cable out of the door handle
- Pull the door lock cable out of the door lock
- Carefully peel back the water shield
-
step 2 :Removing the Window Regulator
- Remove the two 10mm bolts from the window clamps
- Slide the window up by hand
- Hold the window up with painter’s tape
- Disconnect the wiring harness inside the door
- Remove the two lower regulator bolts
- Loosen the two upper regulator bolts
- Remove the three 10mm bolts from the window motor
- Pull the regulator out through the door
-
step 3 :Preparing the New Regulator
- Remove the three 8mm bolts from the window motor
- Remove the window motor from the old regulator
- Position the motor on the new regulator
- Insert the three 8mm bolts into the window motor
- Remove the two upper regulator bolts from the old regulator
- Insert the two upper regulator bolts into the new regulator
-
step 4 :Installing the New Regulator
- Push the new regulator up into the door
- Hang the regulator in place
- Insert the three 10mm bolts into the window motor
- Tighten the upper regulator bolts
- Insert the lower regulator bolts
- Connect the wiring harness inside the door
- Remove the tape from the window
- Lower the window by hand
- Insert the two 10mm bolts into the window clamps
-
step 5 :Reinstalling the Door Panel
- Put the water shield back into place
- Push the lock cable into the door lock
- Push the door handle cable into the door handle
- Connect the courtesy light wiring harness
- Lift the door panel onto the window sill, pulling the window switch harnesses through the cavity
- Push the door panel clips in
- Connect the wiring harnesses to the power window switch
- Push the switch panel in starting at the back
- Insert the 10mm bolt into the door handle
- Insert the two 10mm bolts into the door pull
- Push on the door handle trim panel
- Push on the door pull trim panel
Tools needed
-
Flat Blade Screwdriver
7mm Socket
Painter's Tape
10mm Socket
Ratchet
Brought to you by 1AAuto.com, your source for quality replacement parts and the best service on the Internet.
Hi, I'm Don from 1A Auto. I hope this how-to video helps you out, and next time you need parts for your vehicle, think of 1AAuto.com. Thanks.
In this video, we're going to show you replace a window regulator on this 2004 Nissan Titan and we show you on the driver's side but the passenger's side is a similar procedure. The items you'll need for this is a new window regulator from 1AAuto.com, flat blade screwdriver, an 8mm and a 10mm socket and ratchet.
Start off prying off this little panel back here behind the door handle and then this panel along your pull handle. Then, you want to remove this 10mm bolt, this 10mm bolt and this 10mm bolt right here. You can use a Philip's screwdriver instead if you prefer. Using a flat blade screwdriver, pry up on the side of your switch pack, then lift the front up and then slide the back forward and then push the tab on each of these harnesses and pull them free. Now, pull out along the door panel to release the clips and lift it up and out of the window sill and then push the tabs on either side of this harness and pull it free. Then, push this forward, lift it up and out and do the same thing with this one. Now peel back your water shield.
Holding your window in there's a 10mm bolt here and a 10mm bolt here. You want your regulator to be lined up with these holes so you can remove those bolts. If it's not, cut both of these cables and push your window down to that point, if your regulator won't move on its own to that point. Now, we'll fast forward as Don removes those two bolts. Then, slide the window up and out of the regulator and if your window channel isn't very tight, it's a good idea to just tape that window up into place. Pull your harness from the door and then just push this tab and pull the harness free. We'll fast forward as Don peels back the water shield a bit more to access all the regulator bolts. Now, you can access this bolt here and this bolt, you want to remove those two and then loosen these two. We'll just fast forward as Don does that. Now, remove these three 10mm bolts right here. Now lift up on the regulator so that bolt will go up and out. Then do the same thing for the other side. Now you can pull your regulator down and out through this hole right here.
If you need to swap your window motor to the new regulator, remove these three 10mm bolts and the motor will disconnect from the regulator. Now, your motor will pull down and out. Take your new regulator, push the motor into place and then replace those three 8mm bolts. Once you've tightened those up, swap over those two bolts that you used to hang the regulator in the door.
Now, feed the regulator back into the door. Then push those two 10mm bolts back through the door to hang the regulator in place. We'll fast forward as Don replaces and tightens up all of those 10mm bolts, holding the motor and regulator in place. If you've taped your window, just remove the tape and then slide the window down into your regulator. Once it's down into place and lined up, just replace those two 10mm bolts.
Then, just replace your water shield. To replace your door panel, take your lock cable, push it back down into place and then slide that back into the bracket. Do the same thing with your door handle cable. Then, reconnect your courtesy light. Then lift your door panel back onto the window sill, making sure that your switch pack harnesses are going back up through the door panel. Once you have it in place, make sure the clips line up and just hit them back in. Reconnect your switch pack and then slide this tab on the back down in first and then push the front down. Then replace those three 10mm Philip's bolts. Now push the small panel behind your door handle back into place and then the small panel in your pull handle in place and you're all set.
We hope this video helps you out. Brought to you by www.1AAuto.com, your source for quality replacement parts and the best service on the Internet. Please feel free to call us toll-free, 888-844-3393. We're the company that's here for you on the Internet and in person.
Shop Products


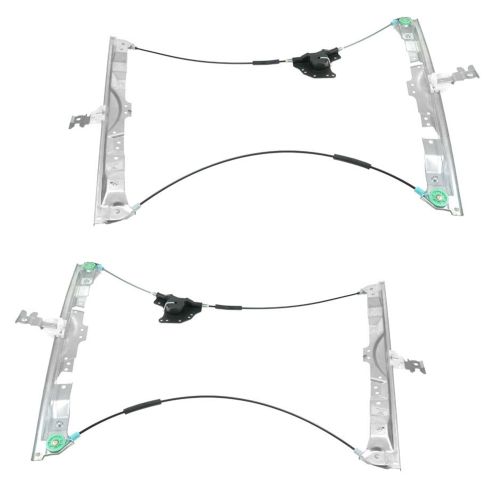
Nissan Infiniti Front Driver & Passenger Side Power 2 Piece Window Regulator Set TRQ WRA50675
Part Details:
- Power
- without Motor
- 2 Piece
- (1) Front Passenger Side Window Regulator
- (1) Front Driver Side Window Regulator

How to Replace Window Regulator 2001-06 Chrysler Sebring
How to repair, install, fix, change or replace a slow, stuck, cracked or damaged window regulator on Chrysler Sebring and Dodge Stratus, model years 01, 02, 03, 04, 05, and 06.
