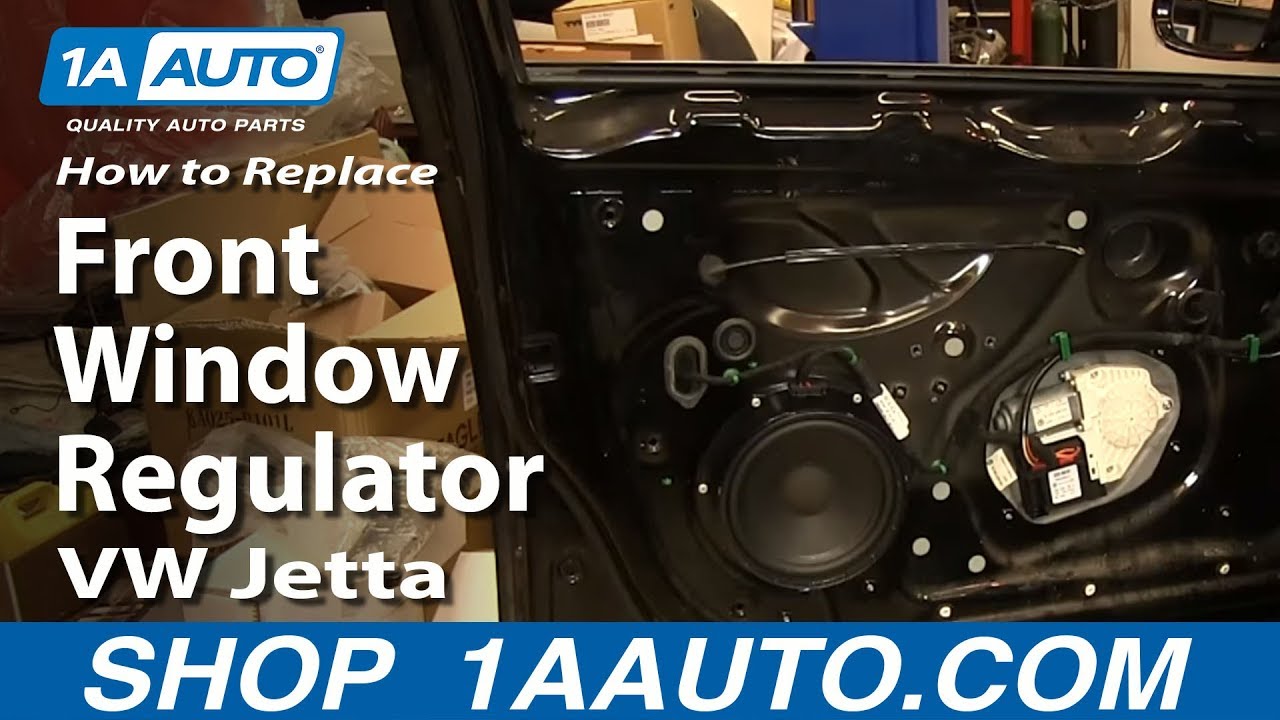
How to Replace Window Regulator 2005-10 Volkswagen Jetta
Created on: 2015-01-31
This video will reveal how to remove the door panel and how to replace the window regulator if it is slow, damaged, or jammed.
-
step 1 :Removing the Interior Door Panel
- Pry up the window switch panel with a flat blade screwdriver
- For the passenger side, pull out the pull handle
- Remove the inner handle
- Remove the two T30 Torx screws behind the inner handle
- Remove the three T20 Torx screws on the bottom of the panel
- Remove the T20 Torx screw at the front top corner of the door panel
- Pry out the door panel
- Lift the door panel up and off
- Disconnect the latch cables from the door handle
- Disconnect the speaker wiring lead
- Disconnect the trunk switch wiring harness
-
step 2 :Removing the Exterior Door Panel
- Pry off the side panel on the door
- Loosen the T20 Torx bolt from the lock bezel
- Remove the lock bezel
- Pry the door handle out
- Pry the clip on the door handle to release it from the latch
- Remove the door handle
- Remove the series of T30 Torx bolts lining the door
- Remove the T20 Torx screws from the outside of the door
- Pull the exterior door panel off
-
step 3 :Removing the Window Regulator
- Disconnect the two window motor leads
- Remove the three T25 Torx screws from the window motor
- Remove the window motor
- Loosen the two T30 Torx bolts that hold the window to the regulator
- Raise the window out by hand
- Remove the four T30 Torx bolts from the regulator
- Remove the four T30 Torx bolts from the regulator plate
- Pull the window regulator out through the door
-
step 4 :Reinstalling the Regulator
- Insert the window regulator into place
- Insert the four T30 bolts into the regulator
- Insert the four T30 bolts into the regulator plate
- Insert the window motor into place
- Tighten the three T25 Torx screws to the window motor
- Connect the window motor wiring leads
-
step 5 :Reinstalling the Interior Door Panel
- Connect the trunk switch wiring harness
- Connect the speaker wiring lead
- Connect the latch cables to the door handle
- Lift the door panel into place
- Push in the door panel clips
- Insert the T30 screws into the door panel bracket
- Insert the T20 screw at the top front corner of the door panel
- Insert the three T20 screws at the bottom of the door panel
- Slide the interior door handle into place
- Push the switch panel in place
-
step 6 :Reinstalling the Exterior Door Panel
- Lower the window onto the regulator
- Insert the two T30 bolts that hold the window to the regulator
- Line up the exterior door panel
- Push the exterior door panel into place
- Twist in the longer T30 screws to hold the exterior panel in place
- Insert the T20 Torx screw to the door panel
- Insert the T30 screws to the exterior door panel
- Latch the door handle cable to the door handle
- Push the door handle into the door
- Push the lock bezel into place
- Insert the T20 screw to the lock
- Push the side panel into place
Tools needed
-
Flat Blade Screwdriver
T20 Driver
T30 Driver
Ratchet
Needle nose pliers
T25 Torx Driver
Brought to you by 1AAuto.com, your source for quality replacement parts and the best service on the Internet.
Hi, I'm Mike from 1A Auto. I hope this how-to video helps you out, and next time you need parts for your vehicle, think of 1AAuto.com. Thanks.
In this video, we're going to show you how to replace a window regulator on this 2005 Volkswagen Jetta. It's the same part and similar process on these Jettas from 2005-2010. The items you'll need for this include a new front window regulator from 1AAuto.com, a T20 Torx driver, a T25 and T30 Torx bit and ratchet, a flat blade screwdriver, and a pair of pliers.
Pry up on the front of the switch panel, and if it doesn't pop up entirely then just pry it from the back. Then it'll pull free, and you can just pull that out. The passenger side is similar, but instead of prying out the switch panel, you want to just pry out on this pull handle. Behind it you'll see these two T30 screws. You want to slide the inner part of the handle back towards the door and out. Then there are the two T30 screws on the driver's side. Then there are four T20 screws, thre at the bottom and one up at the top inside. We'll fast-forward here as I remove all those screws. Then just pull out on the edge of the door panel. You want to do this all the way around the outside edge. Once you've released all of those clips, just slide the door panel up and out of the window sill.
Then pull the door panel back. Push out on this clip, and then unhook the cable from the door handle, and then push the tabs on either side of this harness for your speaker and just disconnect it. Then push the tab on this harness while lifting up on that purple lever and the harness will release. Then your door panel's free.Pry of this panel on the side of the door and any clips that get left behind, pull them out and then just slide them back into place on the panel.
Now, using a T20 Torx driver, you want to just go through this hole right here and loosen up the T20 Torx bolt. You want to keep loosening it until it starts to firm up. Once you've loosened that screw, you can just pull out your lock bezel and then slide your door handle forward. Using a flat blade screwdriver, pry out this clip. That'll release the door handle cable, and you can just pull your door handle free.
Now remove this series of T30 Torx bolts that line the entire door, and we'll fast forward as Mike does that. Now remove this T20 Torx screw right here, and we left one T30 screw on the side of the door just to kind of help hold the panel in place. So we'll just go ahead and remove that the rest of the way, pull out on the panel, and it'll pull free. Pull out on these red clips on the harnesses, and then push the tabs on the two harnesses connected to your window motor and pull those free. Your window motor is held in with three T25 Torx screws. Go ahead and remove those. Now pull the motor free. Now loosen up these two T30 Torx bolts on the window clamps, and then slide your window up and out.
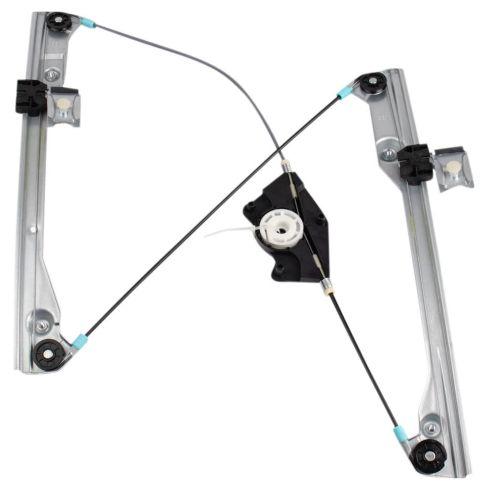
Your window regulator is held in with a series of T30 Torx bolts, and you want to remove the four that are around this plate as well, because that's part of your window regulator. We'll fast-forward as Mike removes all of those bolts. Now lift your window regulator up and out. On the left is the old window regulator; on the right is the new one from 1A Auto. You can see they're identical enough, and exactly the same.
Lower your new window regulator down into place. Once you get it lined up, just replace those T30 Torx screws and tighten them all up. Now push your motor back into place, and if it doesn't seem to be going all the way back in, you can reach onto the other side and just pull on one of the cables. Turn the crank and the motor will push in. Once it does, just replace those three T25 Torx screws and tighten them up. Reconnect your harnesses.
Now, to replace your door panel, reconnect this harness and push that purple lever back down. Reconnect your speaker, and then re-hook your door handle cable into place. Slide that back and put the cable back in. Put your door panel back up to the window sill, and make sure the clips on the edges have lined up, and then hit them back into place. Now we'll fast-forward as Mike replaces those two T30s and the four T20 screws and tightens them up. Slide this handle back into place, and then put your switch panel back down.
Now, put the vehicle in accessory, and just roll your windows all the way down so you can access those window clamp screws. Then loosen both of those up and then slide your window back down into place and into those clamps. Tighten up the two window clamps. Now make sure the three tabs on your door handle bracket are into the slots, and you want to take two of the slightly longer screws and just have those ready to start. Line up your exterior door panel and just push it into place. Make sure all the holes have lined up, and that your door handle holes have lined up, and the bottom lip is going down underneath. When it's all set, just twist in those two slightly longer screws to just kind of hold everything together. Replace this T20 screw, tighten it up, and we'll fast-forward as Mike replaces those T30 screws around the outside edge and tightens all of them up.
Take your door handle. Feed it back into the door, and then take the door handle cable and re-clip it to the handle. Make sure you slide the door handle back and into place. Then take your lock bezel and push it in. Tighten up the T20 screw on the side. Then line up the clips on this panel and push the panel back into place.
We hope this video helps you out. Brought to you by www.1AAuto.com, your source for quality replacement parts and the best service on the Internet. Please feel free to call us toll-free, 888-844-3393. We're the company that's here for you on the Internet and in person.
Shop Products


VW Golf Jetta Front Passenger Side Window Regulator TRQ WRA52710
Part Details:
- No
- Galvanized Steel
- Electric
- No

1AWRG00023 Buick Regal Century Oldsmobile Intrigue Window Regulator
Everything that you want to know about part number 1AWRG00023. It's a power window regulator for a Buick Century, Regal, and Oldsmobile Intrigue, years 97, 98, 99, 00, 01, 02, 03, 04, or 05. It fits the driver's side front door, and it includes the power window motor. New Window Regulator from 1AAuto.com.
