How to Safely Jump Start a Vehicle with Jumper Cables
Created on: 2016-08-19
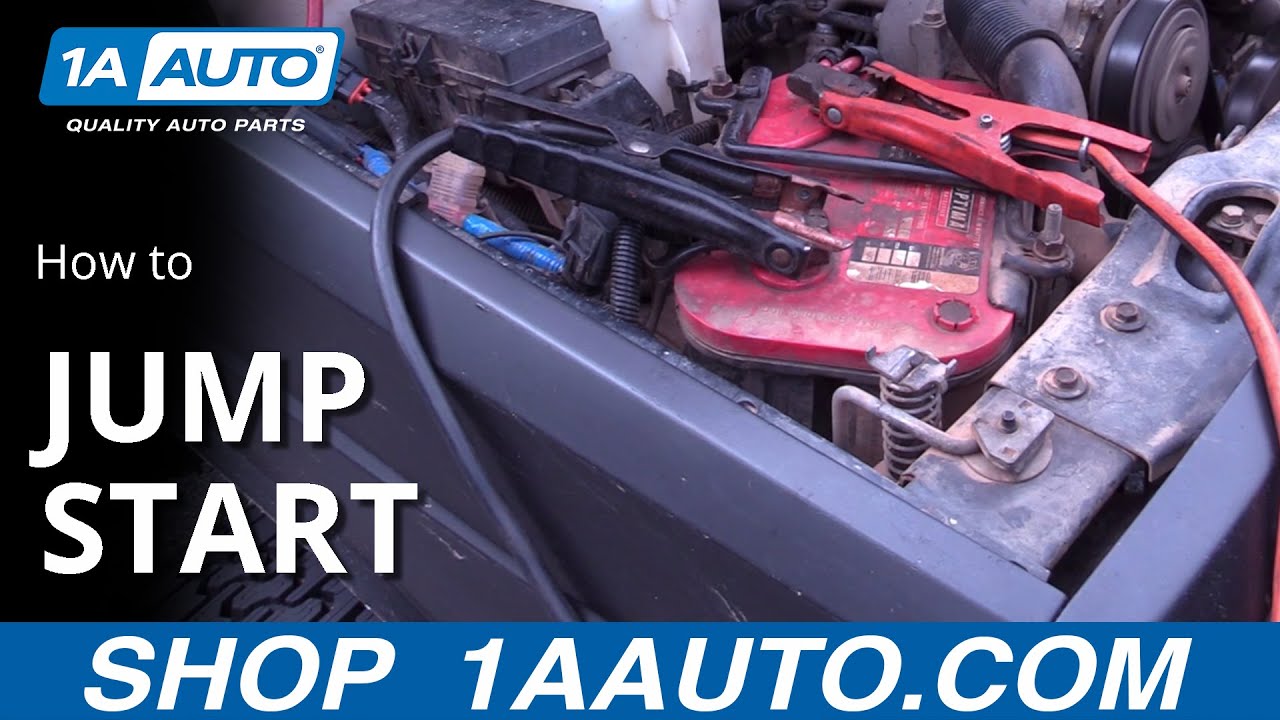
How to jump start and locate your negative and positive battery connections so you can jump start your vehicle safely
-
step 1 :How to Jump Start a Vehicle
- Pop the hood
- Attach the positive cable to the positive terminal of the bad battery
- Attach the negative cable to a ground on the bad vehicle, but do not ground near anything that moves or is electric
- Attach the opposite positive cable to the positive terminal of the good battery
- Attach the opposite negative cable to the negative terminal of the bad battery
- Start the good vehicle and rev to get a few more amperage
- Start the bad vehicle
- Shut off the good vehicle
- Remove the cables
- Allow the bad vehicle to run for at least 30 minutes
Brought to you by 1AAuto.com, your source for quality replacement parts and the best service on the Internet.
Hi, I'm Mike from 1A Auto. I hope this how-to video helps you out, and next time you need parts for your vehicle, think of 1AAuto.com. Thanks.
In this video, our 2004 Ford Ranger's battery has gone dead and we need to jump start it. For this particular vehicle, we have our ‘04 Ranger as well as our ‘96 Jeep Cherokee. This is pretty universal information. The only real differences are going to be where the battery is located in your dead vehicle, as well as the vehicle that you're using to jump.
It's not uncommon for batteries to go dead when they get older and weak, or you may have forgotten a light on or not closed the door fully and cause the battery to die while were grocery shopping or overnight, and you don't find out until you get back to your car or you go to leave to work in the morning.
Once the vehicle's been jump started, it runs off of alternated power, so the battery is almost entirely out of the equation. This jump start should give us enough power to get our vehicle running and rely on alternated power to get us where we need to go make our repair.
We'll start by opening the hood in both vehicles. Ours are nose-to-nose just because the battery location lined up that way. Open the hood on both of your vehicles and park them in a way that your cables will reach.
I have Matt with me to help with the jump starting. What we're going to do is hold one end of the cables. This end is going to end up going on to our good battery. He's just going to make sure that those don't make contact, because there's still a little bit of power in the bad battery that could come back through and create a spark. We'll attach the positive cable to the positive terminal on our battery, and we'll attach the ground cable to a metal ground somewhere on the engine or the chassis of our bad vehicle. In this particular vehicle, I have a good ground here on the EGR line. You want to make sure that you don't ground to anything that has any kind of electronics like a module or a pulley or anything down by the serpentine belt that's going to spin when we start our vehicle and catch the wires.
Now that our bad vehicle is set up, we'll take the other end of our leads and attach them to the positive and negative terminals of the vehicle we'll be using to jump start our truck. Now that all of our cables are hooked up, I'm going to get in my truck, start it up, we'll let it run for a few minutes, and after it's powered up this battery a little bit, we'll have Matt getting to this vehicle.
I'll rev the engine a little bit to produce some more amperage out of my alternator, and Matt will try starting the truck. Make sure that the jump vehicle, now that it's been running and giving some power to our dead battery for a while, has all of its accessories off—Head lights, wipers, any electric components you have. Unfortunately, the air conditioning is going to have to go off. We'll shut off our radio if you're optioned to do so.
Make sure that your vehicle is in park, or in this case that we have the e-brake on in our standard truck. Now we'll rev up the engine to send a little more amperage into the other vehicle, and Matt's going to try and start that truck.
Now that we've got our truck started, we shut off our jump vehicle, we're going to remove these cables, and the best thing to do is to allow this truck to run for 30 minutes to let the battery charge up. Driving around is the best as we're going to go up and down through the revs, and allow that alternator to produce the optimum amperage to charge this battery backup. If we're bringing it home or to a shop to get the battery checked or replaced, we can just drive it there, because we know that we're going to be ready to swap it out anyway. We'll remove the grounds from both sides so we have no flow of current. We'll remove the positive ends. Close the hood on both vehicles, and we're ready to get back on the road.
Thanks for tuning in. We hope this video helped you out. Next time you need parts for your car, please visit 1AAuto.com. Also check out our other helpful how-to and diagnosis videos.

Why Tire Pressure Is Important
How to check your tire pressure, and why properly inflating your tires will reduce your help your fuel mileage
