
How to Upgrade to Tow Mirrors 1997-2001 Dodge Ram Part 2
Created on: 2011-09-16
Check out part 2 in this video series teaching you how to install upgraded towing mirrors on your 97-01 Dodge Ram.
-
step 1 :Beginning the Repair
- This is Part 2 of a two part video
- Please consult Part 1 for prior instructions
- Perform the steps outlined in Part 1
-
step 2 :Connecting the Mirror Light Wiring
- To connect the mirror to the signal lights, connect the passenger mirror to the brown wire with a red stripe and the driver mirror to the green wire with a red stripe
- To connect the mirror to the running lights, connect both mirrors to the black wire with a yellow stripe
- Run the ground wire to the screw underneath the dash
- Strip the end of the ground wire with wiring pliers
- Twist the end of the ground wire
- Fold over the end of the ground wire
- Push the ground wire into an eye terminal
- Crimp the terminal onto the ground wire
- Put the terminal into place on the dash
- Insert the screw through the wire terminal
- Put a wire tap onto the desired lighting wire
- Put a mirror wire into the wire tap
- Press the wire tap together with pliers
-
step 3 :Installing the Towing Mirror
- Lift the towing mirror into place
- Thread the wiring harness through the door
- Put the mirror into place using the studs
- Thread one 10mm nut onto a mirror stud to hold the mirror in place
- Make sure the wires are routed correctly and are not being pinched
- Remove the 10mm nut
- Put the reinforcement plate into place
- Fasten the three 10mm nuts onto the mirror
- Connect the mirror lighting wires
- Reconnect the battery
- Turn the vehicle on
- Test the lights
- Turn the vehicle off
- Fasten the wires with wire ties
-
step 4 :Reinstalling the Door Panel
- Connect the speaker wiring harness
- Push the speaker into the door
- Insert the four Phillips screws into the speaker
- Push the clips into the door panel
- Lift the door panel into place
- Connect the mirror switch wiring harness
- Connect the window switch wiring harness
- Push in the door panel clips
- Insert the Phillips screw into the top front corner of the door panel
- Push the door pull into place
- Insert the two Phillips screws into the door pull
- Start the 10mm bolt into the door handle
- Put the door handle into place
- Tighten the 10mm bolt into the door handle
-
step 5 :Reinstalling the Dash Panel
- Put the dash panel into place using the locating tabs
- Insert the three Phillips head screws into the dash panel
-
step 6 :Reconnecting the Battery
- Reconnect the negative battery cable if you haven't already
Tools needed
-
Wire End Cutters
Wire or String
Socket Extensions
Phillips Head Screwdriver
Putty Knife
Wire Ties
10mm Socket
Door Panel Removal Tool
Ratchet
Needle nose pliers
Brought to you by 1AAuto.com, your source for quality replacement parts and the best service on the Internet.
Hi, I'm Don from 1A Auto. I hope this how-to video helps you out, and next time you need parts for your vehicle, think of 1AAuto.com. Thanks.
Here's part two of putting the upgraded tow mirrors on our '98 Dodge pickup. Here's a quick refresher of the tools that you're going to need. Basically, it's what you need to get the door panels and mirrors on and off as well as a couple of little wiring accessories.
Where we'd left off, we routed the wires and bolted the emergency brake pedal back into place. As a quick reminder, you want to decide if you want to hook your lights on the mirror, if you want to hook them up to the blinkers or to the parking lights. I prefer the parking lights so that they're on all the time so you can judge the width of your vehicle. Here, you can see if you're looking up to hook up your blinkers, you want your right hand signal hooked up to the brown with red stripe, and your left hand signal, hooked up to the green with the red stripe. If you're hooking them up to the parking lights, you want to hook them both to the black with yellow stripe.
First, you want to determine where you're going to route the wire to. This is going to be my ground wire so I route it right to a metal piece of my dash where there's a screw so I can put a terminal on it and the screw can go through. The next thing, choose the correct terminal. You want it to do what you needed to. In this case, I want to put a screw through so it's an eye terminal. There's all kind of different terminals and then also, you want to have the right size for the wire. This is a very small wire because it's an LED. These are the smallest gauge I can get as far as the terminal. Then, you want to have the right tool, okay? These are wiring pliers. The first thing you want to do is strip a little bit of the end off. I have to redo it, because the wire again is so small. I guess I have to go a little bit of an alternate way. Just trying to cut through the casing a little bit and then pull the pieces off. There's my wire exposed. I'm going to twist it because it's a stranded wire and because my terminal is a little bit big. I'm going to actually fold it over on itself. Then you want to take your terminal and put it in the crimping jaws. Make sure the crimping jaws are right over the metal part. You don't want to just crimp the plastic here. There's metal inside there so you want to see the metal. Put your wire in, so you make sure that the wire is the way into the metal terminal. I'm going to squeeze. Use the sharp pointed part of your crimp to really tear down. Test it. Pull it. Don't pull it really hard, but make sure you've got a good tight crimp on there. Now, you can see, I have a good tight ground of that wire in the terminal and screwed into the metal.
This is a wire tap and it's obviously designed to connect two wires. If you open it up, you can see that one passage goes straight through, the other passage is blocked. The way it's designed is if this is your existing wire in your vehicle, you put the tap on to it and then, you take your new wire, and put it right down in here until it stops. Then, take your pliers and drive the splice right into the wires like that and then you can close it off. Inside there, it's spliced, but you have nothing. There's no wires or anything that can short or anything like that. Here, you can see those two blue splices. Those are both my mirror wires, they're spliced into that black with yellow stripe wire.
Here's a new mirror from 1A Auto. We're going with the towing mirror upgrade on this truck. We do sell the regular replacement ones just like the original, but this is the later style, slide out or flip out tow mirror. It offers you a good angle for viewing, for towing and then it also has . this vehicle has the clearance light. We do offer these, as well as, just the regular replacement, as I said. Obviously, to reinstall, we're going to put our harnesses through. Just to hold it for a moment and just thread a bolt on here. These mirrors have a tendency for the wires to get pinched when you're installing them. After you put that little nut in, just separate your mirror out from the car a little bit, and look down in there. You can't really see what I'm doing, but you just make sure that your harness is pushed out of the way, and it's not close to either of the mounting studs. Make sure it routes right between them, and it doesn't get too close to either one of them. Because these mirrors are so big, we provide you with a reinforcement plate. Run the harness through that. I'm going to speed up here, and laugh at myself a little bit as I try and contort myself, getting this mirror on by myself. With these upgraded tow mirrors, they require that reinforcement plate, so it's a little bit of a challenge to get the plate on there and start the nuts, but that's basically what I'm doing. If you're just replacing it with a regular replacement OE style, then you don't even have to worry about the step, it's just putting the mirror on and starting the three nuts. Again, be careful with your wiring harness. Don't pull it hard through or pull it tight. You just want to make sure it's through all the way. You don't want to pull it tight, because pulling it tight will pull it against one of the mounting studs and you could pinch your wires. Continue to fast forward, as we just tighten up the three 10 millimeter nuts that hold it. You want to tighten this up firm. Be careful not to over tighten them though. This is all designed to plug in. We're going to plug in our mirror and our optional lights which I wired before.
So there's our new mirror on the truck, it fits very nicely. We're going to turn the parking lights on. The clearance light works. The mirror folds out. The clearance light stays out there. Once you've made sure everything works, use typical plastic wire ties to tie up your extra there. Make sure you put one down in here so these wires can't interfere with your window and then up underneath here, Im going to put more right up there, which keeps these wires from getting down, and then one on to the wire, up where the harness is as well.
The clearance light's on and the headlights are on. It's the same thing on this side: clearance light with the headlights. Obviously, what I've shown you mostly in this video was doing the driver side. The passenger side is all the same as far as taking the door panel off and putting it back on. The only difference is you have to route the wire a little further and then I ended up putting the grounds to the same screw and I did tap into the same wire for both lights. Everything works pretty well and now, we'll get into closing the dash back up and putting the door panel back on.
Put our speaker through. Pull the harness through. Speed up as we use the four Phillips screws to reinstall the speaker and reconnect it. On the back side, you can see we replaced all our clips. Put it in place, connect our mirror first, and connect our power window switch. Put the panel in place and our lock through. Then, you can peek behind. Make sure the pins are lined up with the hole and then, just push them in all the way around. Just kind of speed up. Put in that top screw, and I apologize. I didn't do a very good filming that. It was kind in the way. Then, put in your door pull cup and replace the two screws for that. Once that's done, then you take your door handle and the 10 millimeter bolt, put that back in, tighten up nice and firm and you should be all set.
This panel's got some clips on it. Let's put it in. See these red tabs? Watch it go right up into there. Just fast forward through putting those three screws in, reconnect your battery, if you haven't already, and you should be all set.
We hope this video helps you out. Brought to you by www.1AAuto.com, your source for quality replacement parts and the best service on the Internet. Please feel free to call us toll-free, 888-844-3393. We're the company that's here for you on the Internet and in person.

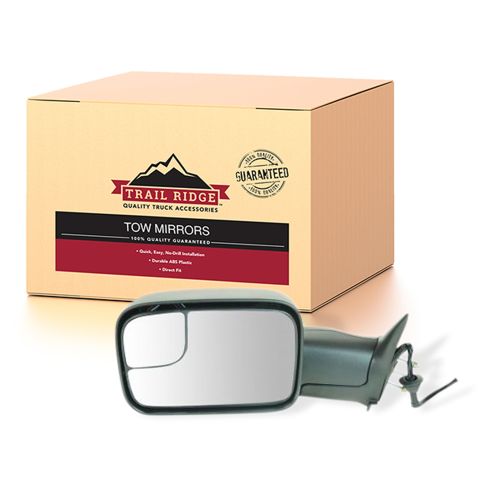
Dodge Ram 1500 2500 3500 Driver Side Mirror Trail Ridge TR00100
Part Details:
- Flip-Up
- Towing
- Features and Benefits
- Black
- Manual
- Electric
- Yes
- No
- Black
- 5
- No
- No
- Textured
- Textured
- No
- Plastic
- 43.7 in
- No
- No
- No
- No
- No
- No
- No
- Clear
- No
- 3
- No
- Yes
- No
- Flat
- No

How to Replace Mirror 1997-99 Toyota 4Runner
If the side view mirror is broken, this video shows what the steps are to replace it
