Replaces
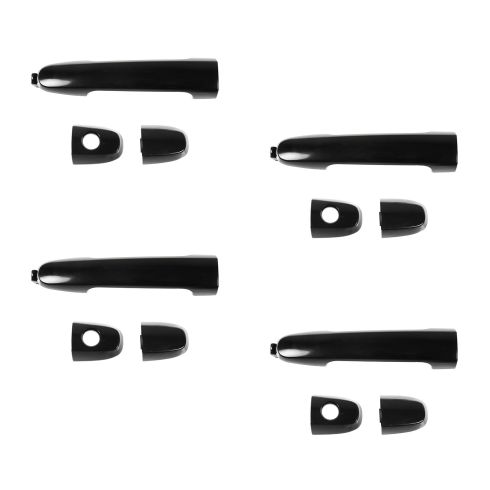
Part Details
Specifications
Paint To Match Note:
"Paint-to-match finish" refers to a smooth, paintable surface. This item is not painted. Paint offers better coverage and adhesion, but it is not necessary for installation.
Attention California Customers:
 WARNING: This product can expose you to chemicals including Butyl benzyl phthalate (BBP)d, which is known to the State of California to cause birth defects or other reproductive harm. For more information, go to www.P65Warnings.ca.gov.
Lifetime Warranty
This item is backed by our limited lifetime warranty. In the event this item should fail due to manufacturing defects during intended use, we will replace the part free of charge. This warranty covers the cost of the part only.
FREE Shipping is standard on Orders shipped to the lower 48 States (Contiguous United States). Standard shipping charges apply to Hawaii, Alaska and US Territories. Shipping is not available to Canada.
Expedited is available on checkout to the United States, excluding Alaska, Hawaii and US Territories as well as P.O. Boxes and APO/FPO/DPO addresses. Final shipping costs are available at checkout.
Created on:
Tools used
What's up, guys? I'm Andy from 1A Auto. In this video I'm going to show you how to replace the outside door handle on this 2010 Toyota Rav4. If you need this part or other parts for your vehicle, click the link in the description and head over to 1AAuto.com.
We want to take this little cover off, or little grommet. Just take a trim tool, just get underneath there or even a straight blade screwdriver. Try to get that off. Pull that off, and then inside there there's a screw. Now the screws not going to come out, but you just want to loosen it up. I'm going to use a T30 socket, extension, and a ratchet to loosen that up. That loose, then we should be able to take a trim tool and just get underneath here. Just be careful not to scratch the paint. Just taking the key, just going to wiggle this a little bit.
All right. There we go. Wasn't all the way loose. So take the key out, just grab the trim tool, slide this out. Watch out for the gasket. You can slide it right out. Just a little tip for you. Sometimes it's difficult with this screw, it doesn't really want to come out when you're trying to take this housing off. Just take a little magnet, then you can grab the screw and then it just makes sliding this out a little bit easier. And you can grab the handle, and just slide it towards the outside of the door, and then it pulls right off. Don't forget the gasket. Take this cover off. Just take the pocket screwdriver, get underneath here, and it pops right off.
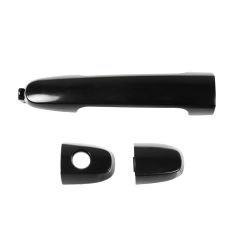
Here's the old part. Here's the new door handle from 1AAuto.com. This door handle happens to be a paint to match, so you're going to want to paint these to match the vehicle. It comes with the driver's door cover so that you have the key hole, or you can put this on the passenger side, or even any of the back doors with this cover. Get yours at 1AAuto.com, and you'll be ready to rock and roll.
Take the door handle, I'm just going to slide this into position. Make sure you have the gasket for this, so you can actually put the gasket there. All right. So we're going to angle this side in just slightly, get it past a certain point, and then you're going to angle the back part in, and then just slide it in. Oops. You got to push it down and then slide it in like that, then your gasket's all in position and it's working good. Now take the cover. I'm just going to slide this side in first, just like that, and then lock it in place. That's good. You can slide this back in position. Just like that. I'll take the T30 socket and the extension, and just get this screw started. And just snug this up, not too tight. Slide this cover back on. Lock it in place.
Thanks for watching. Visit 1AAuto.com for quality auto parts shipped to your door. The place for DIY auto repair. And if you enjoyed this video, please click the subscribe button.