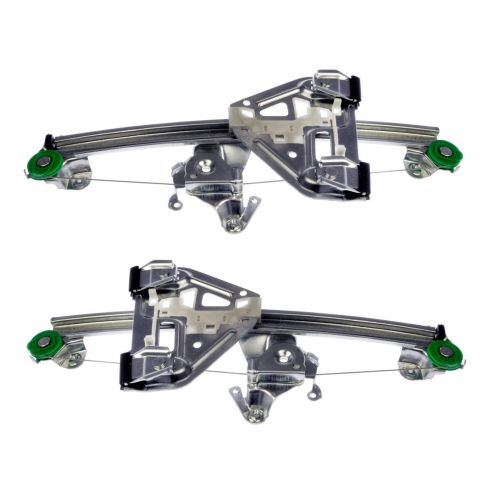
Kit Includes: (1) Rear Driver Side Window Regulator (1) Rear Passenger Side Window Regulator
Quantity: 2 Piece
Operation: Power
Product Features
Heavy Duty: Engineered to perform under harsh conditions
Improved Design: Upgraded components and materials to prevent premature failure
Installer-Friendly: Application Specific Design
Item Condition:New
Attention California Customers:
WARNING: This product can expose you to chemicals including Lead and Lead Compounds, which are known to the State of California to cause cancer, and birth defects or other reproductive harm. For more information, go to www.P65Warnings.ca.gov.
Lifetime Warranty
This item is backed by our limited lifetime warranty. In the event that this item should fail due to manufacturing defects during intended use, we will replace the part free of charge. This warranty covers the cost of the part only.
FREE Shipping is standard on Orders shipped to the lower 48 States (Contiguous United States). Standard shipping charges apply to Hawaii, Alaska and US Territories. Shipping is not available to Canada.
Expedited is available on checkout to the United States, excluding Alaska, Hawaii and US Territories as well as P.O. Boxes and APO/FPO/DPO addresses. Final shipping costs are available at checkout.
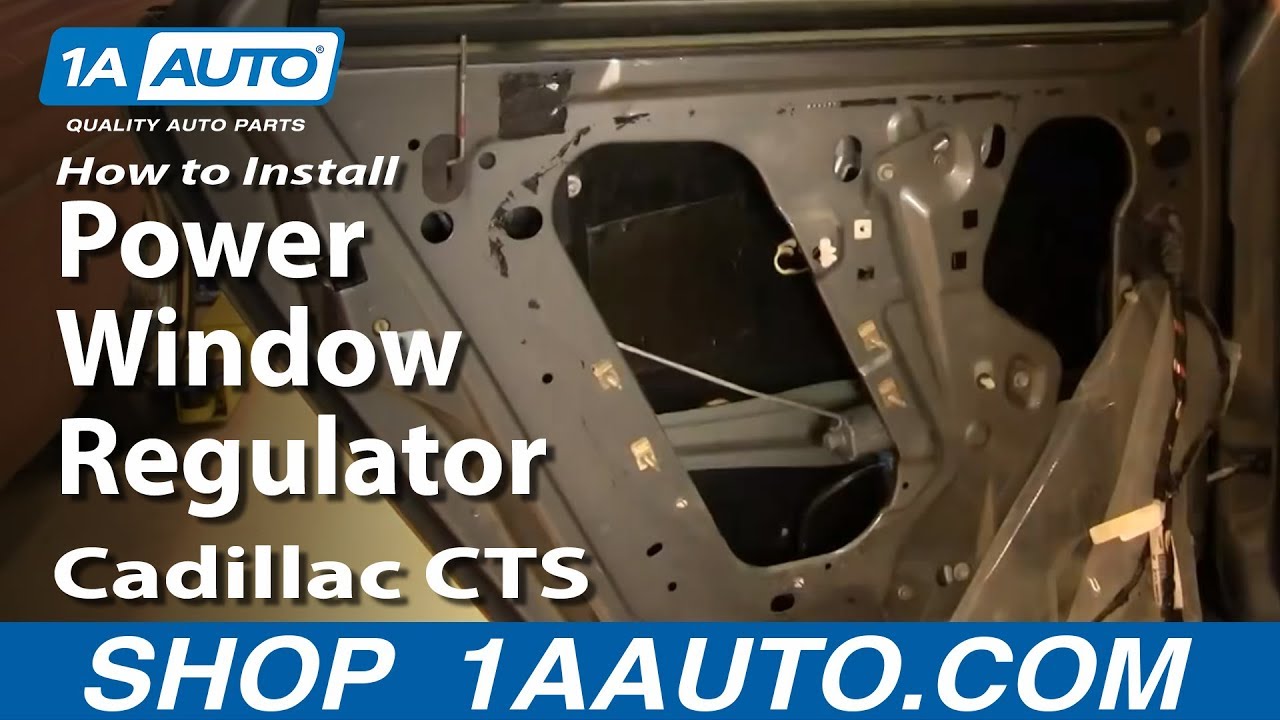
How To Replace Rear Power Window Regulator 2003-07 Cadillac CTS
Created on:
Tools used
Socket Extensions
Phillips Head Screwdriver
Putty Knife
T30 Driver
10mm Socket
Ratchet
Needle nose pliers
1. Remove the door panel
Unclip the door lock tab.
Use a putty knife to unclip the door handle bezel from the door.
Pry off the access panel behind the door pull.
Remove the exposed Phillips screws.
Unbolt the door handle with you 10 mm socket and ratchet.
Unhook the door latch rod from the door handle.
Unclip the wire from the stud in the exposed bracket.
Use a 10 mm socket and ratchet to remove the nuts securing it and set the bracket aside.
Carefully peel back your water shield.
2. Remove the window regulator
Use a 10 mm socket and ratchet and extension to disconnect the window from the window regulator and tape it up out of the way.
Unbolt the window regulator and motor from your door.
Remove the assembly from the inside of the door.
Use a T30 Torx driver to unbolt the motor from the old regulator and install it on the new regulator.
3. Install the new window regulator
Bolt the window regulator into the door using your 10mm socket and ratchet.
Untape your window and carefully lower it into the window regulator.
Secure with your 10 mm socket and ratchet.
Replace the water shield.
Bolt the bracket back to the door with your 10 mm socket and ratchet and clip the wiring harness to the stud.
Hook the door handle to the latch rod and bolt that down to the door as well, using your 10 mm socket and ratchet.
4. Put the door panel back on
Clip the door panel back onto the door.
Secure the two Phillips screws and clip the access panel back in behind the door pull.
Clip the door handle bezel and door lock tab back on.
Brought to you by 1AAuto.com. Your source for quality replacement parts and the best service on the internet. Hi, I'm Mike Green. I'm one of the owners of 1A Auto. I want to help you save time and money repairing and maintaining your vehicle. I'm going to use my 20 plus years experience restoring and repairing cars and trucks like this to show you the correct way to consult parts from 1AAuto.com. The right parts installed correctly, that's going to save you time and money. Thank you and enjoy the video.
In this video I'm going to show you how to replace the rear power window regulator in this Cadillac CTS. This is an 06. This procedure is the same for any 03 to 07. We do the driver side in this video but the passenger side is the same procedure. Tools you'll need are putty knife or similar flat blade tool. A Phillips screw driver. A 10 millimeter socket with a ratchet extension. A T30 Torx Bit with driver to change the motor on to the new regulator and a pair of pliers. I'll use a kind of household putty knife. Just pull up on this lock. A little key way there. Okay, lock button comes off. Then underneath you kind of pry up and you get it started coming out. I'm using pep towel to protect my interior. The same thing over here, kind of pry up. Hold the door handle out a little bit and pull kind of down and out at the same time. Okay, and pull the bezel off. Right in behind your door pull. It's the little oval shaped kind of plug. Use your putty knife or a screw driver. Pull that out. Behind there, you'll see two Phillip screws. We'll fast forward as we take those two screws out. Try not to drop them down in. I actually do. I dropped one of them down in but it's not a big deal since we're taking off the door panel anyways, easy to get back. Screws out. Just kind of work your hands in behind. Give the door panel a tug. Kind of work it up and it comes right out and my screw just fell down into the insulation here.
To remove your door handle, 10 millimeter socket with ratchet or a wrench. Do the bolts. Panel slides forward and then it comes off and then you basically tilt your cable down and unhook it from the rod. Then your 10 millimeter ratchet again, you're going to want to remove this whole plate here. Next just pry off the clip that holds the wire onto the stud. Pry it off then use your 10 millimeter wrench again. Remove the four knots to hold that panel in place and then just kind of pull it down and hang out of the way. Now you'll carefully hold here. Water shield off. I'm just going to take as much as with you if you can. Okay, we'll speed up here and I do stress.
Do this carefully so you don't rip that water shield. Okay, these two nuts, you need to loosen one there and one inside there and those will release the window from the window regulator. Then there are four bolts. You want to remove them all. If your window is stuck in the up position, you want to remove them all. A lot of times what happens on these windows is this cable snaps and then you can just kind of reach in and move the window up and down just with your hand. Okay, 10 millimeter socket with an extension and a ratchet. I'm just going to fast forward here as I remove ... I'm sorry you loosen the two nuts that hold the regulator to the window and then remove for the bolts that hold the regulator rail in and then there is one more bolt hiding behind that control box there. You also need to use a pair needle as pliers. Pinch this in. Lose back and hold further and then pull the bolt here.
Now your regulator comes out. Okay, lean for your power window motor right here and a push on a little tab. Just connect it. Just use my Phillips screw driver and push that tab down and out. Okay, as we get it out. Here's my old regulator with the motor on it. New regulator from 1A Auto, okay. You can see ... what ... all you would have to do, this is absolutely fine so I'm not going to take it apart and I'm not going to replace the regulator. It doesn't need to be replaced but to show you, you want to take a T30 Torx Bit that goes on the ratchet handle and remove the screws here. Obviously, I'm not going to do this part because it's not really necessary with the regulator but you would transfer your motor onto the good regulator, okay, and then reinstall it. For reinstallation, it's kind of better. You'll see that the new regulator is down a little bit. That allows you to put the regulator in and then slide the window down into it. Put your regulator in, okay. Now, you just have to make sure that it goes.
Okay, I want to speed it up here. You do want to have your regulator. You want to have it down about an inch before you install it and if your regulator is all the way up like mine was when I started, what you want to do is just hook your door panel back up to that control panel and turn your key on and you can move the regulator down a little bit. Also, during this, I do ... alright, plug the lead back into the window motor and then get all five bolts started first and then tighten up each one. When you tighten them, you want to make them nice and firm but you don't need to over tighten them. Okay, we'll slide the window down. Make sure it's down and in here and clamped really well. Tighten these up. Kind of speed through here.
Again, make sure that you connect the lead to your window motor and then put your water shield in place. Make sure that you put the door latch rod through the water shield. Put the control box back in place and then bolt on or reattach that plate with the connector in it. Make sure you tighten those 10 millimeter nuts up good and firm and then you're all set to put your door panel back on. Got a couple of longer locating tabs, okay. It'll go in those oblong holes down here. It goes into hole up here. Just kind of look that in. Get this loosen up a little bit to the top there. Pins in. Use your Phillip screws. Again, we'll fast forward as I just put those Phillip screws in and tighten them up nice and firm. Just turn back on them. Make sure your lock button on. Get that on to this piece on here. Put back in the place and put it back on it here.
We hope this helps you out. Brought to you by www.1AAuto.com. Your source for quality replacement parts and the best service on the internet. Please feel free to call us toll-free 888-844-3393. We're the company that's here for you on the internet and in person.
WRA50242
In Stock
Product Reviews
Loading reviews
4.80/ 5.05
5 reviews
5 Stars
4 Stars
3 Stars
2 Stars
1 Star
4
1
0
0
0
Shipping was fast
K
September 13, 2017
shipping was fast. products were great. great to do business with.
Working great
M
July 19, 2018
Ordered the pair to replace the broken one on driver's rear. Read that if one goes the other will follow. Watched to how to video from A-1. Very good tutorial. Took me about thirty-five minutes to replace each one. So far all is good.
One Happy Customer !
Steve
September 3, 2018
The Cadillac Dealership wanted close to $800 to replace the window regulator in my wife's Cadillac. I ordered the part from 1A Auto and watched the installation video. The part came quickly and after a 45 minute installation, the window was fixed at a cost of less than 1/10th of the dealership estimate. I'm one VERY happy customer will return to 1A Auto for any future parts needs. The window works perfectly and the installation was snap (even for a 65-year-old, who stopped "twisting wrenches" years ago) Thanks 1A Auto !!
Great product
S
February 3, 2020
Need to emphasize to Bob to go with the regular
Samuel
April 13, 2022
Easy to install after watching your video!
Recommend to all shade tree mechanics!
Saves plenty of money
Sam V
Customer Q&A
No questions have been asked about this item.
Customer service
877-844-3393
Monday - Friday 8:00am - 9:30pm ET Saturday - Sunday 8:00am - 4:30pm ET
Enter Vehicle Year Make Model
Specify your vehicle's year, make and model to guarantee fit.
Year
Make
Model
Options
Drivetrain
This part doesn’t fit a . Select from parts that fit.