Replaces


Frequently bought together
Part Details
Product Features
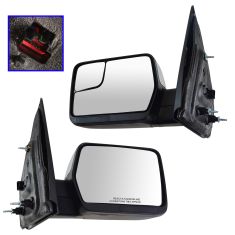
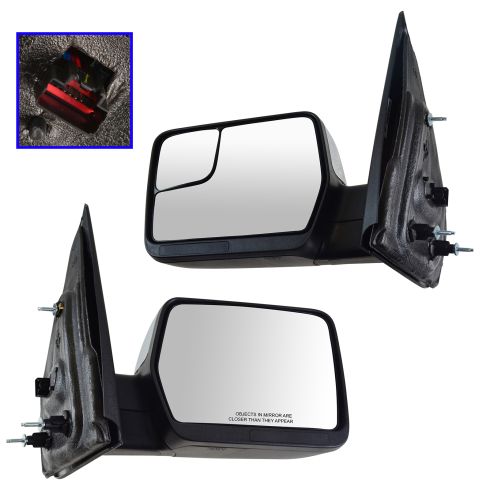
TRQ side mirrors and mirror components are designed to match the function, fixture, and performance of the original version for easy installation. TRQ mirrors are DOT certified, comply with all federal safety standards, and are independently lab tested to ensure our products comply with all government regulations. All products are fit and road-tested in our Massachusetts R&D facility to ensure we deliver on our promise of Trusted Reliable Quality.
Exact fit - To obtain proper fit and function confirm your vehicle has the exact mirror options listed.
Attention California Customers:
 WARNING: This product can expose you to chemicals including Chromium (Hexavalent Compounds), which is known to the State of California to cause cancer, and birth defects or other reproductive harm. For more information, go to www.P65Warnings.ca.gov
Lifetime Warranty
This item is backed by our limited lifetime warranty. In the event that this item should fail due to manufacturing defects during intended use, we will replace the part free of charge. This warranty covers the cost of the part only.
FREE Shipping is standard on orders shipped to the lower 48 States (Contiguous United States). Standard shipping charges apply to Hawaii and Alaska.
Shipping is not available to a P.O. Box, APO/FPO/DPO addresses, US Territories, or Canada for this item.
Expedited is available on checkout to the United States, excluding Alaska, Hawaii.
Final shipping costs are available at checkout.
Created on:
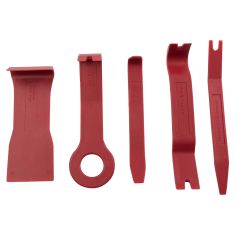
Tools used
Brought to you by 1AAuto.com, your source for quality auto replacement parts and the bets service on the internet. Hi, I'm Mike Green. I'm one of the owners of 1AAuto. I want to help you save time and money repairing and maintaining your vehicle. I'm going to use my 20 plus years experience restoring and repairing cars and trucks like this to show you the correct way to install parts from 1AAuto.com. The right parts installed correctly, that's going to save you time and money. Thank you and enjoy the video.
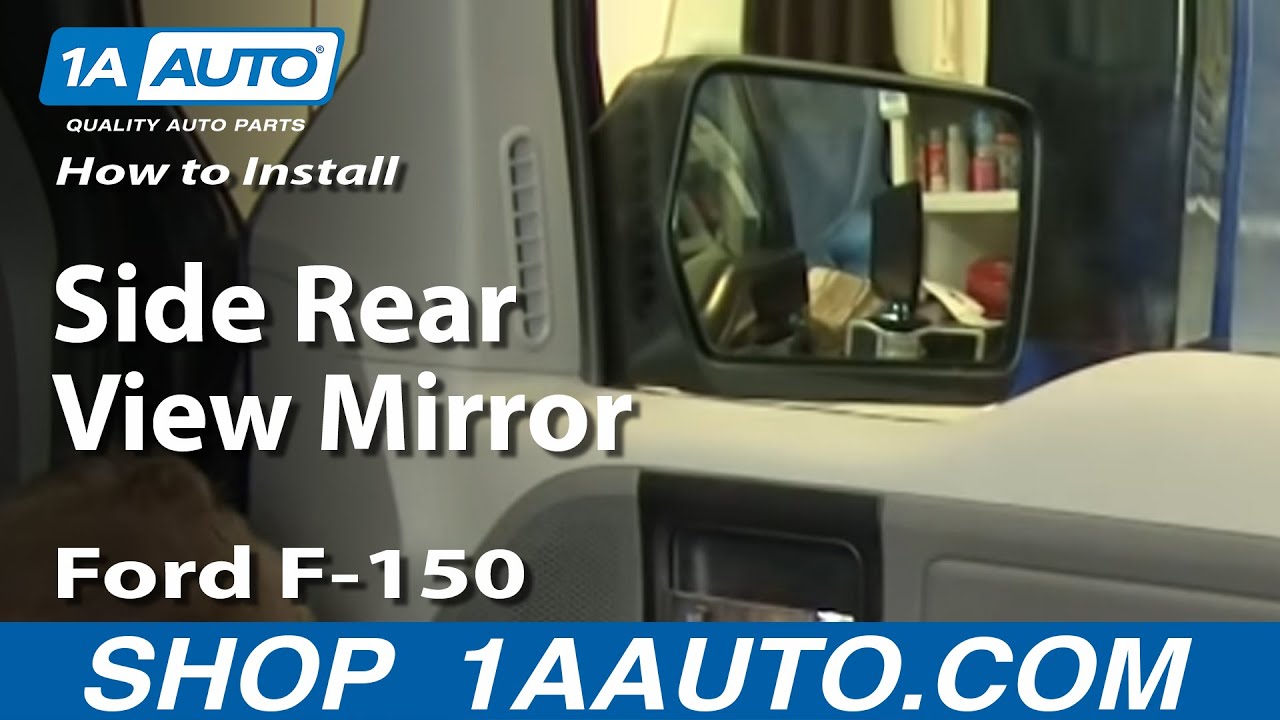
In this video, we'll be showing you how to replace the outside mirror on this 2006 Ford F150, same as any '04 to '08 F150. The tools you'll need are metric sockets from 5 millimeters to 11 millimeters, for the door panel 7/32 and 5/16 works for some of those, a small flat blade screwdriver and a putty knife and a rag to protect your paint. Okay, to get the mirror off, you do have to remove your door panel. I am fast forwarding it through right here. You can check out our other videos to see how you remove the door panel. You might be able to pick up enough here from this footage. It is a few screws and then you lift the door panel basically up and off. Bear with this for another few minutes and you'll see how to do the mirror. Okay, the mirror is up in here. We're going to pull off this piece of plastic carefully. You don't want to rip it. The harness plug is in here. You put your thumb in there. Push that little tab down there and then pull it out. Then an 11 millimeter wrench.
Okay. Take those off. Then there's another clip holding on top. Okay, here's our broken mirror out. There are two designs, one has this second stud in it. This one happens to be that second design but it goes in just fine. The top here has a clip. Okay, put the mirror in. Clip it. Then lock the bolts on. Then these should be tight but not incredibly tight, probably 20 to 25 inch pounds. This one goes in a little further. Okay. We'll plug it in. Do a test. It works well. Now, we'll put the gasket back on and basically what I like to do is do a reference point here, down there and just stick it all along. Now you can put the door panel on. Okay, just like in the beginning, we're going to fast forward through putting our door panel on. You can check out our other videos if you want to see this in real speed. We hope this helps you out. Thank you very much and think of 1AAuto.com for your parts and needs.
We hope this helps you out. Brought to you by www.1AAuto.com, your source for quality auto replacement parts and the bets service on the internet. Please feel free to call us toll-free, 888-844-3393. We're the company that serves you on the internet and in person.
Tools used
Hi, I’m Mike from 1A Auto. We’ve been selling auto parts for over 30 years!
I'm going to use a small flat bladed screwdriver to pop this up. I'm going to use an 8mm socket, an extension, and a ratchet to remove this 8mm bolt. I'll put that aside. I had to wedge a small flat bladed screwdriver in there, because there's no relief to get a screwdriver in. I'll use the other part of my plastic trim tool and get the plastic trim tool under here. Very difficult to remove. You just have to keep working at it. Remove the 8mm bolt. At the bottom of the door, there are two 6mm bolts. Use a 6mm socket, and remove those.
These are actually more like self-tapping screws with a 6mm head. So you can't pull on the door straight out. It has to go up first. You want to lift it up, just like that, and then off of the door panel. We'll reach in here, remove the door handle. You need to unlock this cable from the plastic trim. I'm using some needle nose pliers. Push in on the tabs. I'll push it out and through, and then put the little lead ball that's on the end of it, it's more like a cylinder, but it'll pop right out. I want to unplug the power folding mirror switch. Reach underneath, push the lock in, and pull it down.
Now, I want to do the same for the master window switch. Push in on the lock, and pull this down. Push down on all these locks, now the door panel will come off.
The mirror plug is up here behind this plastic. You don't really need to peel it all back. There's a lock in there, I'm going to push it. It might be easier with my other finger, and then pull just like that. And I'll just leave it like that. There are three nuts on the studs holding the mirror to the body. I'm going to use 11-millimeter deep socket and remove them. Put those aside so you can reuse them. It should pull out of the door straight right out.
We have our broken mirror. Here's our original, broken mirror from our vehicle. A brand new towing mirror from 1AAuto.com. It has the same power fold option. This will manual telescope, you have to really push on it. That way it doesn't slide in on you. It's got a turn signal is up here, as opposed to being down here. It also has the memory function for the mirror. And this should fit great and really look great on our vehicle. This new mirror does come with hardware. I'm going to reuse the old ones, and I'll just take these off. Since the old ones are in good shape and they have a wider base, I'm going to use these instead. To feed these wires through the opening, push our mirror in to the door panel. It also helps to have the window down so you can just reach through. Capture one of these so the mirror doesn't fall. Capture the other ones. Now I'm going to tighten these down, kind of bring them in evenly. You can see the mirror getting tight against the door. As soon as I feel them get tight, I'll just go a little turn more. You don't want to over-tighten them and pull the studs out of the plastic, so we'll go a little more just like that. Put our harness back up, plug it in. Stuff that up into the door. That just kind of sat over that.
See these hooks are on the edge of the door panel instead of clips, so just while I hook everything up, I'm going to rest the door panel just like that so I don't have to hold it, and just push it against myself so it doesn't fall backwards, and hook the door release handle cable right here. It's going to push through.
I'm going to reach down and plug in the master window switch. I may have to push the door panel in. Kind of feel for these. Get this one in there. Now, I'm going to put the door panel up, and I push it, and get it hooked in place. You also have to capture this, the door lock little plunger. That can be tricky to line up. Make sure the door's unlocked, because it will make it this much taller and easier to line up. So that's it.
Door panel is hooked to the doorframe. Now I can bolt it back up. Put the bottom self-tapping bolts back in. Install the bolt behind the door handle. Install the bolt in the little door pull area. Install the little trim piece. Snaps down into place. Reinstall the trim that goes behind the door handle. Go this way with it. It snaps into place.
Thanks for watching. Visit us at 1AAuto.com for quality auto parts, fast and free shipping, and the best customer service in the industry.

MRA08607