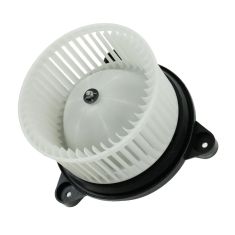
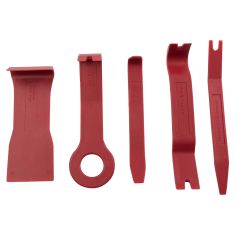
All of our auto parts are intended for Left Hand Drive USDM vehicles. If your vehicle is Right Hand Drive, please ensure the part is correct for your specific vehicle.
Item Condition:New
Attention California Customers:
WARNING: This product can expose you to chemicals including Di(2-ethylhexyl)phthalate (DEHP), which is known to the State of California to cause cancer, and birth defects or other reproductive harm. For more information, go to www.P65Warnings.ca.gov.
Lifetime Warranty
This item is backed by our limited lifetime warranty. In the event that this item should fail due to manufacturing defects during intended use, we will replace the part free of charge. This warranty covers the cost of the part only.
Returns: Parts with electrical components cannot be returned once installed.
FREE Shipping is standard on Orders shipped to the lower 48 States (Contiguous United States). Standard shipping charges apply to Hawaii, Alaska and US Territories. Shipping is not available to Canada.
Expedited is available on checkout to the United States, excluding Alaska, Hawaii and US Territories as well as P.O. Boxes and APO/FPO/DPO addresses. Final shipping costs are available at checkout.
How to Replace Heater Blower Motor with Fan Cage 2001-06 Dodge Stratus
How to Replace Heater Blower Motor with Fan Cage 2001-06 Chrysler Sebring
Created on:
Tools used
Socket Extensions
8mm Socket
5/8 Inch Spark Plug Socket
Ratchet
1. Accessing the Blower Motor
Remove the two 5/8 inch nuts from the panel below the glove box
Pull down the panel
2. Removing the Blower Motor
Disconnect the blower motor wiring harness
Remove the three 8mm bolts from the blower motor
Pull the blower motor down and out
3. Installing the New Blower Motor
Put the blower motor into place using the locating tab
Insert the three 8mm bolts into the blower motor
Connect the blower motor wiring harness
4. Reinstalling the Glove Box Panel
Put the panel into place
Fasten the two 5/8 inch nuts onto the panel
Brought to you by 1AAuto.com, your source for quality replacement parts and the best service on the Internet.
In this video, we're going to replace the blower motor on this 2004 Stratus four-door, same as any '01-'06 four-door. The tools you'll need are a flashlight, an 8mm socket with ratchet and extension and a 5/8 inch socket. You'll want to replace your blower motor. Usually the signs are that it makes noise, a whirring or a groaning noise that changes in pitch, as you, maybe, increase the speed of the fan.
Starting in underneath your glove box, you need to remove this panel. There's a little nut here as well as, there should be one over here but it's missing on this vehicle. You'll want to use a socket head, put it up in there and remove that. It takes a 5/8 socket. Once that's out, you can . right under here is your connector for your blower motor. I just pushed in a tab, here, with my thumb, pulled that down and out. There are three mounting screws: one with a yellow dot there, one with a yellow dot there and the last one right there by the connector. I'm going to fast-forward here as I take an 8mm socket with a ratchet and extension, put it up in there and remove those three bolts. Now, the motor is kind of sealed in there. So it takes a pretty good pull to pull it down and out once those three bolts are out.
On my vehicle, my original fan is in fine shape. I just cleaned some of the dust off the wheel and the motor and I'm going to reinstall it. It has this triangle protrusion on it. Just make sure, when you're installing it, that triangle is over here. It kind of points at the middle of the vehicle. Reinstallation is pretty much a reverse. I kind of fumble with getting it in here, because I'm doing it without looking, but once you get it in and you start the bolts in and make sure you don't pinch any of the wires in between the motor and the housing. Then, once you get the bolts on, tighten them up with your 8mm socket with ratchet and extension. Now, reach underneath and plug your harness connection back in. Take your insulation, push it back in, and put that up. Just take your nut. Actually you can just push it on with your fingers, and twist it a little bit into place. Make sure this is all lined up over here. If you have your second nut, install it
We hope this video helps you out. Brought to you by www.1AAuto.com, your source for quality replacement parts and the best service on the Internet. Please feel free to call us toll-free, 888-844-3393. We're the company that's here for you on the Internet and in person.
Tools used
Phillips Head Screwdriver
7mm Socket
Ratchet
1. Removing the Blower Motor
Remove the nut below the glove box by hand
Pull the insulation down and out
Push the tab and remove the blower motor wiring harness
Remove the three 7mm screws from the blower motor with a Phillips screwdriver or socket
Pull the blower motor down and out
2. Installing the Blower Motor
Insert the blower motor into place
Insert and tighten the 7mm screws
Connect the blower motor harness
Replace the insulation
Tighten the nut by hand
Brought to you by 1AAuto.com, your source for quality replacement parts and the best service on the Internet.
Hi, I'm Don from 1A Auto. I hope this how-to video helps you out, and next time you need parts for your vehicle, think of 1AAuto.com. Thanks.
In this video, we're going to show you how to replace the blower motor in this 2004 Chrysler Sebring. It's in the same process in the Sebrings from 2001 to 2006, as well as the Dodge Stratuses from the same time. The tools you'll need include a 7mm socket, a ratchet, and a new blower motor from 1AAuto.com.
Your blower motor is located on the passenger side underneath the dash here. You're going to have to remove this nut by just twisting it off. You can do it by hand, actually. Once that's removed, you can just pull that insulation down and out.
I'm going to try to show you the screws to remove on the blower motor. There's one up at the top left of your screen. You want to remove that. It's a Phillips screw and a 7mm bolt. Either one works. There's another one on the right there, and there's one right down there. Before you remove those you want to just disconnect this harness. It'll make it a little bit easier. Just push a tab and pull it out. We'll just fast -forward as Don removes those bolts. Again, you can use a 7mm socket or you can use a Phillips screwdriver. Once those are removed the blower motor will just pull down and out.
The old part is on the left and the new part from 1A Auto is on the right. You can see they're identical with the same mounting points and same everything. It'll fit exactly the same.
Put the new blower motor up into place. You may have to pull back some harnesses to get it up in there. Fast-forward here as we put those 7mm screws back up in. Again, you can use a Phillips screwdriver as well. Tighten them up nice and firm, but you don't want to over tighten them. You don't want to strip out the plastic that you're going into. Now reconnect the harness. You can do a test here if you want to, to make sure it's working before you put the insulation back in. Put that insulation back up in and put the nut back on to hold it.
We hope this video helps you out. Brought to you by www.1AAuto.com, your source for quality replacement parts and the best service on the Internet. Please feel free to call us toll-free, 888-844-3393. We're the company that's here for you on the Internet and in person.
HMA84841
In Stock
Product Reviews
Loading reviews
5.00/ 5.09
9 reviews
5 Stars
4 Stars
3 Stars
2 Stars
1 Star
9
0
0
0
0
Blower motor
William
August 16, 2017
Exact replacement. Worked perfectly! Nearly half the cost at my local autoparts store. The online video of how to change it out was a great help!
Thanks 1aauto!
Service Saver
Larry
October 25, 2017
Exact replacement and 1a Auto video made easy to learn how to do the installation!
Heater blower motor with fan cage
John
February 6, 2018
Works as advertised. I picked up a $20 speed control resistor locally and replaced while I was under the dash. The how-to video, while very helpful, really doesn't show the degree of difficulty which should be expected considering the location of the blower motor. Use common sense. For some older folks like me, you might consider removing the passenger seat to give you plenty of room to lie down. It's pretty easy to do. I'm a retired aircraft mechanic and like to dust my tools off occasionally and do my own auto repairs. I've found that 1A Auto is your best bet for price and quick shipping for parts you don't need immediately.
BLOWER MTR R&R
M
August 9, 2018
This blower motor was a direct replacement and fit perfect. The installation video was very helpful telling me exactly what size sockets were required to do the job which only took 25 minutes , start to finish. Runs great and I highly recommend this product !
replaced the heater blower
B
October 23, 2018
Watched the you tube video 1A did on the install. Installation went as planned. Was a great price.
Thank you again 1A
Blower motor
N
November 22, 2018
Great price. Fit right on. Would buy from again. Great customer service.
A1 Auto never fails.
Peter
September 10, 2021
Excellent. Perfect replacement. Quick delivery.
Perfect fit and works great
Thomas
March 22, 2022
It came quickly before I melted in this Florida humidity. I watched your video and the old one came out and the new one went in. They looked exactly the same and I have Air Conditioning blowing cold dry air again.
Thanks
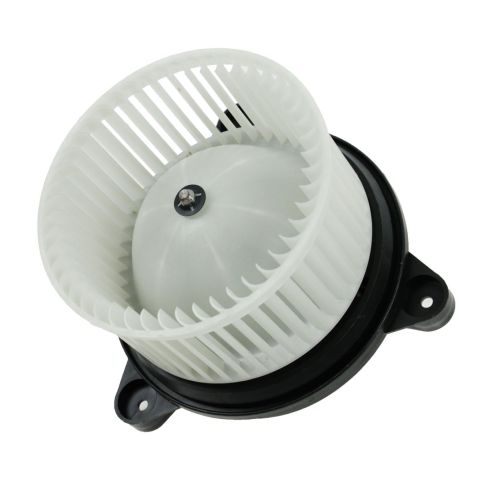
Chrysler Sebring HVAC Blower Motor Assembly TRQ HMA84841
Rollins
September 19, 2023
The Chrysler Sebring HVAC Blower Motor Assembly TRQ HMA84841 was a perfect fit! It was easy to install and works like a charm!! Also dealing with A1 Auto was a great experience. My part was easy to order, in stock, and arrived quickly!!
Customer Q&A
No questions have been asked about this item.
Customer service
877-844-3393
Monday - Friday 8:00am - 9:30pm ET Saturday - Sunday 8:00am - 4:30pm ET
Enter Vehicle Year Make Model
Specify your vehicle's year, make and model to guarantee fit.
Year
Make
Model
Options
Drivetrain
This part doesn’t fit a . Select from parts that fit.