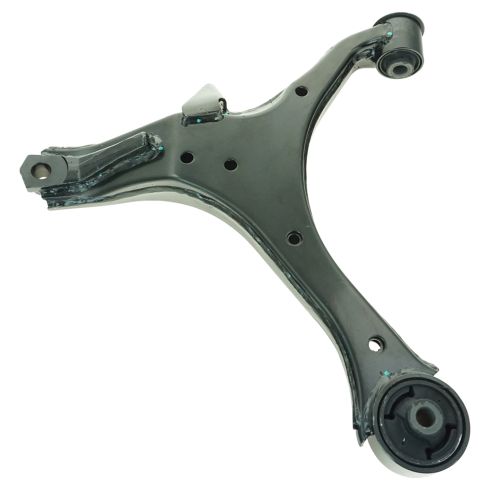
Our control arms are designed to be direct replacements for the original factory parts. They are 100% brand new and require no modifications for installation. No special tools are required because all of the bushings come pre-installed.
Our steering and suspension components are pre-greased and sealed for long life and do not require the extra maintenance typically required by greaseable versions.
Item Condition:New
Attention California Customers:
WARNING: This product can expose you to chemicals including Lead and Lead Compounds, which are known to the State of California to cause cancer, and birth defects or other reproductive harm. For more information, go to www.P65Warnings.ca.gov.
Lifetime Warranty
This item is backed by our limited lifetime warranty. In the event that this item should fail due to manufacturing defects during intended use, we will replace the part free of charge. This warranty covers the cost of the part only.
FREE Shipping is standard on orders shipped to the lower 48 States (Contiguous United States). Standard shipping charges apply to Hawaii and Alaska.
Shipping is not available to a P.O. Box, APO/FPO/DPO addresses, US Territories, or Canada for this item.
Expedited is available on checkout to the United States, excluding Alaska, Hawaii.
Final shipping costs are available at checkout.
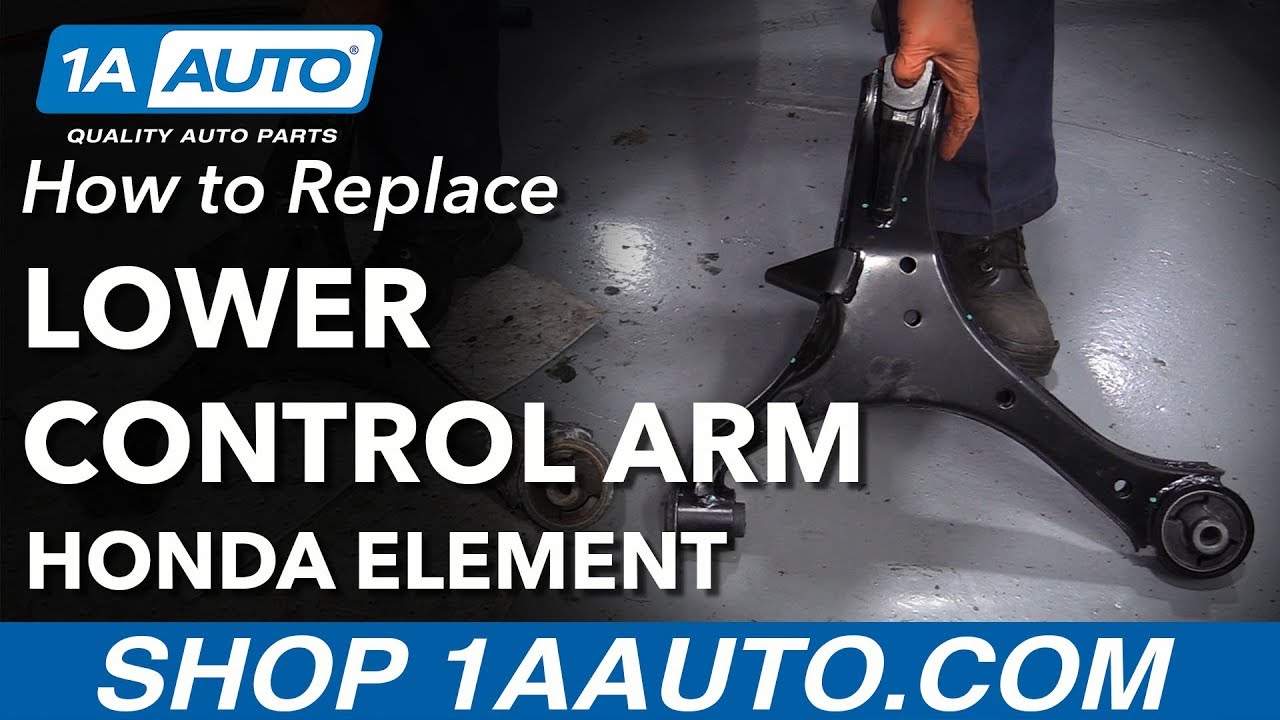
How to Replace Front Lower Control Arms 2003-06 Honda Element
Created on:
Tools used
14mm Wrench
Socket Extensions
Torque Wrench
Hammer
15mm Socket
Pry Bar
16mm Socket
17mm Socket
Jack Stands
18mm Socket
19mm Socket
5mm Hex Wrench
Pickle Fork
Side Cutters
Ratchet
Floor Jack
1/2 Inch Breaker Bar
1. Removing the Wheel
Loosen the lug nut covers with a 19mm socket
Pry off the center cap with a flat blade screwdriver
Loosen the lug nuts with the vehicle on the ground
Raise the vehicle with a floor jack
Secure the vehicle on jack stands
Remove the lug nuts
Pull off the wheel
2. Removing the Sway Bar Link
Remove the lower sway bar link nut with a 5mm allen wrench and a 14mm wrench
Remove the sway bar link with a pry bar
3. Removing the Front Lower Control Arms
Straighten the cotter pin out with needle nose pliers
Remove the cotter pin
Remove the castle nut with a 17mm socket and breaker bar
Break the ball joint free with a pickle fork and hammer
Separate the control arm from the ball joint spindle by hand
Remove the two control arm bolts with a 19mm socket
Remove the control arm by hand
4. Installing the Front Lower Control Arms
Insert the front lower control arm into place, using a pry bar if needed
Place the bolts into the control arm by hand
Torque the bolts to 61 foot-pounds
Place the ball joint into the control arm
Spin the castle nut on by hand
Tighten the castle nut with an 18mm socket and ratchet
Torque the castle nut to 51 foot-pounds
Insert the cotter pin
Bend the end of the cotter pin down with a pair of pliers and clip the end of the pin with cutting pliers
5. Installing the Sway Bar Link
Insert the bottom half of the sway bar link into the control arm
Tighten the lower nut with a 15mm socket and ratchet and a 14mm wrench
Torque the lower nut to 29 foot-pounds
6. Removing the Wheel
Slide the wheel into place
Start the lug nuts by hand
Tighten the lug nuts preliminarily
Lower the vehicle to the ground
Tighten the lug nuts to 80 foot-pounds in a crossing or star pattern
Hi. I'm Mike from 1A Auto. We've been selling auto parts for over 30 years!
Hi, everyone. Sue here from 1A Auto, and today on our '06 Honda Element, I'm gonna show you how to replace a lower control arm. If you need this part or any other part for your car, click on the link below and head on over to 1aauto.com.
To remove the tire, you need a 19 millimeter socket. The vehicle has weight on it so that I can loosen up each lug nut as I go around. I'm using a two post lift. At home, you can use jack and jack stands. Now that I have it up in the air, I'm just gonna remove all the lug nuts. Beautiful. You can discard the hubcap. 14 millimeter wrench and a number five Allen socket. I'm going to put the 14 wrench on the sway bar link nut. I'm gonna install the Allen head in the stud with the cutout and we're gonna loosen up. You get yourself a good spot and you feel like a ratchet wrench is gonna work, then you can move onto that. You can take the Allen head socket off, and you should be able to get this right off. I'm gonna take a pry bar and see if I can pull that right out of the cutout. There we go. Nice. So I'm gonna remove the cotter pin and discard that, and I'm gonna take the castle nut off. That's a 17 millimeter socket.
I'm gonna slide that right on there and break it free. Discard that. Now I'm gonna use a pickle fork to break the ball joint free from the control arm, and if you're not replacing your ball joint and you're gonna reuse the ball joint, you've got to be really careful and not to tear this boot on the ball joint. Luckily for me, this boot's already torn. So I don't have to worry about trying to save it. But if your boot is in good shape and your ball joint's in good shape, just be careful.
Work your pickle fork underneath the boot and not pinching the boot. There it is. So now I can separate my control arm from the ball joint spindle and just pull down like that and push that knuckle out of the way. Remove the two control arm bolts. Take a 19 millimeter socket. As you can see, the CV shaft has been dismounted from the knuckle. It doesn't need to be if you're just doing the lower control arm. We're also doing a ball joint. Sweet. I'm gonna take a look at both bolts. Okay, they're the same length, same shanks, same diameter, so you don't have to separate them. I'm just gonna pull this control arm out. Just rock it back and forth.
Here we have the new lower control arm for our '06 Element from 1A Auto and here we have the one that we just took out. They're identical in shape and size. The 1A Auto comes with pressed in bushings for both control arm marks where it hits the sub-frame. It's got the ear for the sway bar link and the nice, thick cast for the ball joint. If you need this part or any other part for your car, click on the link below and head on over to 1aauto.com.
I'm gonna line up the front bolt first, and I'm gonna actually thread a bolt in so I'm not fighting with that. Just want to turn it a couple of threads by hand. Then I'm gonna bring the backside up in there. That's why I wanted the front bolted in, because this is gonna take some pressure. There we go. There we go. How does it look? There we go. Perfect.
Now that we've snugged them down, we're gonna torque it to the manufacturer's spec, which is 61 foot-pounds. What I'm gonna do, is I like to make sure it's seated in there. Now I'm gonna put the new castle nut. The new castle nut is an 18 millimeter socket and we're going the wrong way. There we go. I'm gonna snug this up, pull that ball joint spindle right down through. Once I feel that snugging, the torque is 51 foot-pounds. I'm gonna torque it up. Now let's see if the cotter pin has any line up holes and it's fine. Yup, I can put the new cotter pin in.
I like to put the cotter pin so that the opening is on the inside there so that way when I bend it down and lock it into place, I can cut it easily and it won't cut people that are just doing simple oil changes or anything like that—any front end or brakes. Sometimes, these cotter pins can be more dangerous than they appear, and then I'll fold that up. So I'm gonna take a pry bar, and I'm going to slide it up through here so that I can lift that up and line up the sway bar. Beautiful. Put the new nut on. As you can see, we ended up replacing the sway bar link. So there's no Allen head on the end of the new one. Instead, it's a 14 millimeter on the inside and a 15 on the nut side. I'm gonna tighten this down. So now we're gonna torque the nut to 29 foot-pounds.
Gonna mount the tire again, and the reason why I put the tire on before I tighten the top of the strut is because I want the weight of the weight on the suspension to assure that I'm not pulling up on that cap, the strut cap and that can warp the studs on the outer edge. I want the vehicle weight down holding that up and then I can get a true torque end tightening of it.
Grab your hubcap because this particular Honda does not have extra Y cutouts for three lug nuts. Set the rim up on the hub and put your lug nuts on. So the wheel torque, now that I got the weight of the vehicle down on the tire and I'm gonna torque up the wheels and the wheel torque. Spec is 80 foot-pounds.
Thanks for watching. Visit us at 1aauto.com for quality auto parts, fast and free shipping, and the best customer service in the industry.
PSA66380
In Stock
Product Reviews
Loading reviews
There are no reviews for this item.
Customer Q&A
No questions have been asked about this item.
Customer service
877-844-3393
Monday - Friday 8:00am - 9:30pm ET Saturday - Sunday 8:00am - 4:30pm ET
Enter Vehicle Year Make Model
Specify your vehicle's year, make and model to guarantee fit.
Year
Make
Model
Options
Drivetrain
This part doesn’t fit a . Select from parts that fit.