How to Replace Alternator 2005-10 Chevy Silverado
Created on: 2019-07-05
Watch this video from 1A Auto to learn how to replace the alternator in your 05-10 Chevy Silverado.
-
step 1 :Removing the Alternator
- Loosen the 10 mm negative battery terminal and disconnect the negative battery cable
- Attach a 3/8 ratchet to the serpentine belt tensioner
- Push the tensioner down to loosen the belt
- Pull the belt off by hand
- Release the tensioner
- Loosen the worm clamp securing the air snorkel to the mass airflow sensor
- Loosen the worm clamp securing the air snorkel to the throttle body
- Remove the air snorkel
- Remove the 13 mm bolt securing the heater hose pipe bracket next to the alternator
- Remove the AC hose from the mounting bracket next to the alternator
- Disconnect the alternator electrical connector
- Slide the main power cable boot off
- Remove the 10 mm nut securing the main power cable to the alternator
- Remove the main power cable
- Remove the two 15 mm alternator mounting bolts
- Pry the alternator up to remove it
-
step 2 :Installing the Alternator
- Clean any corrosion off the alternator mount bushings
- Seat the alternator in position
- Reinstall the 15 mm alternator mounting bolts
- Torque the 15 mm alternator mounting bolts to 37 ft-lb
- Connect the main power cable to the alternator
- Secure the main power cable with the 10 mm nut
- Torque the 10 mm nut to 80 in-lb
- Reposition the main power cable boot
- Reconnect the alternator electrical connector
- Reposition the AC line into the mounting bracket
- Reposition the heater hose bracket and secure it with the 13 mm bolt
- Reposition the intake snorkel on the throttle body
- Tighten the worm clamp to secure the intake snorkel to the throttle body
- Reposition the intake snorkel on the mass airflow sensor
- Tighten the worm clamp to secure the intake snorkel to the mass air flow sensor
- Reinstall the serpentine belt around the crank pulley, over the water pump pulley, under the power steering pulley, over the AC compressor pulley, around the alternator and tensioner pulley
- Hold the serpentine belt near the idler pulley
- Turn the serpentine belt tensioner with a 3/8 ratchet
- Slide the serpentine belt over the idler pulley
- Release the tensioner
- Reconnect the negative battery cable and tighten the terminal with a 10 mm wrench
Tools needed
-
13mm Socket
Socket Extensions
Flat Blade Screwdriver
15mm Socket
Pry Bar
10mm Wrench
Ratchet
3/8 Inch Drive Ratchet
Hi, I'm Mike from 1A Auto. We've been selling auto parts for over 30 years.
What's up, guys? I'm Andy from 1A Auto. Here I'm going to be installing an alternator on this 2008 Chevy Silverado work truck. If you need this part or other parts for your vehicle, click the link in the description and head over to 1AAuto.com.
I'm going to disconnect the battery. This vehicle, there is a bracket missing here. Normally there would be a bracket here with four 13 millimeter bolts. You would take those out to access the negative battery cable. I'm just going to use a 10 millimeter wrench, loosen up the cable. You can probably do it without taking that bracket off but just make it easier to take the bracket off. Loosen this up. Wiggle it back and forth and set it aside.
Now I'm going to remove the serpentine belt. I'm just going to use 3/8ths ratchet for the tensioner right here. You can use a serpentine belt tool as well. Just loosen up the tension in the belt, take it off right here on the idler pulley then loosen the tensioner. Get my ratchet out of the way. Now we can remove the belt off the alternator, off the AC compressor, off the power steering pump, the water pump and then off the crank.
Now I'm going to remove this snorkel off the top of the engine. Just use a straight blade screwdriver. Loosen up this worm clamp right here on the mass airflow sensor. Just grab the snorkel and take that off. We'll take the screwdriver again over on throttle body, loosen up the worm clamp right there. Just grab this and rock it back and forth. Slide it off. There's a hose right here on this back side, we'll have to disconnect it from the snorkel just like that and set this aside.
I'm just going to move this little pipe out of the way. That just goes to the valve cover. This pipe is going to be in my way so I just want to get it out the way a little bit. I'm going to use a 13 millimeter socket and extension and a ratchet. Just take this bolt out. Take that out, and that way I can maneuver this pipe out of my way. This pipe is an AC pipe--you can just loosen this up here. Can release it from this bracket and just move that out of your way a little bit. I'm not going to disconnect them but just to move it out of the way.
Now I'm going to disconnect this electrical connector. Push down. There's a little lock tab here, and then slide it up. That's the little lock on the connector. Set that aside. Now we're going to disconnect the big cable that's on the back of the alternator. Just move this boot down and you can access the nut. We'll take a 10 millimeter wrench and we'll loosen up the nut. If it's loose, you can take it off by hand usually. Take this positive cable off and set it aside. Sometimes I take the nut and just put it back on so I don't lose it.
Now I'm going to take these two alternator bolts out. They go through the bracket. I'm going to use a 15 millimeter socket and extension and a ratchet. Once it's loose, pull that one out and this one as well. Slide that out. All right, now I want to pry up on the alternator. I'm going to use a pry bar. Sometimes this can be tricky depending on how long the alternator's been in there. Can get underneath here. Try to pry. Just be careful. You kind of want to twist it up as you could potentially break the ears on the bracket. Just pry in between there. Just pry it up. You can go back and forth on both sides. It's a little bit tight in there. Once you get one side up, then you can rock it back and forth a little bit. And there we go. It's loose. We can just slide it forward just like that.
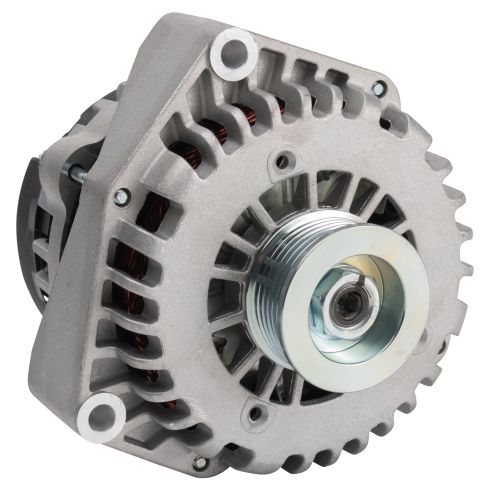
Here we have the old alternator. Here we have the new alternator from 1AAuto.com. It's a direct replacement. It's got the same pulley. It's got the same mounting holes as the old one. The backside, the connectors are the same. Comes with the same stud for mounting the power wire and it also comes with a nut. It's a direct replacement, there is no core charge. Get yours at 1AAuto.com and you'll be ready to rock and roll.
Before I install the new alternator, sometimes these get some corrosion on them, these little bushing things. I'm just going to take a little wire brush, just try to get some corrosion off. Should be good. If you see a little bit of corrosion on this side too, you can wipe some of that off. Could use some emery cloth or some sandpaper as well.
All right, now I'm going to slide the new alternator underneath this coolant pipe. You could disconnect this coolant pipe if you wanted to. If it was in your way more but I'd rather disconnect less things. Get the alternator lined up. Just slide it down in position. Don't wiggle it too much because like I said before, you don't want to break these ears off. If it doesn't slide down too easy, you probably going to to clean more of that corrosion out.
Now, I'm just want to line up these holes so I'm just going to take a Phillips head screwdriver and just move this into position. Line the holes up. I can take the bolt. Get that started. Take the other bolt, get that one started as well. Can grab the bolt, try to pull it out, then you know at least you got a couple threads started. That one's good. And that one's good. I'll take my 15 millimeter socket extension and a ratchet, just snug these up a little bit. Just snug those both up. Now I'm going to use a torque wrench and I'm going to torque these bolts to 37 foot pounds.
I'm going to take this nut off that comes with the alternator. We'll install this power cable. It's just going to slide on there and then reinstall the nut. I'll take a 10 millimeter socket and a torque wrench, and I'm going to torque this to 80 inch pounds. Make sure you're on inch pounds and not foot pounds. Once that's torqued, take the boot and slide it over the nut just like that.
Now we can reconnect this electrical connector. Just line that up and lock it in place. Now we're going to reinstall this AC line into this bracket. Just lock it in place. Then take this coolant hose. Just take this 13 millimeter bolt. Get that in position and snug this down. I'll take my 13 millimeter socket extension and ratchet and just snug it down. Now we can reinstall this engine snorkel. Slide this over near the throttle body. Before I install it on the throttle body, we have this hose underneath here. I'm going to slide that onto this just like that and then slide this on the throttle body. Take the straight blade screwdriver. Get this started then we'll install this side on the mass air sensor. Take this screwdriver and snug this worm clamp down.
All right, now I'm going to install the serpentine belt. I'm going to around the crank pulley first. Get that lined up. Then come around the water pump pulley and down around the power steering pump pulley then up around the AC compressor. Then you're going to go over here around the alternator and the tensioner pulley. And then I'm going to hold it down near the idler pulley. Then I'm going to take my ratchet and this is a flex head ratchet so it makes it a little bit easier, and then I'm going to relieve tension on the pulley and just snake it under the idler. Just like that. Then take my ratchet away.
Now I'm going to grab the negative battery cable. Slide this over the terminal on the battery and then take a 10 millimeter wrench and just snug this up. Not too tight--you don't want to break it. Just make sure you grab the terminal. Grab the cable and make sure it doesn't twist. That's good. And then if you had that bracket here, you're going to want to reinstall that bracket.
Thanks for watching. Visit us at 1AAuto.com for quality auto parts, fast and free shipping and the best customer service in the industry.
Shop Products
Chevrolet GMC Buick Cadillac Saab Alternator TRQ ALA94477
Part Details:
- Yes
- 145 A
- 12 VDC
- Serpentine
- 6
- 51 mm
- 43 mm
- Clockwise (Right)
- No
- No
- Internal
- Yes
- No
- DELCO
- 2.01 in
- 1.69 in

How to Replace Alternator 2011-17 Toyota Camry
How to repair, install, fix, change or replace a broken or bad alternator on 11, 12, 13, 14, 15, 16, 17 Toyota Camry
