How to Replace Engine Water Pump 2000-03 GMC Yukon SUV
Created on: 2010-12-21
Watch this video to learn how to fix a leaking or broken water pump. The experts at 1A Auto will show you how to replace the water pump on your 99-04 Chevy Silverado or Tahoe, or GMC Sierra or Yukon.
-
step 1 :Remove Intake Tube
- Start by using an 8 millimeter socket wrench to disconnect the negative battery cable.
- Loosen the two clamps by the throttle body and air box.
- Use a small flathead screwdriver to break the seal.
- Lift the intake tube out.
-
step 2 :Remove fan shroud
- Remove the two 10 millimeter bolts with your socket wrench.
- Unclip the small hose from the shroud.
- Remove pins around fan shroud and gently work hose back and forth to pull fan shroud out.
-
step 3 :Remove fan
- Use a large adjustable wrench on the center nut.
- Apply force on the wrench to break it loose.
- Carefully pull fan out and set aside.
-
step 4 :Remove serpentine belt
- Start by double checking that your routing diagram is legible.
- Draw out your own if it isn't to save time and confusion later.
- Use your socket ratchet to loosen the 15 millimeter bolt located on the tensioner.
- Turn your ratchet clockwise to release the tension and remove the belt.
-
step 5 :Drain radiator and disconnect hoses from water pump
- Release lower radiator hose and drain fluid into your drain pan.
- Use your pliers to slowly squeeze the clamp and pull it back to drain the fluid into your catch pan.
- Disconnect radiator hose by loosening and pulling back the clamp.
- Use your small flathead screwdriver to gently pry up the hose and wiggle it off.
- Make sure any water has drained out of it and set aside. Finally disconnect heater hoses.
- Ensure that your catch pan is underneath to catch any water.
-
step 6 :Remove tension arm
- Use your wrench to remove the tension arm from the water pump.
- Set aside.
-
step 7 :Remove water neck and remove pump
- Use your 10 millimeter socket wrench to remove the two bolts.
- Use your torque wrench to remove the six bolts on the water pump.
- Then using a sharp razor blade, scrape off any residual gasket material that could create a bad seal.
-
step 8 :Install 1A Auto water pump
- Put the new gasket plates on your 1A Auto water pump using the two bolts.
- Seat the new pump and place bolts and use your torque wrench to gently snug them up.
- Go back and torque them between 22 and 24 foot pounds.
- Take the new O-ring that came with your 1A Auto and put it on your thermostat housing.
-
step 9 :Reassemble
- Reconnect all your hoses.
- Put your belt tensioner back on and put your serpentine belt back on using your diagram.
- Reassemble your fan, fan shroud, and intake pipe.
- Finally refill with a 50/50 mixture of Dex Cool.
- Listen for the sound of any leaks to make sure everything is connected properly.
- Finally, reconnect the battery and start up the engine and run it for 30 seconds or so to circulate the coolant.
- Double check your level of coolant to make sure it is at the right spot, and you are good to go.
Tools needed
-
Razor Blade / Gasket Scraper
Flat Blade Screwdriver
15mm Socket
8mm Socket
Drain Pan
10mm Socket
Ratchet
Brought to you by 1AAuto.com-- your source for quality replacement parts and the best service on the internet.
Hi, I'm Mike Green. I'm one of the owners of 1A Auto. I want to help you save time and money repairing and maintaining your vehicle. I'm going to use my 20 plus years experience restoring and repairing cars and truck like this to show you the correct way to install parts from 1AAuto.com. The right parts installed correctly. That's going to save you time and money. Thank you and enjoy the video.
In this video we'll be replacing the water pump on this '02 GMC Yukon with a 5.3 liter. This procedure is basically the same for many of these engines; the 4.8, the 6.0 liter in the trucks and SUVs. There are some slight differences by year but the general procedure is the same.
The tools you'll need are a flat blade screwdriver, 8, 10 and 15 millimeter sockets and ratchet, pliers, a torque wrench and a catch pan. Obviously, you'll need extra fluid to refill your vehicle afterwards. We're going to begin by using an 8 millimeter socket ratchet or wrench to disconnect our negative battery cable. Then we're going to loosen two clamps; this one here at the front of your throttle body and this one right down here near your air box. Disconnect the battery and then you'll probably want to use a little screw driver or something to break the seal between the plastic and the rubber hose. Then pull the hose from the air box and the hose from the throttle body. Then you lift the whole intake tube right out.
Next we're going to remove two 10 millimeter bolts. One here and one right over here and then pull this little hose out of here. We're basically going to take off the upper fan shroud. You'll want to pull this hose up and out. Work it carefully back and forth and pull up and you should be able to pull that out. Then down here there are little pins. You actually pry the center of them up first. Then once you pry the center up they come right out. There are four of those there, there, and then the same area on the other side; right there and then one right there.
Our next step is to remove the fan here. A large adjustable wrench put it onto that nut. The best way is to use a little old fashioned impact. Obviously you still have the belts on the motor. Once you've broken it loose.
Now we're going to want to remove our serpentine belt. Before you do that, make sure you have your routing diagram here and you know which one you're going to use. If you take this off chances are it's going to be difficult to get back on if you don't have a routing diagram. If you can't read your routing diagram anymore I definitely suggest drawing it on paper so you know exactly how the belt goes back together. This one here is pretty typical of this is a '03 Yukon with AC and all the accessories. Remove the serpentine belt- there's a 15 millimeter bolt right on your tension arm right here. Put a socket wrench on it and just turn it clockwise to release the tension. Pull the belt from the idler pulley and release your tension arm. Now we can take the belt all the way out.
At this point we're going to want to drain the radiator; two ways to do it. Some would say the right way would be to loosen this petcock down here and put your drain pan underneath it. What I prefer to do, because a lot of times those petcocks just break off, is I just release the lower radiator hose which is right down there. You can see the clamp. Then I have my drain pan underneath that. We're looking at the passenger side right down in there. You can see I have my hand and pliers; I'm not going to be able to film this but obviously you want to squeeze the clamp and pull it back off the hose. Pull this out. Now here I'm working those pliers in and I'm squeezing the clamp with the pliers and grabbing a hold of the hose, twisting and shaking it up and down. Pull it off slowly. You can see the fluid starting to drain. Keep pulling it back slowly so that the fluid drains out in a controlled manner.
I've turned my attention to the upper radiator hose. Again, squeezing the clamp, pulling it back and then twisting and I'm using a screwdriver to pry under the hose to get it loosened up. I've disconnected that hose. Make sure no water comes draining out of it. I'm finally turning my attention to the two hoses. These are the heater hoses. They connect into the side of the water pump. Make sure you have your catch pan underneath here as your release these because they do let a lot of water out. All the water comes out of the engine when you release the forward one.
Now you're going to want to remove your belt tension arm because that's going to go on to the new water pump. We're going to remove this water neck here which is two 10 millimeter bolts. More fluid is going to come out and the O-ring; stick it on there a little bit. I remove this clamp off of here. I have six bolts to remove; one, two, three there. Then one, let's see here, one, two and three right there. Now that you have the pump off you want to use a nice sharp razor blade. Make sure you scrape off any remaining gasket material that could cause a bad seal.
Here's my new water pump from 1A Auto. The exact same as the old one. You can see I put two bolts through and I put my gasket plates on there. Now I'm going to lower it down into place. Guide my bolts in, start this one over here. Put my other two bolts in, make sure they start fine. I'm going to slowly snug them up. I'm not going to make them tight with this. I'm going to get them in most of the way. We're going to torque these. First I'm going to make sure they're snug all the way around. We're going to torque them between 22 and 24 foot pounds.
Here's our thermostat housing. The new water pump comes with a new O-ring for it. Make sure that's right in the groove. Then we want to put it on this with this ear up. Then put these bolts in and you'll torque them to 12 foot pounds. I'm going to hold the thermostat housing against the water pump to make sure that O-ring stays in the groove. We're going to put these hoses back on. So now all my hoses, my little hoses are all together. At this point I'm going to put all the other components on. I put the belt tensioner on.
We're filling the system with a 50/50 mix of the Dex Cool for this GM truck. While you're filling listen for any water dripping out in case you might have forgotten to connect something. Most likely if you followed everything you didn't. It does have a fill cold line and it will pretty much just run right into the engine from here. Reconnect the battery.
I want to start the car up for about 30 seconds or so. You should start the car up a little bit, give it a chance to circulate the coolant but not really get hot. Then check your level of coolant and make sure it's in the right spot.
We hope this helps you out. Brought to you by www.1AAuto.com-- your source for quality replacement parts and the best service on the internet. Please feel free to call us toll free 888-844-3393. We're the company that's here for you on the internet and in person.
Shop Products


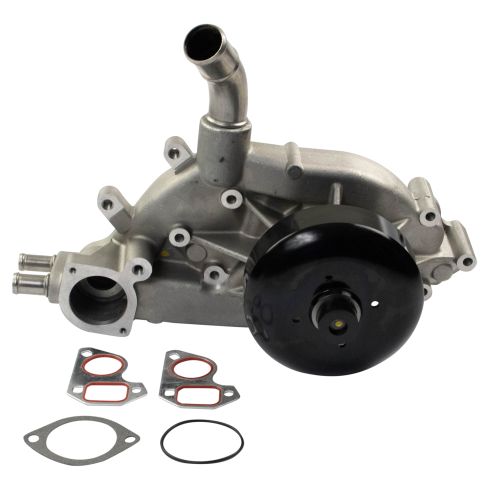
ACDelco Professional Engine Water Pump ACDelco 252-845
Part Details:
- ACDelco Professional
- Gasket
- LS Swap

How to Replace Water Pump 2002-10 Ford Explorer
This video will show the steps for replacing a bad water pump, including draining and refilling the coolant
