
How to Replace Headlight 1996-98 Honda Civic
Created on: 2013-12-18
Replacing the headlights is a great way to freshen up your 96-98 Honda Civic. Learn how to do it yourself with this 1A Auto video!
-
step 1 :Removing the Headlight
- Remove the plastic panel over the radiator by removing the seven clips with a flat blade screwdriver
- Pull the panel up and out
- Pull back the wheel well panel
- Remove the Phillips screw or 10mm bolt from the headlight bracket behind the wheel well panel
- Pull the bumper cover forward
- Remove the 10mm bolt from the bumper
- Remove the 10mm bolt behind the bumper on the headlight
- Remove the two 10mm bolts from the headlight bracket
- Pull the headlight out and over the bumper
- Disconnect the headlight wiring harness
-
step 2 :Servicing the Bulbs
- Twist the bulb socket counterclockwise out the turn signal light
- Pull the bulb off of the socket
- Push on the new bulb
- Twist the bulb clockwise into the turn signal light
- Remove the dust cover from the head light
- Push the retaining clip up and over
- Remove the bulb off of the socket
- Push on the new bulb
- Push the retaining clip back over
- Replace the dust cover
-
step 3 :Installing the New Headlight
- Transfer the bulbs from the old headlight to the new one
- Reconnect the wiring harness to the headlight
- Line up the bolt holes on the headlight bracket to the bolt holes on the vehicle
- Replace the 10mm bolts into the headlight bracket
- Replace the 10mm bolts on the headlight and bumper
- Place the plastic panel over the radiator
- Insert the seven clips into the plastic panel
- Replace the Phillips screw or 10mm bolt from the headlight bracket behind the wheel well panel
Tools needed
-
Flat Blade Screwdriver
Phillips Head Screwdriver
10mm Socket
Ratchet
In this video, we show you how to replace the headlight assembly as well as service the bulbs on this 1998 Honda Civic. We show you on the passenger's side, but it's the same process on the driver's side. The items you'll need for this include a new headlight assembly from 1AAuto.com, a flat blade screwdriver, Phillips screwdriver, and 10mm socket and ratchet.
There are seven clips on the lining on top of your bumper. Use a flat blade screwdriver, pry up the center of these clips, and then pry up the bottom. We'll just fast-forward as Don does this to the other six clips. In the wheel well behind the headlight, you'll see this Phillips screw right here. Go ahead and remove that. This may be a 10mm bolt on some vehicles. Once that's removed, you can pull your bumper cover forward.
Right here, there is a 10mm bolt; remove that. Down inside, behind the headlight, there is a 10mm bolt; just pull back on the bumper and remove that bolt. Then remove the last two bolts, and these two 10mm bolts along the top of the headlight. Once all the bolts are removed, pull your bumper down and you pull your headlight out and over the bumper.
On the back of the headlight there are two harnesses. Just push on the tabs and disconnect them. You just look in to service your bulbs for the turn signal. You just twist the socket counterclockwise, pull it out, and pull the bulb out. Push the new one in. Push the socket into place and twist it clockwise to lock. Remove that dust cover for the headlight. Push that retaining clip up and over, and the bulb pulls out. Put your new headlight bulb in the retaining clip and back over and clip it. Then put your dust cover back on with the tab staying top.
On the left is the old headlight; on the right is the new one from 1A Auto. You can see the one from 1A Auto looks much better, clearer, brighter, and it will mount exactly the same. You just want to take your sockets and put them over into your new headlight. We're just going to fast-forward through this. Reconnect your harnesses. Now, slide the headlight over the bumper cover. Hold the bumper cover out and get a headlight in. We noticed, after we took out the original headlight, that our car had been damaged in the front end, so he struggles with it a little bit to get it past some of the parts that are bent in there. You'll probably have an easier time with this.
Replace those two 10mm bolts at the top of the headlight. We'll just fast-forward as Don replaces the other two 10mm bolts and tightens all of them up. Then, you want to repeat this for the other side. Now you can push your bumper back into place. Replace those seven clips along the top of the bumper. You just push them down with the center still up, and push the center down to lock them. Then, just replace that Phillips screw and then you're all set.
Shop Products

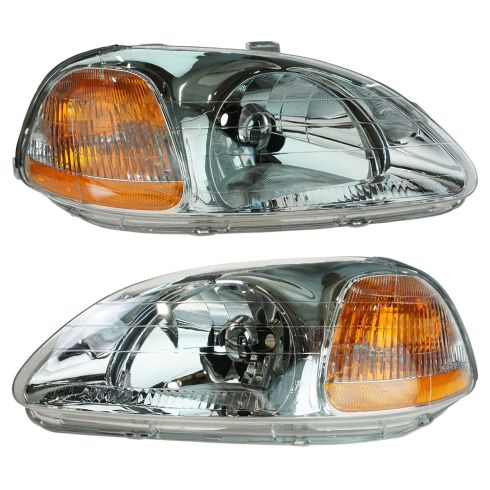
1996-98 Honda Civic Driver & Passenger Side 2 Piece Headlight Set TRQ HLA79673
Part Details:
- 2 Piece
- (1) Passenger Side Headlight Assembly
- (1) Driver Side Headlight Assembly

How to Replace Headlight 2002-06 GMC Envoy XL
Learn how to change the headlights or headlight bulbs on your 02-09 GMC Envoy by watching this 1A Auto video
