How to Replace Headlight Mounting Bracket 2003-06 Chevy Silverado
Created on: 2020-06-08
Watch this video to learn how to install a new headlight mounting bracket on your 1999-2007 Chevy Silverado.
Tools needed
-
Socket Extensions
Flat Blade Screwdriver
Socket Driver
Ratchet
Trim Tool Set
T25 Torx Socket
One of the first things you're going to want to do is make sure that your hood is up. Once it's up, if you were to look right along here, you're going to see this bar. Go ahead and grab on it, flip it up, and then draw it away. We'll set that aside. Just go ahead and grab on to that headlamp assembly. Give it a little wiggle. It's going to break free. Bring it up. Then you should be able to see the backside.
Now, if you were to look at the backside, you're going to be able to see your high beam assembly. Go ahead and pull out that pigtail. Take a peek at the bulb just to make sure it's in good condition. We're going to carefully set this aside. Do the same right here. Twist that out with the headlight bulb. Take a look. Make sure it's in good condition. These look great, and there's our headlamp assembly.
Next, what we're going to do, is we're going to take the bulbs off of here. Just take a small pocket screwdriver, kind of weasel it inside there, separate those prongs, and then draw the bulb off. This one is the high beam, and this one will be the low beam. Now, we're just going to take out the headlamp on the other side of the vehicle. The next thing we're going to do is remove this top plastic area here. You're going to see a whole bunch of push clips coming across the top. Go ahead and draw out the center, and then draw out the outer portion.
There's the center. There's the outer portion. Do the same to all. Those push clips are out. Let's go ahead and get this off of here. Maybe time to get the grille off of here. To do that, if you were to look along the backside, you're going to see these little tabs that, kind of, hold it in. There's a couple of ways you can get these off. You can use a nice screwdriver, press down on the tab, and then just draw it away. Or if you're dealing with one of these sideways clips like this one, it might be a little bit harder with a screwdriver. So, you could also use some needle nose pliers, grab right onto it, and then draw it away.
If you were to look down along the bottom, there should be an area that's secured with one of these tabs as well. It's a little bit smaller. Go ahead and get that off of there, and then we'll do the same down the line. Let's go ahead and take this right off of here. The next thing we're going to do is get this off of here. To do that, there's a little tab right there. Go ahead and squeeze on that, and then draw this away. Give it a nice squeeze. Throw it away. For these, you press in right there. That's the lock, and then you twist it counterclockwise. They come right off. I always take a peek at the bulbs. Both of these look good.
Let's check this one. That looks good as well. Now, the next thing we're going to need to do, to get this off of here is, of course, to remove all the mounting bolts. You're going to notice that there's several. There's going to be some 10-millimeter bolts, and there's also going to be some T25 bolts. With that said, let's get started. There's going to be one straight down and under here. Real quick.
There should be one right here. This one is broken. Another one there, move it around. Another one, another one, that leads us to the T25 Torx bits. And grab on to that. Be careful for any bulbs that might be attached, or going through anything. You don't want to damage them, of course. Go ahead and remove your unit. Okay, friends, so it's time for an install.
Let's go ahead and grab our piece. We have our assemblies back here, the pigtails. You want to make sure everything is in good order. This right here is going to go up to your high beams, so it's going to come up along the top. This is going to come through one of the lower holes. And then, of course, we have this. This is going to go through the lower hole as well. We can set all these aside. Go ahead and grab it. Bring it down to approximately where it's going to go. Go ahead and put your pigtail through here, right down through that hole.
We've got these ones. You have that one right there, the marker as well. And then you'll have this one for the headlight. We're going to go ahead and put that up and through here. This looks great. We'll leave it like that. Now, we're just going to take our assembly. Line it up with where it needs to go. Make sure you don't have your hood cables, so it's going to get pinched or crimped in any way. Let's find that hole. There it is. Go ahead and start in one of those bolts.
We remember that this one right here was one of the Torx bits, and this one right here was also one of the Torx bits. After that, go ahead and put in all the rest of those 10-millimeter-headed bolts. Now, it's going to be time to go ahead and snug these up. Okay. As I'm tightening things up, I just like to, kind of, grab onto stuff and just make sure that I'm not crimping anything. The last thing you want to do is pinch one of these wires between the plastic here and the plastic behind it. You could, of course, potentially cause some major damage.
Now, we'll just snug up the rest. So, now it's going to be time to get this installed. Go ahead and turn it backwards. Make sure you grab your three wiring harnesses here. You have your little one for the marker. You have this one right here. It's going to go in the center for the directional, and this one right here. Get our little running light. Click it in. Put your little tab down and behind there, and then go ahead and press this in. Just make sure that you don't have any wiring harnesses behind there. Latches in. Give it a nice tug.
Now, it's going to be time to get the grille on here. Just carefully bring it up. You want to be careful you're clear for all your paint. Line up the pitons. Put them right in. Do the same for the other side. So, now it's going to be time to get our bulbs back on here. You want to make sure that you have your high beam back inside the high beam socket. Click it in. Give it a tug. Set it down. Go ahead and attach that headlamp assembly or headlamp bulb. That looks good. Give it a tug.
Now, we're going to put these back into the assembly, like this. There it is. This one, push it in. Twist it. Now, I'm just going to carefully bring this around the backside of the grille right here. Slide it down. There we go. I might just have to push down a little bit to line up our little side prong there. It's going to be time to get our pin in here. Just go ahead and line up the holes. Slide it through. There we are. Go ahead and flip that and lock it right into the slot just like that.
Be time to get our plastic cover back over the grille here. Just go ahead and lay it down. Line up all your holes. Take our little push clips, and you can start wherever you want. Just start dropping them right in there. Go outside first and then press in the center.
So, the next thing we need to do is test those lights. We want to make sure everything works as it should. That's great.
Shop Products


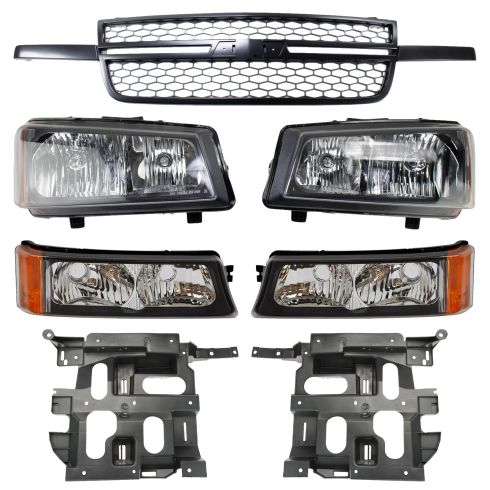
Chevrolet 7 Piece Lighting Kit DIY Solutions LHT11177
Part Details:
- 7 Piece
- (1) Passenger Side Headlight
- (1) Driver Side Headlight
- SS
- (1) Driver Side Parking Light
- (1) Driver Side Headlight Mounting Bracket
- (1) Passenger Side Headlight Mounting Bracket
- (1) Passenger Side Parking Light
- (1) Argent Grille

How to Replace Fog Driving Light 2002-06 GMC Envoy XL
How to install, repair, fix, change, or replace a broken, damaged, burned out, cracked, faded, cloudy or chipped fog light on 02, 03, 04, 05, 06, 07, 08, 09 GMC Envoy, Envoy XL, or Envoy XUV.
