
How to Replace Headlights 2004-06 Nissan Maxima
Created on: 2012-03-18
Watch this video to learn how to replace the headlights in a 04-06 Nissan Maxima.
-
step 1 :Removing the Bumper Cover
- Remove the two black clips from both sides of top of the bumper.
- Remove the two Phillips screws underneath the bumper in front of the wheels.
- Pull the inner fender back.
- Find the wiring harness inside the fender and pull the tab to disconnect it.
- Remove the two 10mm bolts inside the inner fender.
- Remove the series of six pins underneath the front bumper.
- Pull firmly on each side and lift and pull the bumper cover forward.
-
step 2 :Removing the Headlight
- Remove the five 10mm bolts around the headlight.
- Pull the light forward, up and out.
- Press firmly on the tab and pull the wiring harness free.
-
step 3 :Changing Headlight Bulb
- Turn headlight cap counterclockwise and pull out.
- Press the locks in towards the center of the light.
- Pull the bulb out. (Do not touch the glass of the new bulb).
- Press down and turn counterclockwise to free the old bulb.
- Push new bulb in and turn clockwise
- Put socket into place and latch the locks.
- Reapply headlight cap by lining up tabs and locking it into place.
-
step 4 :Changing Turn Signal Bulb
- Twist the socket counterclockwise to release it.
- Push bulb down and out.
- Push new bulb in.
- Turn clockwise to lock.
-
step 5 :Changing Fog Light
- Twist socket cap counter clockwise and pull out.
- Push latch on light down and pull the socket free.
- Free bulb from cap.
- Carefully pull the bulb free.
- Push new bulb into place and reconnect to cap.
- Line the round cut out with the bottom and place the socket into place.
- Bring the latch down to lock it.
- Twist the cap clockwise to lock.
-
step 6 :Replacing the Headlight Assembly and Bumper Cover
- Reconnect the light harness and line up the headlight.
- Lock it into place and reinsert the five 10mm bolts.
- Test Headlight.
- Line up the bumper cover and push it into place.
- Push the two clips back in on top.
- Lift the bottom panel up and over. Replace the six clips.
- Reach up into the fender and replace the two bolts.
- Reinstall the wiring harness.
- Reinstall the Phillips screws under bumper cover.
Tools needed
-
Socket Extensions
Flat Blade Screwdriver
Phillips Head Screwdriver
10mm Socket
Ratchet
Flashlight
Needle nose pliers
Brought to you by 1AAuto.com, your source for quality replacement parts and the best service on the internet.
Hi, I'm Mike from 1A Auto. I hope this How-to video helps you out and next time you need parts for your vehicle think of 1AAuto.com.
In this video we're going to show you how service the headlights on this 2005 Nissan Maxima. They're not the same as any '04 or '08, this does have xenon headlights. Some maybe a little different if you just have the regular halogen style headlights. You do have to remove the front bumper cover to do this. But don't fret it's actually not that difficult of a thing to do. It is just a little time consuming. Tools you'll need are a flat blade screwdriver, pliers, Phillips screwdriver, a 10mm socket with a ratchet and extension, and a flashlight's going to help you because you're going to have to kind of look back into things and find some of the bolts and stuff.
Start with your hood open and remove two clips. One here using flat blade screwdriver, pry up on the center, then pull the clip up and out. Now, this is free, same thing here on this side, pry up on the center. Up underneath in front of the wheels are two Phillip screws. You want to remove those and then you kind of pull this out. Pull your inner fender, like that, and you can pull this back, you can see the back of your side light. It's hard to film but there's the connection. Right here, there's a tab on the outside. Pull that tab and disconnect it.
Now, up inside there's a 10mm bolt that you want to remove. Also, if you reach your hand over further up in you'll feel another one of those bolts. Generally, I found the best tool is a socket with an extension and ratchet. I'm just going to fast forward to removing those two bolts and obviously again I'm doing this on the passenger side, you want to repeat the same procedure on the other side.
There are a series of the pins like on top and there are 6 right across here, looks like this vehicle has been apart because it only has 2 of the original ones. One's missing there and then it's got kind of a different style over here. The other option is you can take this apart up here which has the same thing, series of pins. I even see on this vehicle it actually got a bolt here and no pins here. It looks like they may have actually super glued this together.
Now, fast forward here again as I'm pulling the clips out just like on top, you pry the center out and then pull the clip down. On the bottom they're a little more difficult usually, because sand and dirt has gotten in and it makes the clip difficult to get apart. You'll probably need a screwdriver as well as a pair of needle nose pliers. Once you've got those fasteners off just pull firmly on each side, out, real firm. Grab it by the sides here. Just pull forward and the whole face comes off. There are 5 bolts to remove, one here, here, and right up under, right there, then another one here and one on the side here. Fast forward here as I use a 10mm socket with a ratchet and extension to remove those 5 bolts. Now, pull the light forward, high up and out and now there is a connector which I'm grabbing onto, it has tab, press down firmly on the tab and allow it to disconnect it. Then pull out.
It's here on the bench. To change any bulbs, your main headlight bulb is here. Turn this counter clockwise and then pull out. There are two locks, one here. Press in towards the center of light. This one, the same thing and then your bulb comes out.
Now, when you're putting a new bulb in you want to very careful not to touch the glass at all. I'm going to remove this one and put it back in. You can see that my original one is in fine shape. You want to press down, turn counter clockwise and then pull out, and then you want to put it back the same way. Push down and clockwise to lock, hear it click and I put it in just like that. Take your locks and then you push them in towards the center, back in and latch them and then take this simply. Just make sure it's got one larger tab which goes on the side here and then it locks into place. This is the turn signal indicator up here just turn it counter clockwise, pull it out, push down on this bulb and pull it out and re-install the same way, and clockwise to lock.
This is your fog light bulb here. Turn counter clockwise, this pulls out, your bulb is down in here. There's a little latch here. Push it in, out. The bulb comes out. You take this out of the cap here and carefully grab as high up on here as you can, shake it back and forth and disconnect. Replace that bulb, reconnect it. Put your connector back in here. Latch it into place. This bulb has a round cut-out and a square cut-out, they correspond in here. Just make sure you put it the round cut-out on the bottom. Keep the latch out of the way and just put it in. Usually, you can hold it with the other finger. Bring your latch down and it's locked, this just goes back on, clockwise to lock. That's how you service the bulbs.
Here's the new lights from 1A Auto. This vehicle has pretty low mileage so there's not a lot of difference, but you can see it is much more clear and a new light from 1A Auto it's got the same connector. Everything's the same. I am just going to re-install my original one because it's in good shape. But, if you have a broken light or your lenses are cloudy and fogged up or faded a new light from 1A Auto are going to take care of your problem and we're going to install just like your original.
Reverse the procedure. Get close and reconnect your harness, it should goes in, it clicks. You put the light in the place and then slide that in.
Now, will be the best time to test the light before you get it all back together, make it sure it works okay. Here, I'm just fast forwarding as I put in those bolts by hand first. Keep the fast forward going here as I tighten up those bolts and basically I tighten them until they're kind of seeded first and then I go around and tighten them up afterwards, that way the lights just kind of get set into place. Basically, tighten them up firm or till they're seeded and then go around and tighten them firm after.
Put the fascia in. You put the facer on and then you put your 2 pins in the top and just to note here you can see that the grill is not there. I did do another video for replacing the grill. You don't need to remove the grill, don't feel you need to do that, it's just how I shot this basically. If you take your fascia off you take it right back on. You don't have to do everything.
You want to push it in. Underneath make sure that it goes up and over. Same on this side up and over and I'm just going to speed up as I put those clips in the bottom of that panel.
Load the bolts in here and then what you can do is kind of pull out on your fender. You put the bolt up through first and push it in and start it into the fender and start this one same thing, you kind of look it up through and start it in the fender. As I move in it starts getting tight, kind of push in on your fender a little bit make it nice and flush. Bring this one up in. Here I'm just reaching in, grabbing the harness for that corner light and plugging it back in. Now, push here, the fender back up and in, and now reinstall the 2 Phillip screws underneath. Obviously, repeat the procedures for the other side and you should be all set.
We hope this helps you all. Brought to you by www.1AAuto.com, your source for quality replacement parts and the best service on the internet. Please feel free to call us toll free 888-844-3393. We're the company that's here for you on the internet and in person.

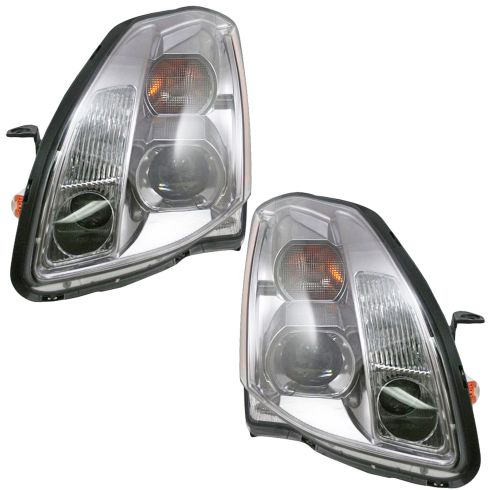
2004-06 Nissan Maxima Driver & Passenger Side 2 Piece Headlight Set DIY Solutions LHT03536
Part Details:
- 2 Piece
- Halogen
- (1) Passenger Side Headlight Assembly
- (1) Driver Side Headlight Assembly

How to Replace Headlight 2002-06 GMC Envoy XL
Learn how to change the headlights or headlight bulbs on your 02-09 GMC Envoy by watching this 1A Auto video
