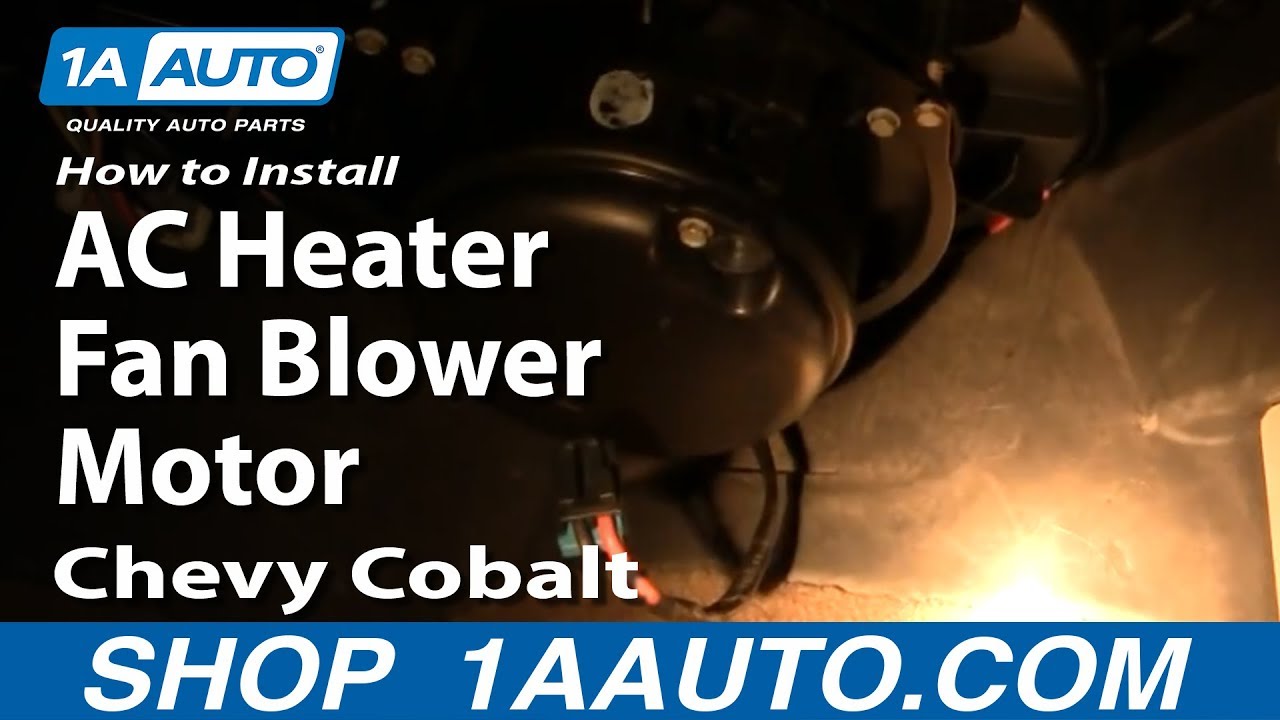
How to Replace Heater Blower Motor with Fan Cage 2005-10 Chevy Cobalt
Created on: 2012-07-06
Watch this video to learn how to replace the blower motor in your 05-10 Chevy Cobalt or Pontiac G5.
-
step 1 :Remove the AC Blower Fan Motor
- Reach under the passenger side dash and use a box cutter to cut out the blower motor fan.
- Unclip the wiring harness.
- Use a drill to remove the rivets securing the blower motor fan into its housing.
- Separate the plastic housing from the blower motor.
-
step 2 :Install the new AC Blower Fan Motor
- Install the plastic housing on the new motor
- Use small course thread bolts and bolt in with a socket and ratchet to replace the rivets.
- Insert the new motor into place and bolt in with your socket and ratchet.
- Plug in the wiring harness.
Tools needed
-
Razor Blade / Gasket Scraper
1/2 Inch Drill Bit
Coarse Threaded Bolts (to replace rivets)
Flat Blade Screwdriver
Phillips Head Screwdriver
6mm Socket
Drill
Ratchet
Brought to you by 1AAuto.com, your source for quality replacement parts and the best service on the Internet. Hi I'm Mike from 1AAuto. I hope this how-to video helps you out and next time you need parts for your vehicle think of 1AAuto.com. Thanks.
In this video we're going to show you how to replace an AC and heater fan motor. Usually you'll start hearing the motor groan or make a higher pitched squeaking noise. That's when you know it's starting to get bad and sometimes they do just quit all together. The fan in this vehicle is actually molded into place. You do have to cut it out. The tools you'll need are a flat blade screwdriver, a utility knife, you'll need a drill with a half inch bit to drill out a couple of plastic rivets, a small socket ratchet, and eight small coarse thread bolts or screws. The lead goes in right above your passenger's feet, just use a screwdriver and press the tabs there and it comes right out. Then you get a nice sharp razor knife and you actually just cut. There's a groove all the way around the motor. You just push your razor knife right up into it.
Now I'm going to speed up the tape. Obviously you want to do this very carefully. Be very careful not to cut yourself with the razor knife. Like I said, there's a groove all the way around. Stick your razor knife up in there and just pull or push in a controlled manner and work your way all the way around the motor. There is a block in the front of the motor where the groove basically does not exist and that's the part where you try and cut into it that as much as possible and in the end probably a little piece of that will break off. The motor is held to this housing with two plastic rivets. I'm going to use the three-eighths drill. I'm going to speed up here. I just drilled those two plastic rivets. They're pretty easy. Don't use a lot of pressure; you don't want to drill too far through. Drill a little bit with the three eighths and then I actually do switch to a half-inch diameter drill bit to finish it off. Push down on the two studs where you removed the nuts and separate the plastic housing from the motor.
The old motor comes out. The new motor from 1A Auto, exactly the same as the old motor, put it obviously where the lead goes. That goes to the corresponding area on this housing. Put it down on. Speed up here again as I put those two nuts on and then tighten them up. You don't want to tighten them incredibly tight but you want them nice and firm. Now you need eight of these small coarse thread bolts. Basically you just use them. Place the rivets and molding. Fast forward here. As I just used, like I said, some small coarse thread bolts about the size of the diameter of the holes and bolt that together. You use them in place of where the rivets were, as well as you'll use a ring provided with the motor to reinstall it. Obviously we can't mold it back in so it comes with a ring. Put the ring in place and then use the small bolts to bolt it on to the plastic. You want to make sure your bolts aren't too long. You only want them to be a centimeter long, or so, or else they could interfere with the fan if they go too far through the housing.
I'm going to go through this kind of relatively fast. You've got the new motor with the ring on it. Put it up in there. Start a couple of the bolts in by hand as much as you can. Then get the two ones that are easiest to get to. Tighten them up somewhat and then you can tighten the third one that's more difficult to get to. Tighten that one up and then just reconnect the lead and you should be all set.
We hope this helps you out. Brought to you by www.1AAuto.com your source for quality replacement parts and the best service on the Internet.
Please feel free to call us toll free 888-844-3393. We're the company that's here for you on the Internet and in person.

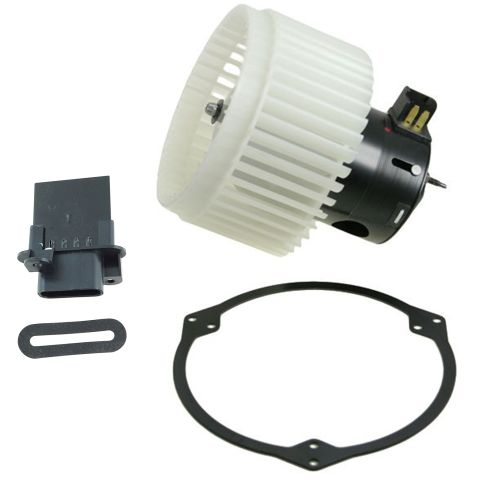
Chevrolet Cobalt HHR Pontiac G5 HVAC Blower Motor Kit TRQ HMA81479
Part Details:
- Highest Quality Materials
- Quality Tested - built to a strict level of product standards.
- (1) HVAC Blower Motor Assembly
- (1) Blower Motor Resistor

How to Replace Blower Motor w Fan Cage 2001-07 Toyota Sequoia
Watch this video to learn how to replace the blower motor in your 01-07 Toyota Sequoia. 1A Auto experts show you how to do it yourself and save money!
