
How to Replace Rear Window Hinges 2008-12 Ford Escape
Created on: 2019-03-07
How to replace the window hinge on 08, 09, 10, 11, 12 Ford Escape
Tools needed
-
Socket Extensions
Torque Wrench
Rust Penetrant
T30 Driver
Glass Cleaner
Ratchet
Trim Tool Set
11mm Socket
Pick
Hi, I'm Mike from 1A Auto. We've been selling auto parts for over 30 years.
What's up, guys? I'm Andy from 1A Auto.
In this video I'm gonna be replacing the rear window hinges on this 2012 Ford Escape. This is a very common problem; we have the window hinges have rotted away. If you need this part or other parts for your vehicle click the link at the description and head over to 1aauto.com.
All right, before I do anything I'm going to spray these down with some rust penetrant. These have broken off pretty good right here; I can see the actual bolt going through. So I just wanna soak these down a little bit. Just take a rag so it doesn't drip all over the place.
All right, I'm gonna open the hatch. I don't wanna open the glass at this time 'cause the struts are still connected on the glass side. Just lift up like that. Next I wanna take a 90-degree pick ... I wanna disconnect these glass hatch struts. These are just pushing the glass down right now, which is not good, so I'll just take the pick, get underneath this clip right here, pull it off, and that's gonna go like that. We'll do the same with the other side. Just be careful. And actually I'm gonna disconnect the strut right here, take this one off completely ... just like that.
I want the glass latched in so that it doesn't go. All right, so the glass is latched where it's supposed to be, which is good. I'm gonna take this little rubber grommet off; I'll just use a 90-degree pick ... get underneath here ... And then I can access the nut of the hinge. I'll do the same on this side. Just try to rotate this rubber piece off ... and that little flange ... just like that. And then I can access up.
It's ideal to do these one at a time. If you only have one that's broken you're gonna wanna do the broken one first and then you can do the other one. With this one both of these are broken so ... But I'm gonna take out this side first and use an 11-millimeter socket, an extension, and a ratchet, take this nut off. I'm gonna have to hold the hinge from the outside while I do this. Take that nut off ... We're gonna reuse that nut. Slide the hinge out from up top.
Then we're gonna take this Torx bolt out ... at least try to get it out ... It had all that corrosion up top. We've let it soak for a little bit. I'm gonna use a T30 and extension and a ratchet to take this off ... twist it ... Oh, it's really corroded on there. Let's go back and forth a little bit. I'm being careful not to break the glass. It's a good idea to wear safety glasses just in case the glass did break while you're doing this.
Okay, we're gonna let that soak a little bit longer. We're gonna try to take this side out. All right, I'm just taking this plastic piece off from the outside. It's kinda hard 'cause it's right at the glass. We can't heat this up or you're gonna crack the glass so ... Just let that soak.
At this point since both of these are broken I'm gonna take this one off. But like I said before it's a good idea to leave one of these on ... Do one and then do the other one. Grab the hinge from the outside ... Take that nut off. You can grab the hinge, pull it off. I'm just gonna take a plastic trim tool and try to pry underneath this while I'm loosening this ... And pull it in just like that. I was able to get that bolt out, and I'll try the same with the other side.
This side's fighting me a little bit more. There we go; got this one out as well. You can see the corrosion just gets in there ... just eats away at the hinge and that's why this broke. It's a good idea to check these hinges and maybe even do this before you get to this point.
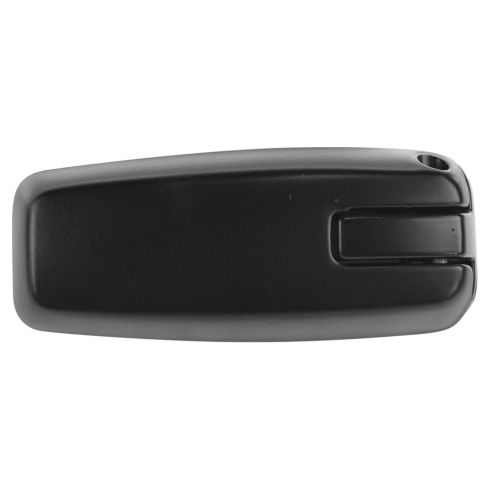
Here's the old window hinge. Here's the new window hinge from 1aauto.com. As you can see the shape is the same. It's got the same stud on the back. It does come with a bolt, which is nice, a new screw. 'Cause otherwise we would have to try to extract that one. They are different right to left so you can get a kit with both of them. Get yours at 1aauto.com and you'll be ready to rock and roll.
All right, before I put these new hinges on I am gonna take some glass cleaner and just clean the window off. Try to get as much of the old corrosion out of there as possible. Do the same for the other side. You're gonna wanna make sure you clean this part of the body as well ... just get anything off of there ... same with this side ... a little bit of dirt in there.
All right, so because the window's latched ... that's why the window's not falling ... You still wanna be careful, make sure that you don't break the glass. We can slide the glass around a little bit. So I'm gonna take the right side hinge, go over to the passenger side ... slide this into position ... Get that lined up. And then carefully you can move the glass into position.
So this plastic piece broke on ours ... this piece that goes right here ... And this little washer thing has to go on here, otherwise the window's not gonna tighten up. So if you have the opportunity to replace this piece you might wanna get that. We're just gonna reuse this ... put this in here like this ... get this stud in ... We're gonna have to do the same with the other side. I'll use my T30 ... Just get this started. Take the nut ... Get the nut started. Make sure it looks like it's lining up pretty good. Do the same with the left side. Get that in position.
This side's the same way; this side is broken so I've got to reuse that plastic washer and put the screw through ... Let's use our T30 and snug this bolt up. Just gonna take the 11-millimeter nut ... use a socket and extension ... Get this started by hand as well. All right I'm gonna tighten this nut down first and use the 11-millimeter socket extension and a torque wrench ... Gonna tighten down this to 97 inch pounds ... Make sure you're on inch pounds, not foot pounds. I'm gonna do the same for this bolt ... Just gonna tighten this down 30 ... a T30 socket, extension, and a torque wrench ... Tighten this down to 97 inch pounds. Do the same for the other side.
All right, so if you didn't break these things you can reposition the wires through there or you can use some double-sided tape and glue it to the glass. Do the same for this side ... Slide it in position there, just like that. To reposition this rubber grommet I'm actually gonna take my 90-degree pick ... I'm gonna pull this plastic piece out. Just slide this off a little bit. I'm gonna re-go-around this like this. Once that's all around that bracket you can slide the bracket back in position. That looks good. Get that lined up and lock it in place.
And I'll take this rubber grommet, slide this over here. Now we gotta close this. That looks good ... Just double-check, make sure it looks all right. And I'm gonna open the lift glass ... I'm gonna reinstall these struts ... Reattach that there. I'm just gonna take this side off. Just use the 90-degree pick, slide that off. So I'll attach this back here ... Attach this here. So if I was doing this again, when I was taking it apart I would disconnect these lift gate struts from this part first and then the glass, not the glass, 'cause that would make it easier. Just check operation; make sure it works good.
It looks good. Our hinges are working good.
Thanks for watching. Visit us at 1aauto.com for quality auto parts, fast and free shipping, and the best customer service in the industry.
Shop Products


How to Replace Sliding Window Lock 1994-2002 Dodge RAM 1500
Check out this video to learn how to replace the sliding window latch on your 94-02 Dodge Ram truck. 1A Auto shows you how easy it is to DIY!
