How to Replace Serpentine Belt Tensioner 2009-16 Mercedes E350
Created on: 2019-11-04
Check out this video from 1A Auto to learn how to replace the serpentine belt tensioner on your 09-16 Mercedes Benz E350.
-
step 1 :Removing the Serpentine Belt Tensioner
- Lift up on the front engine cover to remove it
- Turn the serpentine belt tensioner counter clockwise with a 17 mm socket to relieve tension
- Remove the belt from the tensioner
- Turn the tensioner again, and insert a pin into the tensioner hold hole
- Remove the two E12 tensioner mounting bolts
- Remove the tensioner
-
step 2 :Installing the Serpentine Belt Tensioner
- Install the serpentine belt tensioner into position
- Install the two E12 mounting bolts
- Turn the tensioner with the 17 mm socket to release the hold pin, and release the tensioner
- Turn the tensioner and set the belt back on the tensioner pulley, and release the tensioner
- Check the belt for proper fitment on all of the remaining pulleys
Tools needed
-
Socket Extensions
17mm Socket
E12 Inverted Torx Socket
Ratchet
Hey friends, it's Len here from 1A Auto. Today we are going to be working on our 2011 Mercedes E-350 and I want to show you how to replace your serpentine belt tensioner. If you need this, or any other part check us out at 1AAuto.com, thanks.
So we're going to take off this cover, just lift it straight up. Now we can see our serpentine belt and right all the way down here is where the tensioner is and then this is where we are going to be going with our 17-millimeter socket and we are going to relieve tension from the belt and remove the belt to the point that we can get the tensioner out of here.
Come right down along here to where the tensioner is, I'm going to turn this counter-clockwise and that's going to relieve tension and then at that point, I'm just going to slide the belt off of it. And then I'm gonna release the tension from my ratchet and we can just move the belt aside. I'm going to leave it on the rest of the pulleys as much as possible because well, why not? The next thing you're going to want to do is you're going to want to have something like this. It doesn't have to look exactly like this, it just needs to have a shanked area because we are going to turn the tensioner counterclockwise and then it's going to line up the hole with the little piton and that's going to hold it in the open position and then we will be able to get to both the mounting screws. This part might take a couple tries but I'm going to give it my best shot, see if we can get it done in a fair amount of time here because it really shouldn't take too long. I just need to feel around, try to find the hole. There we go
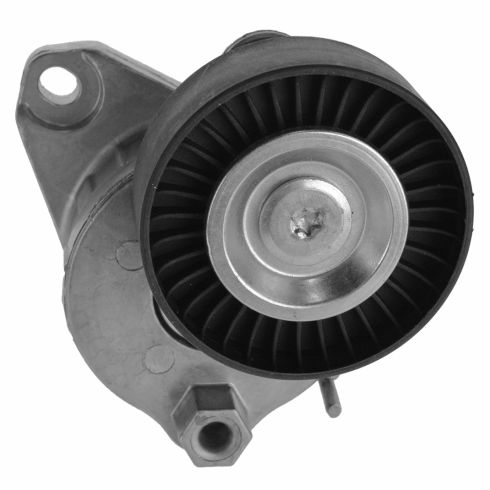
So basically you push the tensioner all the way, almost as far as it's going to want to go. Then you should be able to feel around under there and you will find there's a hole. I will show you on a quality 1A Auto one here what we are dealing with. So the tensioner will look like this inside the car, I turned this, I brought this up and it opened up this area where the hole is, all right? That makes it so you can get to here and to here. If you don't put that in, you're not going to be able to get to this bolt.
We've got our E12, which is an inverted Torx. So come right down here, I'm going to feel around with my hand, I'm going to feel where the other bolt is. And essentially it is right where you put your little stud, that you use to lock this in, right towards the driver's side. Or if you are looking at it from my side right here, it will be to the right. Just get this on there. awesome. There we go. Bolt number one. Bolt number two, right up here.
Okay, so I just to show you the new to the old here. We are looking at the same exact thing. You've got the same mounting areas, very important. One thing that I would note is using a tool that you want to keep inside here when you take it off, might not be the best idea. That was an afterthought. So what I'm going to do is I'm going to put this in the vice, I'll use my 17 again, release tension and get my tool out of there.
Got one of my bolts in my hand, gonna slide it through the hole, bring it down, get it approximately where I need it. I'm just going to start this bolt in. Once it's started in, a few good threads. I'm going to stop at that bolt, I'll jump over to the second bolt, get that one started in, and then we will go ahead and snug them up.
Be able to find that at some point today. There it is. Alright, let's get both of these snugged right up. Okay, it's bottomed out, just give it a teeny bit more. Same to the other one, it's bottomed out, a teeny bit more, awesome.
Alright so now it's time to carefully take that locking pin out of there. So you are going to take your 17-millimeter socket again. Put it right up on there. Heres where you want to be very careful. I don't want you to get pinched or hurt in any way. You're just going to relieve pressure by turning counterclockwise. Grab your little pin and then release that pressure. We'll set this aside.
The belt's already on the majority of the pulleys here. I didn't remove the whole thing so we don't really have to necessarily have to worry about too much hopefully. But once we do get it on that to the tensioner, of course, we need to check every pulley just to make sure everything's sitting where it needs to sit. Counterclockwise, slide it over the tensioner pulley. Slowly relieve the pressure here.
Okay, now we are going to check all these pulleys. Start wherever you want to start. I'm going to start with AC compressor. I can feel it's completely on. I'm gonna come all the way up here. We got ourselves the power steering pump, that feels great. Follow that belt, it comes right up here, you've got your idler pulley. Perfect. Alternator, wonderful. You've got your water pump pulley, it's sitting right inside there, comes up along here, perfect. Tensioner, crank. Let's finish all the way around that crank, yes. Love it.
We're going to grab our cover, set it so it lines up with everything. Give it a couple of loving bonks, make sure it's all the way down. Perfect, close your hood.
Thanks for watching. Visit 1AAuto.com for all your quality auto parts shipped to your door. The place for DIY auto repair and if you enjoyed the video, please click the subscribe button.
Shop Products

How to Replace AC Belt Tensioner 1999-2008 Chevy Silverado
This video shows you how to install a new serpentine belt tensioner on your 1999-2008 Chevy Silverado.
