Upgraded Service Life: Pressure-Fit High-Capacity Diodes for improved heat dissipation
Improved Reliability: Double insulated rotors and stators to reduce signal degradation
Item Condition:New
Attention California Customers:
WARNING: This product can expose you to chemicals including Lead and Lead Compounds, which are known to the State of California to cause cancer, and birth defects or other reproductive harm. For more information, go to www.P65Warnings.ca.gov.
Lifetime Warranty
This item is backed by our limited lifetime warranty. In the event that this item should fail due to manufacturing defects during intended use, we will replace the part free of charge. This warranty covers the cost of the part only.
Returns: Parts with electrical components cannot be returned once installed.
FREE Shipping is standard on orders shipped to the lower 48 States (Contiguous United States). Standard shipping charges apply to Hawaii and Alaska.
Shipping is not available to a P.O. Box, APO/FPO/DPO addresses, US Territories, or Canada for this item.
Expedited is available on checkout to the United States, excluding Alaska, Hawaii.
Final shipping costs are available at checkout.
How to Replace New Alternator 1997-2001 Toyota Camry
Created on:
Tools used
12mm Socket
Socket Extensions
14mm Socket
Pry Bar
8mm Socket
10mm Socket
Ratchet
1. Removing the Serpentine Belt
Loosen the negative battery terminal with a 10mm wrench
Remove and isolate the terminal
Loosen the 14mm bolt that mounts the alternator to the engine
Loosen the 12mm bolt underneath the adjusting screw
Turn the adjusting screw counterclockwise to drop the belt
Familiarize yourself with the route of the serpentine belt
Pull the belt off the alternator
Release the tensioner
Pull the belt off by hand
2. Installing the Alternator
Remove the 8mm nut from the retainer and transfer it to the new one if needed
Insert the alternator into the bracket
Hand-tighten the 14mm bolt
Hand-tighten the 12mm adjusting screw
Do not tighten them all the way
Press the wiring harness onto the bracket
Connect the wiring harness
Insert the terminal wire into place
Tighten the 10mm bolt to the terminal wire
Replace the terminal wire cover
3. Removing the Alternator
Pry off the alternator terminal cap
Make sure the battery is disconnected
Remove the 10mm nut
Pry out the wiring harness from the alternator
Move the wiring harness out of the way
Remove the 12mm bolt from the back of the adjustor
Remove the 14mm bolt that mounts the alternator
Work the alternator out of the pivot bracket by hand or with a small pry bar
4. Installing the Serpentine Belt
Loop the belt around the crank pulley
Bring it under the A/C compressor
Pull the belt over the alternator
Loosen the adjustor if needed
Tighten the 12mm adjustor bolt clockwise
Tighten the 12mm bolt beneath the adjustor bolt
Tighten the 14mm bolt that mounts the alternator to the engine
Reconnect the 10mm negative battery terminal
Start the vehicle and listen for slipping or squeaking
Brought to you by 1AAuto.com, your source for quality replacement parts and the best service on the Internet.
Hi, I'm Mike from 1A Auto. I hope this how-to video helps you out, and next time you need parts for your vehicle, think of 1AAuto.com. Thanks.
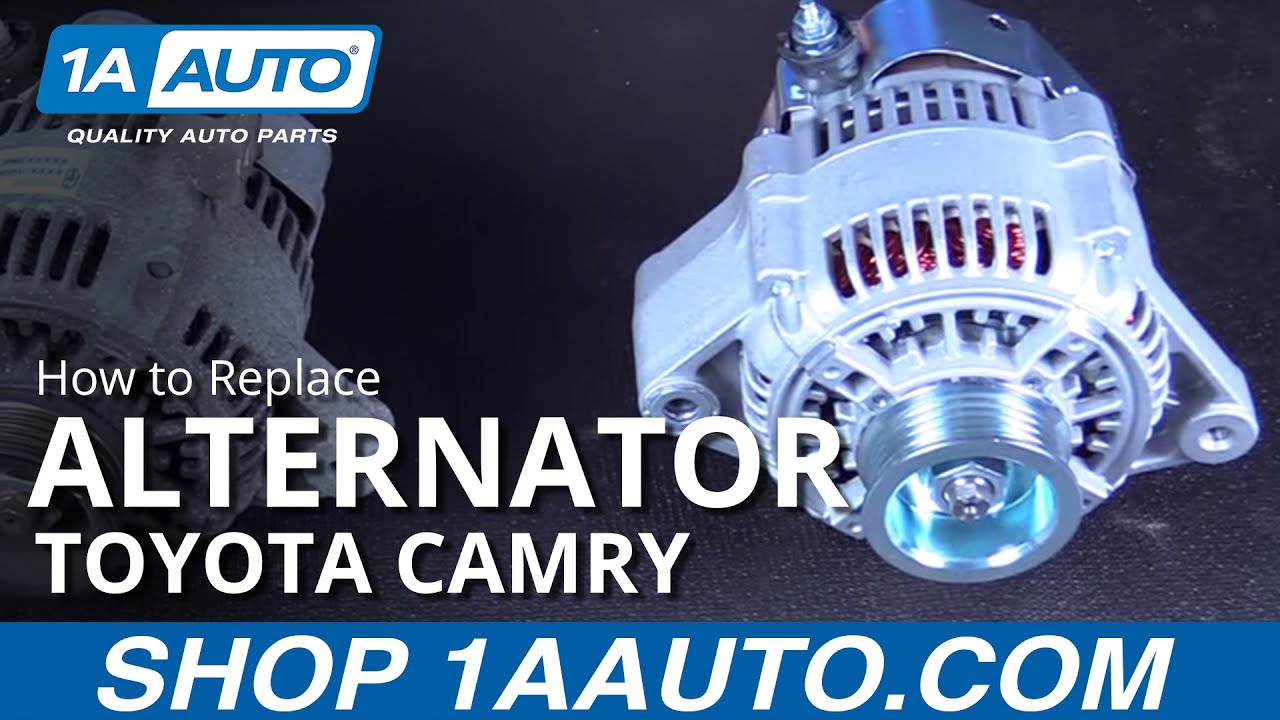
In this video, we're going to show you how to replace an alternator. This is a Toyota Camry 1998. The procedure is pretty much the same for Toyota Camrys between 1997 to 2001.
Items you will need include new alternator from 1AAuto.com, 8-14 millimeter sockets and wrenches, ratchet and extension, and a small pry bar.
Open the hood and secure the hood prop. Your alternator is used to adjust the tension of the serpentine belt, either tighter or looser, and also to slack it enough to be removed.
Using a 14mm socket and ratchet, loosen the bolt where the alternator mounts to the engine. This will allow the alternator to pivot when adjusting the adjuster screw. Using the 12mm socket and ratchet, loosen this bolt into the alternator, and then adjust your adjusting screw down to remove the belt. Turn the adjusting screw counterclockwise to loosen it. You may have to push down on the alternator a little to get it to move.
Once you have enough slack, remove the serpentine belt from the pulleys. You may have to twist it sideways to clear between the pulleys and the body. Put your fingers underneath the cap on the alternator terminal, pop the cap off.
Using a 10 millimeter socket and ratchet, be sure the battery is disconnected, remove the nut from the power terminal of the alternator. Remove the cable and place it off to the side. Push down on the top of the connector at the back of the alternator. Remove the connector.
Using a small flat blade screwdriver, carefully pry out on the retainer for the alternator harness and move it out of the way. Using a 12 millimeter socket, finish removing the bolt on the back of the adjuster on the alternator. With a 14 millimeter socket and ratchet finish removing the bolt at the pivot point of the alternator. Work the alternator out of the pivot bracket either by hand or with the help of small pry bar.
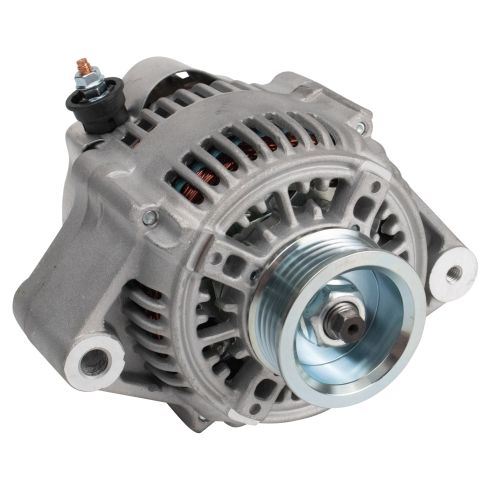
Here we have our old part which we removed from our car and our new part from 1AAuto.com. As you can see, the alternators are identical in size. They have the same pulley. They're both an 80 amp output rating. We have the same connector on the back as well, as the same top post here for our battery cable. You will have to change over the old wire loom bracket retainer if you would like. Your alternator is responsible for charging your battery, as well as being the power source of your vehicle when the engine is running. It doesn't come from your battery once the engine has been started.
Some symptoms of a bad alternator include a noise from a bad baring. If the alternator itself fails, you can overcharge or undercharge the vehicle while driving. You would notice a high or low gauge at that point, a low state of charge in your battery, as well as sulfated plates, or the vehicle is shutting off while driving.
If your old alternator has failed, caused the vehicle's battery to become damaged, shut off while the engine is running; or you have a bad baring, then this brand new replacement alternator from 1A Auto is going to go in direct fit just like your original equipment and fix you up right.
Your new alternator may not come with the wire retention bracket on it. If that's the case, you can use an 8 millimeter socket and ratchet to remove the nut holding the old one on. Take your old retainer and remove the nut from your new alternator in the same location. Install the retainer onto the stud. Reinstall your nut. Now you’re ready to install your new alternator in the vehicle.
Reinstall the pivot portion of the alternator into the pivot bracket here. Start your 14 millimeter bolt. Start the bolt in by hand. Leave it loose just so you won't lose the alignment. It's easier to line up the other side. Line up the block here on the adjusting screw. Send your 12 millimeter bolt through. Start it into the back of your alternator. Now you can bring the rear 14 millimeter bolt back a little tighter. Make sure you don't tighten it all the way, because we still have to install the serpentine belt and adjust it properly.
Reinstall the wire harness retainer onto the bracket that we switched over from the old alternator. Reconnect the plug at the back with the clip facing up. Install the terminal wire with the tabs facing down. Reinstall the 10 millimeter nut. Tighten it down with a socket and ratchet. Reinstall the cover.
The serpentine belt will be installed around the crank pulley, over top of the alternator pulley, and under the AC compressor. Be sure that the belt is seated properly onto the grooves of each pulley. Using a 12 millimeter socket and ratchet, turn the tension bolt clockwise to add tension to the belt. Lock down the adjusting block with the same 12 millimeter. Using a 14 millimeter socket and ratchet, clamp down the pivot point bolt.
Reinstall the negative batter terminal. Tighten it down with your 10 millimeter wrench. Start the vehicle and check that the belt does not squeal or slip.
Thanks for tuning in. We hope this video helped you out. Next time you need parts for your car, please visit 1AAuto.com. Also check out our other helpful how-to and diagnosis videos.
Product Reviews
Loading reviews
5.00/ 5.012
12 reviews
5 Stars
4 Stars
3 Stars
2 Stars
1 Star
12
0
0
0
0
Thanks 1A Auto
shakeel
February 19, 2022
I bought this altinator last month for my camry I did fix my self it's exactly like original equipment and it's perfectly working and the best thing they show you how to fix
Perfect match; Works fine.
Griffin-
May 24, 2022
It was on my doorstep in a box when I got home from work - installed in short time before I went into the house.
James
October 25, 2022
Exactly what I needed. Thanks!
Great purchase
William
November 14, 2022
Works and fit just like original alternator
james
November 19, 2022
So far so Good.
Jairo
August 21, 2023
Before 1A Auto order one and it did not fit. 1A Auto fit like original part. I very happy and the installation video help a lot. I did it my self.
Thank you 1A Auto
Not to good
James
October 4, 2023
The part lasted 30 days and I had to change it
Yahoo!!
Ted
October 6, 2023
Yahoo.. Part fit as promised. Didn't have to return for the right part. Love dealing with 1A auto.
Company is right on target!
Greg
October 25, 2023
Everything from ordering, receiving and installing went perfectly. I'd highly recommend this company.
1A AUTO IS A1 AWESOME
Mike
December 8, 2023
Changed the alternator in my Toyota Camry in about 45 minutes. With the video provided it was as smooth as could be. The step by step instructions we flawless and the new alternator works perfectly. I really appreciate not only the great value in the parts they sell, but the videos are second to none. They've given me the confidence to do so much more work myself and save a ton of money. Recently I changed all four rotors and brakes saving at least $700 off the price I was quoted. Keep up the great work guys. 1A is the best!
Alternator
L
April 22, 2024
It fit perfect and car started right away.
Great products
Mubashir
October 31, 2024
Love your videos and simplicity in it
Customer Q&A
New or reburbished?January 2, 2023
John D
10
It's new.
January 3, 2023
Victor W
10
This part will be brand new. We do not sell refurbished parts.
January 3, 2023
Emma F
would this fit on a v6 camry 1999?August 25, 2023
Andre P
10
Currently, we do not carry this part for your vehicle. We're always updating our inventory so please check back soon!
August 29, 2023
Emma F
Do. U. Need. Vin. Toyota Camry 4 cylinder 2.2 Toyota Camry LE ??February 1, 2024
Donald R
Customer service
877-844-3393
Monday - Friday 8:00am - 9:30pm ET Saturday - Sunday 8:00am - 4:30pm ET
Toyota is a registered trademark of Toyota Motor Corporation. 1A Auto is not affiliated with or sponsored by Toyota or Toyota Motor Corporation.See all trademarks.
Enter Vehicle Year Make Model
Specify your vehicle's year, make and model to guarantee fit.
Year
Make
Model
Options
Drivetrain
This part doesn’t fit a . Select from parts that fit.